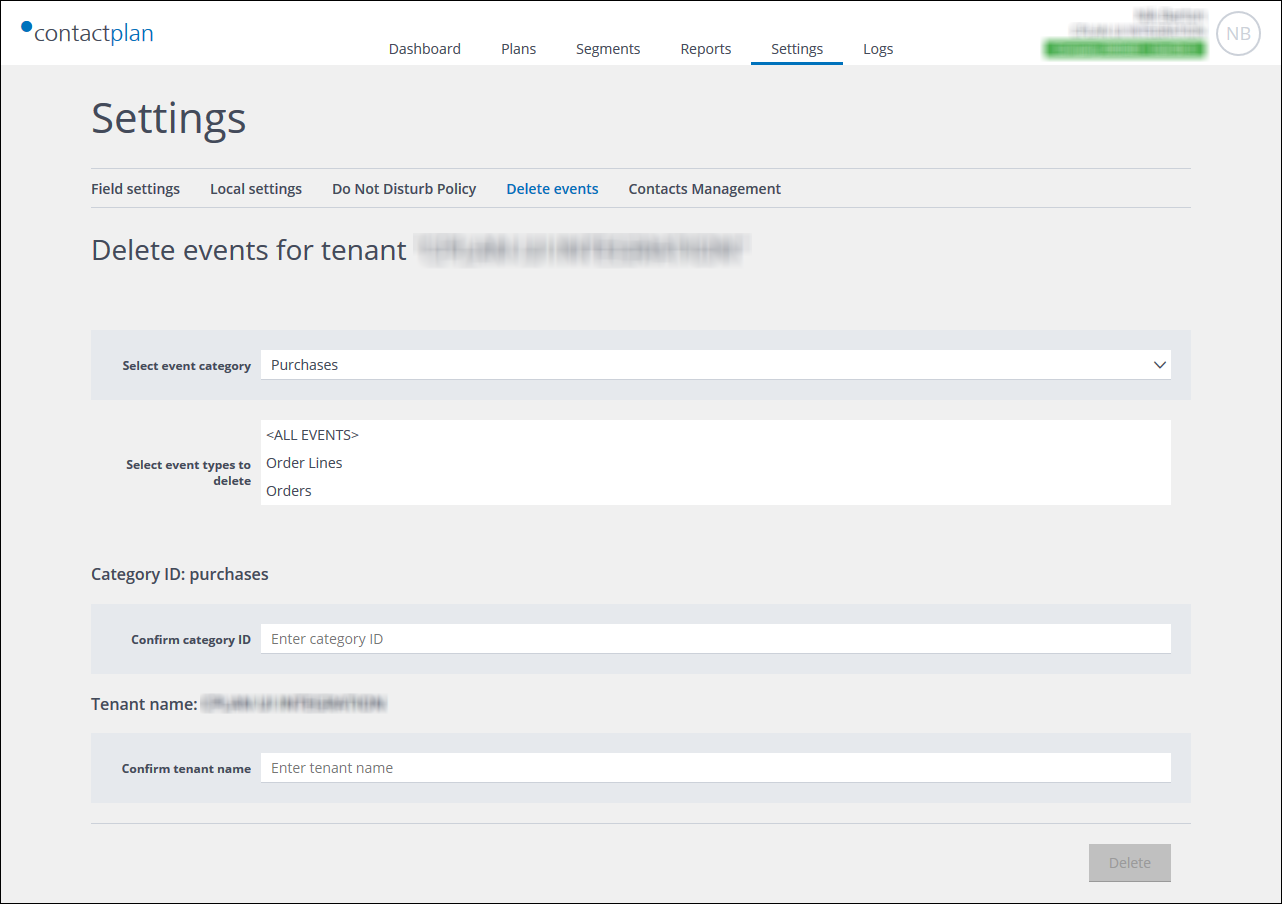
Example of the Delete events page, once a category has been selected
Provided you have the appropriate permissions, the Delete events page enables you to delete all events from the Contactplan database that are related to a selected category.
Note:
You cannot delete Digital Messages events.
A delete events action cannot be reversed.
Deleting events
To delete events, do the following:
-
- Click the Settings tab, in the Control bar.
The segmentation Field settings page displays by default. - Click the Delete events tab.
The Delete events page displays, with the name of the current tenant.
Note:
If you do not have the required permissions, the Delete events tab is not available. - Under Select event category, select the appropriate entry from the drop-down list.
Note:
You can only select one category.
Further editable fields display. - Under Select event types to delete, select one or more events types.
For example, if you have selected Purchases as the category, the All events, Order Lines and Orders event types are selectable. - Under Confirm category ID, enter the appropriate category ID.
For example, purchases.
Note:
The correct ID is displayed in the heading positioned directly above the Confirm category ID field. - Under Confirm tenant name, enter the name of the tenant.
Note:
The correct tenant name is displayed in the heading positioned directly above the Confirm tenant name field.
The Delete button is unavailable until you complete steps 5 and 6 correctly. - When you are finished, click Delete.
A confirmation window displays. - Confirm the deletion to proceed.
The relevant events are deleted from the Contactlab database.
- Click the Settings tab, in the Control bar.
Previous page: Local settings | Next page: Contacts management
