The new Contactflow version is available from February 4th, 2019, and it includes some new features that enhance the module.
The release is planned between 2.15 pm and 2.45 pm CET.
What does this release enable you to do?
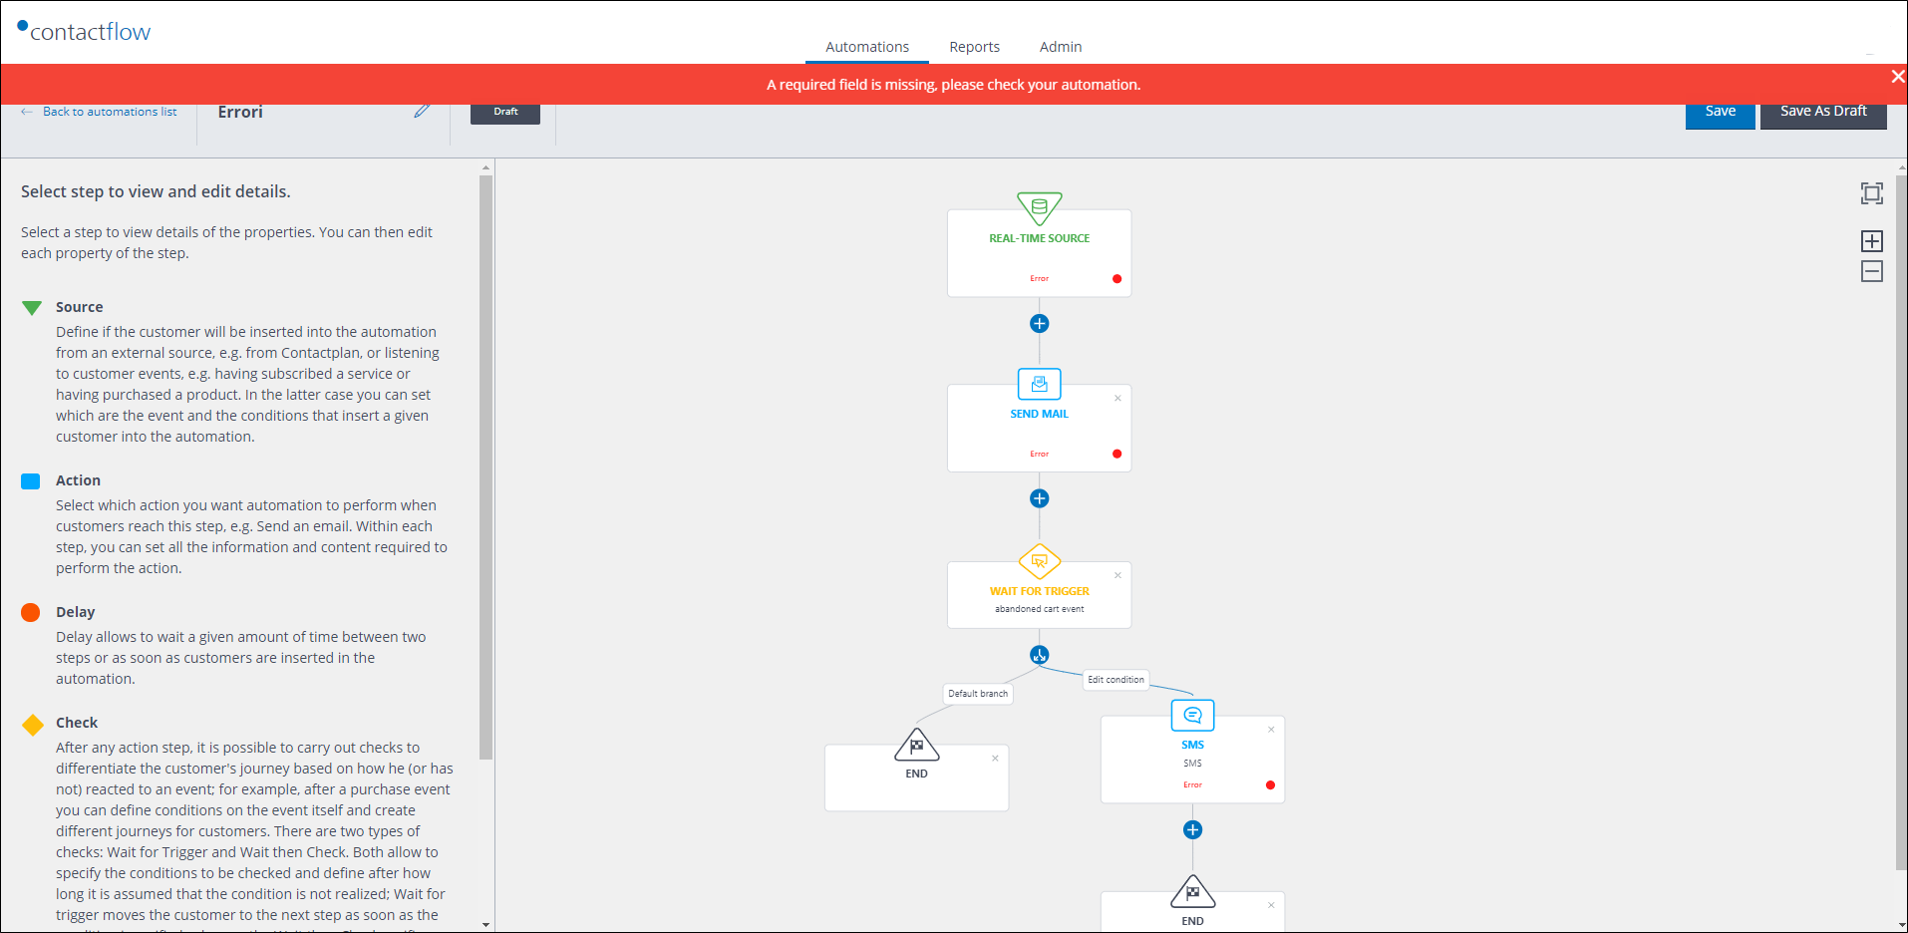
You can create different Flow journeys based on the event extended properties that are collected in Hub. In addition to being selectable in the Real-time source configuration options, the Event condition parameters, which are available following a Flow Check step, also include extended properties in the Event rules drop-down list.
Suppose, for example, you want to keep track of the ‘type of the travel’ extended property for a ‘Completed Order‘ event. You can create different paths for your customers’ journeys, depending on the type of travel they bought. You can then offer them additional services, or new adventures, based on this information.
You can identify any flow steps that have configuration errors and, as a result, are blocking the activation of the automation you are creating.
Do you want to automatically add women who have just viewed a bag on your… In this tutorial, we will learn how simple it is to immediately and automatically add contacts to a Flow automation, as soon as they conform with the event condition/s you have defined. For example, add each woman to an automation,…
Envisage creating a well targeted and personalized email delivery in a few simple, easy-to-follow stages…
In this tutorial, you will learn how to use Send and the new Email Designer content editor to create powerful, personalized and effective email deliveries, which you can deploy just when you require.
Just step this way…
As an example, imagine you have decided that you want to invite your top spending customers to a special local event, where they can preview your latest collection. The teaser email should give each contact the opportunity to choose exactly which event they want to attend, and let you know whether they will come alone, or with friends.
Note:
For a complete description of all the steps and controls mentioned in the following example, as well as other available options, see the Email deliveries page in the Send Guide.
Do the following:
Sign in to Send, then click Create > Email campaign.
The list of Email groups displays.
Locate the appropriate group and click Create delivery to display the Procedure selection page, where you should select Create a new campaign.
On the Delivery parameters page, under Delivery title, enter a name for the delivery, or leave the field blank if you want to use the email subject instead.
Under Campaign filter, click Select a filter and choose the Best spenders one from the drop-down list, which you created earlier in Plan.
See the Plan Guide for more about creating filters for use in Send.
Under Message format, ensure that HTML and plain text is selected, together with Use dynamic text under Options, and Track opens and Track clicks under Statistics.
Click Next to display the Message content page.
After you have completed the From and Reply to fields, enter the Email subject, for example, ‘A special opening, just for you …’
Don’t forget to start personalizing the message by adding the contact’s first name to the subject, as follows:
Position the mouse cursor after ‘just for you ‘, then under Insert, select FirstName (or whatever the column is called in your database) from the drop-down list and click +.
The appropriate string is added to the email subject field.
Under the HTML version panel, click Email Designer.
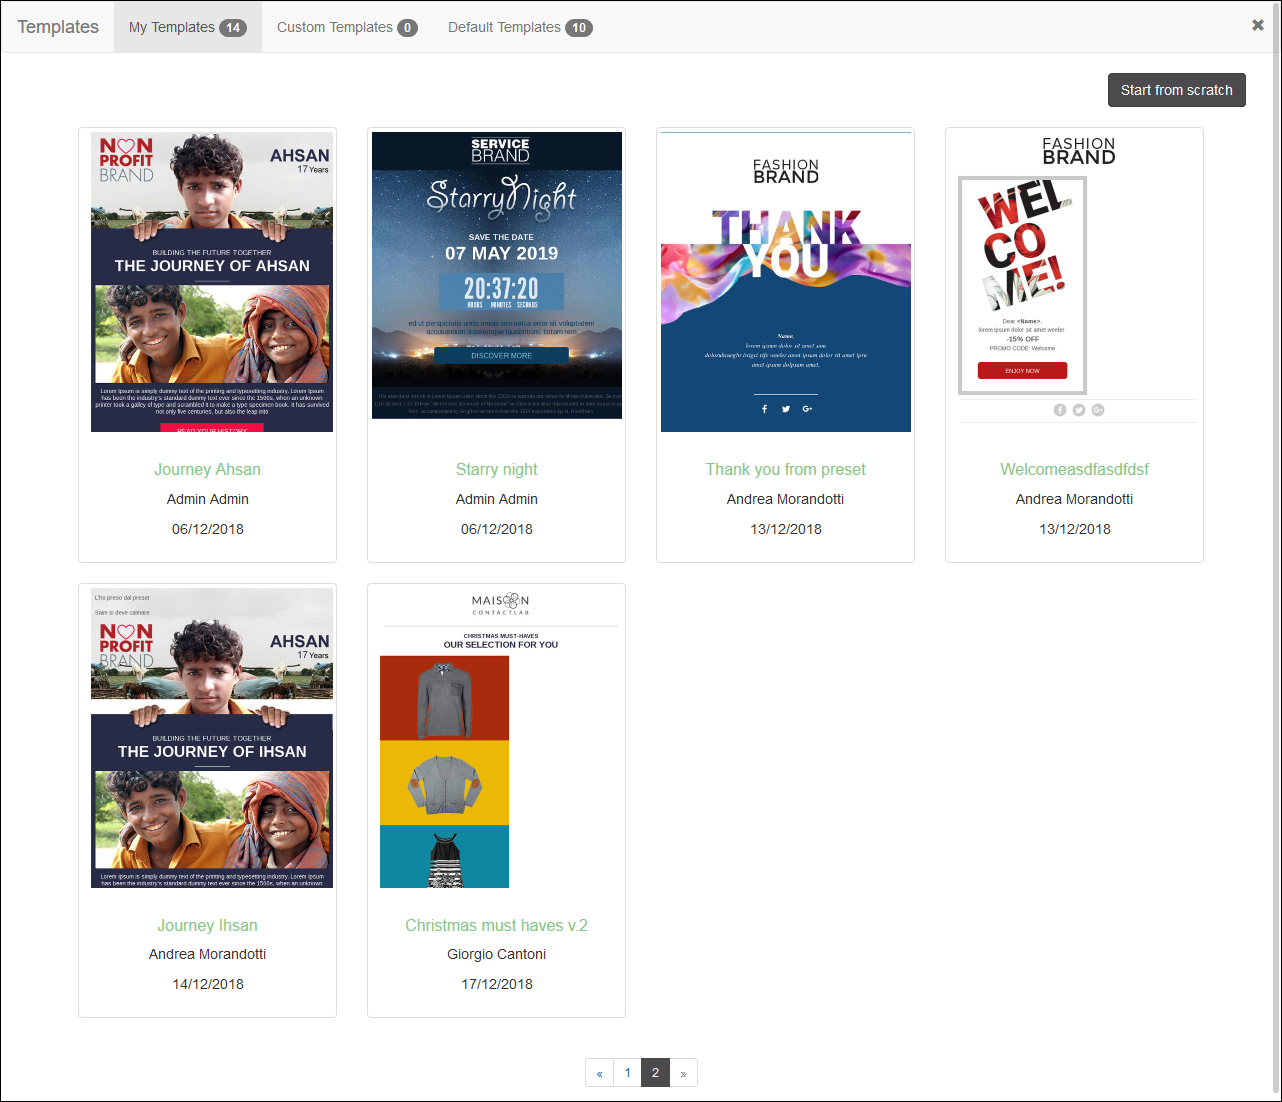
The Email DesignerTemplate management page displays in an overlay window.
Example of the Email Designer Template management page
Click the appropriate template, followed by Open.
For this example, the Starry Night template has been selected, but you are free to use any template that you feel is appropriate.
The template displays in the Content Editing page.
Example of a template open in the Email Designer Content Editing page
Edit the template as required, for example:
Add your company logo at the top.
Edit the date of the event.
Enter an appropriate description of the event with any dynamic text that may be required.
Configure the Discover More button.
For example, create a link to a web page where the recipient can select the appropriate local event, download tickets, and let you know how many people will be attending.
When you are happy with the email content, click Use in Contactsend.
Email Designer closes, and the email content HTML is transferred to the HTML version panel of the Contactsend Message content page.
Under Plain text version, click Plain text from HTML.
The plain text is automatically generated from the HTML version.
Under Preview on different clients, click Generate preview to see how the message will display on different devices.
When you are finished, click Next to display the Link tracking page.
If there are any problems with the HTML version, notices display. If so, correct any issues, then click Next again.
Click Check the links to test that they work correctly, then click Next.
On the Summary page, review the details of the email and, if you want to make any changes, click Back until you have returned to the appropriate page.
Under Analysis, check whether the message may be flagged as spam, or whether any links include IP addresses instead of text-based URLs.
When you have finished, click Next to display the Delivery page.
Here, you can send a test delivery, which is highly recommended, and remove duplicate addresses.
Select Confirm your campaign deployment from the Communicate section and click Extract the addresses from the database only at the time of mailing.
Click Finish to display the Email campaign confirmation page, then Go to communicate section to complete the deployment of the delivery, by sending it immediately or on a later date.
Now, you can stop imagining, and create a well targeted and personalized email delivery as simply as 1, 2, 3, with Send and Email Designer.
See the Send Guide for more about creating email deliveries and using Email Designer, or contact our Customer Care for further details.
Creating effective email content has just become as easy as drag &… Creating effective personalized emails is now as easy as dragging and dropping elements to your template. And that's exactly how our Email Designer works. In this tutorial we show you how to use the brand new editor of the Contactlab…
Send an email to your contacts by inserting them in an automated journey Creating a Send email automation step is very simple to do. But being able to add different types of customizable communications to an automated journey, then send them to the appropriate contacts according to their behavior and needs, can be…
Remind you invitees about the location and time of your event with a… Imagine you have arranged an exclusive presentation of your new spring & summer collection, to which you have invited the most loyal customers from your Milan store. Now, you want to plan to send them an email to remind them…
2018 was an important year for Contactlab’s customer engagement platform. Here, we’ve tried to select 10 news articles that recall a year of compelling releases and considerable excitement, although they are not necessarily shown in order of importance.
Contactlab constantly renews its commitment to customer engagement, this time raising it to the heights of Engagement Intelligence. The new platform provides you with the best tools to study, analyze and manage your contacts and their journeys, enabling you to carry out precisely targeted marketing activities that result in a successful customer experience, for both you and your audiences.
Contactlab has been registered as a Customer Data Platform solution provider by the CDP Institute
That’s right, we passed the exam: From 2018, you can also find Contactlab among the CDP providers recognized by the institute. According to the official definition, the platform’s knowledge modules meet the requirements fully.
Access a new intelligence that can analyze all your contacts’ data, enabling you to know them even better, predict their potential and anticipate future behavior. Thanks to the application of algorithms and predictive models based on the data you collect through your contacts’ actions and habits, you can use information that would not otherwise be available, to enhance individual contact profiles and create segments.
The Contactlab Marketing Automation module is called Flow
Bring unforgettable experiences to your contacts. Create personalized communication journeys, establish continuing and lasting relationships, build loyalty among your customers and encourage them to choose you both now, and time and time again in the future. Rely on marketing automation that can deploy email, SMS and webhooks to reach the right audience, in the most appropriate way, at the right time, wherever they may be.
The data you collect every day possesses considerable powers, and if you can easily and correctly interpret it, it tells you so many stories. With Analytics, you can visually explore all your data, and access invaluable information that helps you evaluate and influence the future of your business, extremely quickly.
Composing email has never been easier than with Email Designer
The platform has been enriched with a new editor, which makes email content management and the editing experience more immediate, while enhancing the levels of control and flexibility beyond what we are used to. The drag & drop interface, and a range of out-of-the-box tools, enable you to create responsive design-based emails with personalized messages, in just a few minutes.
With WhatsApp, the number of Instant Messaging apps that are available on the platform rises to 5
Facebook Messenger, Line, Telegram, WeChat and WhatsApp… you can chat with your contacts on all the available communication channels from a single platform. In fact, One allows your Sales Associates to communicate with your customers through their favorite channel, while using the same interface and without having to change tools.
Turn GDPR compliance into opportunities to improve your contacts’ experience
Contactlab has worked hard to provide you with a platform that offers all the features you need on your way to compliance. GDPR introduces principles and rigorous requirements that guarantee the right to privacy and data protection. But at the same time, it offers opportunities to improve a contact’s experience, and their perceptions of a brand, as well as adding value to the relationship that needs to be established with customers.
Being able to collect more information about your contacts enables you to differentiate your activities towards them, according to the true characteristics that distinguish them. Thanks to the enrichment of data managed by Hub, you can create increasingly precise segments… making use not only of demographic details, but also behavioral information including online habits, purchasing frequency, future expenditure forecasts, the possibility of churn and much, much more.
It’s not just emails that you can use in your engagement plans, but SMS messages too! After all, the SMS channel can guarantee opening rates in excess of 98%. In addition, 90% of openings take place within three minutes of message delivery (source: Forbes) while 74% of those who read an SMS, then interact with the brand (source: SMS Advantage Report). Contactlab has, of course, been thinking about helping you take full advantage of all this.
Marketing Automation and new Intelligence increase the value of the… Enrich your contact profiles with new information and create automated journeys: request a demo of Contactflow and Contactdata immediately. Ensuring that customers have enjoyable and unforgettable experiences, is the goal of every brand. But to do so, it is vital that…
Presenting the Contactlab Marketing Cloud: The platform that transforms… At the Contactlab Conference 2018, the new Contactlab Marketing Cloud, the digital marketing platform that firmly focuses on engagement intelligence, was presented. All this is possible thanks to combining artificial intelligence with the tangible added value of a human touch
Analytics arrives and your data takes shape Today, Contactlab announces Analytics, the new platform module and the latest great news of 2018. More and more each day, the future of companies resides in data. Being able to query it in a structured and speedy way, while allowing the…
The new approach to creating email content without any HTML or other coding skills, and with no need to use a preformatted template (although that option is of course, readily available too) is called Email Designer. A modern, responsive design compliant, and very effective editor, which has recently been added to your choice of options in the Contactlab platform.
In this tutorial. You will learn how to quickly and easily create content by using drag & drop tools to define the structure, then simply and intuitively adding the message, images and pretty much anything else you require, including dynamic links for individual personalization.
How does Email Designer work?
As an example, consider an email to welcome new customers to your e-commerce site and thank them for their initial purchase. While a suitable template is already available on Email Designer’s template page, you want to try something a little different. Do the following:
Sign in to Send, click Create > Email campaign, locate the appropriate email group, then click Create delivery, to display the Procedure selection page.
Click Create a new campaign, complete the Delivery parameters page as required, making sure that Use dynamic text is selected, then click Next.
On the Message content page, complete the Sender details and Email subject fields, then click Email Designer, positioned under the HTML version panel.
The Email DesignerTemplate management page displays in an overlay window.
Click Start from scratch to display the Content editing page.
The first thing you need to do is define the basic settings for the message. To do so:
Click the Settings tab, located in the Sidebar and set the Content area width to 600 pixels.
If your company uses a special font for its communications, you can also select it here, under Default font.
Otherwise, leave the remaining settings set to their default.
Now click the Rows tab to define the column layout of your email.
The default email layout already includes a single column row block at the top of the page in the Editing panel, which you can use, for example, for your brand’s logo, a heading and perhaps your initial message. To add further column combinations:
Drag the appropriate tile from the Rows tab, for example, two equal width columns, onto the Editing panel and drop it in the appropriate place. In this instance, below the default single column row block.
When you drop the tile, the resulting block’s width, together with the column layout it includes, automatically adjusts to the Content area width that you set in Step 5a above.
Continue to add row and column configurations to your email, as required. To complete this simple example, drag and drop another single column row beneath the two column block you have just added. Note:
It is generally recommended that you keep the layout simple, so you do not risk confusing the recipient with an over complicated design.
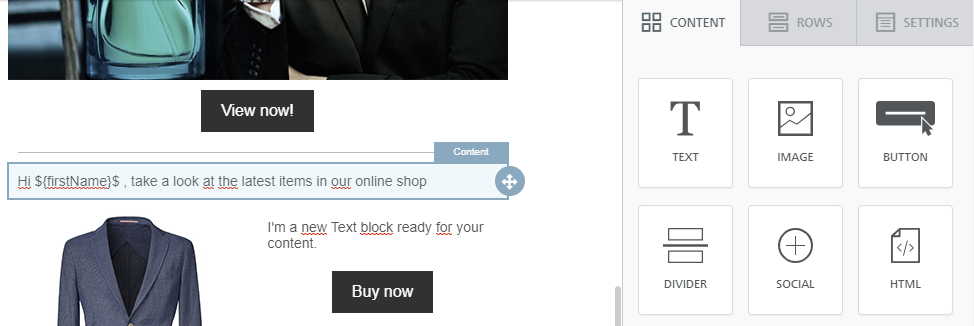
Next click the Content tab to define the type of content that you want to add, for example:
In the top row, drag and drop an Image tile, followed by two Text tiles, positioned vertically below the previous block. Note:
When using a single column layout, content blocks can only be ordered vertically. They cannot be added horizontally side-by-side.
In the middle row, drag and drop a Text tile and a Button tile to the left column, followed by an Image tile to the right one.
Add a Social tile and a Text tile to the bottom row.
Now do the following:
Hover your mouse over the two-column row block to display its Structure frame, then click the frame to reveal the control buttons.
Click the Duplicate button.
An exact copy of the block is added to the layout immediately beneath the original.
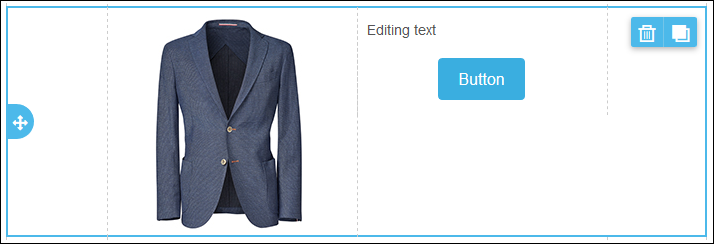
Click the Image block in the duplicate to display its Content frame, then use the Re-positioning arrows to move it to the left column.
Click the Text block in the duplicate and use the Re-positioning arrows to move it to the right column.
Example of a row’s Structure frame
Once you are finished with creating the email’s structure and layout, you can start adding the content. For example:
In the top row, click Browse in the Image block, then use the File manager to Upload an appropriate copy of your brand’s logo to the Myfiles folder. Click Insert positioned next to its icon, to add the logo to your email. Then:
Click the logo to display its Content Properties and adjust or set them as required.
Besides adjusting the image size and alignment, you can, for example:
Under Action, add an Image link, so the brand’s home web page opens when the reader clicks the logo.
Click the first text block to display the Text editor controls, then:
Adjust the text size so that it is appropriate for a heading, then add the required text, such as ‘Welcome to our online store!’
To make the email more personal, you could add the customer’s first name to the title, by left-clicking the mouse after the word ‘store’, then clicking the Special links button on the text control panel and adding the appropriate Dynamic field.
See the Send Guide for more about dynamic text.
The Text editor controls
In the second text box, enter your initial message.
In the second row, add a promotional text, perhaps related to something the customer has already bought from your e-commerce site, remembering to add the appropriate dynamic text. You could also, for example:
Offer the customer a 10% discount off their next purchase online or in-store.
Configure the button that is associated with the text to open a web page where they can collect the discount voucher. Note: Click the button to display its Content Properties. To change the button text, simply highlight it and enter the text you require.
Add a product image to the content block in the adjacent column, then convert it to a Dynamic image, using its Content Properties.
Dynamic images enable you, for example, to personalize the visual content for each contact that the email is sent to.
In the third row, add a further promotional text such as inviting the customer to view your range of accessories, with the button linked to the appropriate web page, and perhaps a static image of the range in the Image block.
Click the Social networks block and use its Content Properties to configure each required icon and link.
In the following text field:
Add text such as ‘To unsubscribe or change your email preferences, please click here’.
Highlight the words ‘click here’, then click the Insert link button in the Text editor controls panel, and add the appropriate URL for the unsubscribe web page.
Add any further text as required, such as your company’s contact details.
When you are finished, click Use in Contactsend, to add the relevant HTML to the HTML version panel on the Messagecontent page.
Continue creating your campaign as described in the Email deliveries page of the Send Guide.
Why wait any longer? Start creating your next email content today, using Email Designer and its simple yet very capable drag & drop tools.
See the Send Guide for more about using Email Designer, or contact our Customer Care for further details.
Creating an email delivery with Send and Email Designer is as simple as 1, 2, 3… Our new content editor Email Designer is perfectly integrated in the Send module interface and workflows. In this tutorial we show you how to use the editor together with Send to easily create effective and personalized email campaigns to reach…
Welcome Email Designer: Building emails in the platform has never been so easy A new email content editor is being added to the Contactlab Marketing Cloud, enriching its already impressive capabilities even further. Email Designer is built to make the already straightforward editing experience of our customers even easier and to further enhance…
Email Designer in action Email Designer is the new editor that, thanks to its intuitive drag & drop interface and many other features, makes it fast and easy to create beautiful, personalized and responsive design compliant emails. Watch the video and discover how to…
A new email content editor will be added to the Contactlab Marketing Cloud soon, enriching its already impressive capabilities even further. Email Designer is our Christmas Gift to you all, with two main goals:
To make your already straightforward editing experience even easier.
To further enhance the significant levels of control and flexibility that you currently enjoy, when creating and managing email content.
Simply an easier editing experience
A modern and advanced UI enables you to quickly and effectively compose the message body, by dragging & dropping components from the sidebar. Need to edit an element or alter its settings? Just click it and make your changes in situ. You can also upload images and insert them in your content, or choose the ones you need from a free gallery. You can even use an integrated tool for basic image editing.
Personalizing your message with dynamic placeholders is also simplicity itself… Open Email Designer directly from the campaign creation wizard, then select the appropriate one from a drop-down menu.
More power, more control
When you access Email Designer for the first time, you’ll find a set of free-to-use templates that are ready to be edited and sent on their way. They cover several common use cases such as Happy Birthday messages, season’s greetings, welcome and thank you emails, order confirmation communications, special offers and save the date teasers.
Need more? You can easily request additional templates from us, based on your specific requirements. Alternatively, you can also create your own templates from scratch and save them for future use.
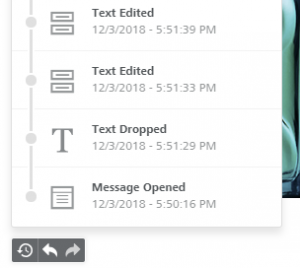
But what if you make a mistake while creating your message? No worries… you can always use the undo/redo button, or even go back through the timeline of your recent changes and restore a previous version.
Eager to try out Email Designer?
See the relevant section of the Send Guide for more about Email Designer.
Email Designer in action Email Designer is the new editor that, thanks to its intuitive drag & drop interface and many other features, makes it fast and easy to create beautiful, personalized and responsive design compliant emails. Watch the video and discover how to…
Creating an email delivery with Send and Email Designer is as simple as 1, 2, 3… Our new content editor Email Designer is perfectly integrated in the Send module interface and workflows. In this tutorial we show you how to use the editor together with Send to easily create effective and personalized email campaigns to reach…
Creating effective email content has just become as easy as drag &… Creating effective personalized emails is now as easy as dragging and dropping elements to your template. And that's exactly how our Email Designer works. In this tutorial we show you how to use the brand new editor of the Contactlab…
The year is coming to an end, but the Contactlab news keeps on coming! Today, we present two new Flow features, which will enable you to design and execute Customer Journeys that are even closer to your needs, and your customers’ expectations.
1. The CHECK step now extends to all Hub events
Why only automate customer journeys based on whether they open an email or click a link? With Flow, you can now use any Hub-based event to trigger the next step, as soon as it is added to a contact’s individual profile. It may result in sending an email or a text message, or perhaps activating a webhook to start, for instance, a push notification, or to communicate with an external app.
You can decide, for example, to send an email to a customer who has visited a page on your web site, or someone who added a product to their cart, but did not complete the order. You can even send a request to your warehouse to process the order, as soon as the purchase is concluded.
But that is not all that is new…
2. Create MULTIPATH journeys
When a particular event takes place, Flow now enables you to differentiate the paths a contact can follow, and the subsequent communications they will receive, based on pre-set conditions.
But just what does that mean in practice?Imagine that customers who have been included in a journey because they satisfy the entry condition, now complete purchases on your e-commerce site.You can, for instance, decide to split the communication channels and the message content you send them, according to the product they purchased.For example, you can send a special offer e-mail when contacts buy product A, a reminder SMS for product B, and a push notification – by activating a webhook – for product C, and so on.And of course, you can still send a completely different message to contacts who do not complete a purchase at all.
After your contacts carry out defined activities, decide if, how and when to respond to them, with the most appropriate communications. Create diverse channels and messages within the same journey, while being confident that from today, you can define more than just two paths… enough, in fact, to effectively create differentiated journeys and truly personalized experiences.
Thank customers for their purchases, automatically promote your range, and… Your customers have responded well to your latest promotion, buying products from your new range as a result, but where to now? Learn how to easily build multi-option journeys, to reach each customer with messages tailored to their interests, through…
Customize your contacts’ journeys according to their actions Contacts who, for example, receive the same email, can react in completely different ways. One person might leave the email unopened, another perhaps just reads it, while a third could click a link in the message, to view more details…
Together, Contactlab and Fresh Relevance enable you to create… A new cooperation between Fresh Relevance and Contactlab is born, delivering an integration that enables you to always interact with your customers in a more personalized way, and provide journeys that are shaped by their real needs.
Why analyze data? Because analysis often answers questions not yet asked … and in a world where shoppers are becoming increasingly demanding and looking for unique customer experiences, this is becoming a key success factor for brands.
Assessing data thoroughly enables you to extract hidden value, while truly understanding it reveals results. But above all, it provides key indicators for the future. A future where every day, data will become more and more important for a company. Being able to query it in a structured and speedy way, allowing the data to be readily understood and transformed into actions… activating marketing campaigns as a result, and making effective business decisions across the board.
And it is precisely in this direction that Contactlab has moved in recent months. Now, today, we are making a new platform module available – presenting the latest big news for 2018: Analytics.
Analytics is the Contactlab Marketing Cloud module that allows you to access all data, to explore and use it effectively, while receiving accurate visual representations of vital information in near real-time… enabling you to decide and influence the future of your business in a highly informed way. With Analytics, you can get structured data in pre-configured business views, then examine it with the visualization tool that is closest to your needs.
The data you collect every day has immense value. It tells many stories and allows you to envisage a path for the future. But people require easy, fast access to data, in just the way they need. Data tells us things that are not always easy to see. But now, thanks to Analytics, you can get deep inside the data, to understand it better and use it immediately.
Analytics in action
What kind of data do we mean? With Analytics, you can access all the data you collect during your daily activity, through every communication channel and each contact occasion. Every interaction enables you to learn something more about your customers:
Online, on the web, through social media or mobile apps.
But don’t forget, for example, in-store visits or phone conversations with Customer Service.
Today, the Contactlab Marketing Cloud platform enables you to get to know your contacts even better, by creating unique profiles in which you collect and integrate all the available information… individual customer views that you can enrich with KPIs and forecasts of their behavior. Analytics adds to all this – it gives you access to the vast amounts of data you’ll encounter and allows you to browse and translate it into easily understandable visuals, which are intuitive and quick to read.
What could be worse than not being able to collect customer data? Almost certainly, not being able to analyze and understand it, quickly and easily.
Benefits of adopting Analytics
To briefly summarize the new platform module, you could say that ‘Analytics provides all the data in a structured way, to be able to query it independently, and obtain clear, quick and actionable results, in one place’. That is the new module functionality in a nutshell.
Access all data from a single point.
The whole story of every contact, which can be queried with just a few clicks: Facts, purchase preferences, digital and non-digital habits, KPIs and predictive analysis of behaviors, readily available in profiles that are enriched by processing all the acquired information.
From macro to micro queries.
View the aggregated data, or drill down until you reach the finest details.
Many systems combined in a single visualization tool.
Choose the tool that best suits your needs. Browse and explore the data and discover the relationships that exist: For example, from stock to context data, to sales results analysis.
Guided, simple and fast navigation with the support of blueprints for static and dynamic visualizations.
You can go straight to the heart of the data you need. With the wide range of blueprints that Contactlab provides, you can immediately start browsing to get the answers you are looking for, without investing additional time in creating dashboards and reports.
With Analytics, you make easy to understand data available to anyone who needs it. And understanding data better means more knowledge, increased loyalty, more conversions and enhanced results.
For more details, call Customer Service or get in touch with your usual contact at Contactlab. Better still, request a demo and discover the enormous potential that the platform offers to your business.
[WEBINAR] Discover the real meaning of your data with Analytics The future of brands is increasingly dependent on the data you collect every day, and on the valuable information it provides about your contacts and your activities, marketing or otherwise. Subscribe to our webinar to find out how Analytics enables you to…
Marketing Automation and new Intelligence increase the value of the… Enrich your contact profiles with new information and create automated journeys: request a demo of Contactflow and Contactdata immediately. Ensuring that customers have enjoyable and unforgettable experiences, is the goal of every brand. But to do so, it is vital that…
Contactlab’s Top 10 Product Developments of 2018 2018 was an important year for Contactlab's customer engagement platform. Here, we've tried to select 10 news articles that recall a year of compelling releases and considerable excitement, although they are not necessarily shown in order of importance.
Thanks to One, you can now converse with your customers on WhatsApp!
You could already count on Facebook Messenger, Line, Telegram and WeChat, but now you can chat with your contacts through one of the most popular instant messaging apps, which is already used by millions of people around the world. From today, you can offer your Sales Associates another channel to communicate with their customers, and what a channel!
WhatsApp and One make Contactlab even more multi-channel!
By accessing their own account and selecting the appropriate contacts, a Sales Associate can choose when and how to reach each one, carrying out every conversation from a single point, regardless of the channel. They can send dedicated promotions, tell customer’s about today’s offers and the latest brand news, and let a shopper know when that special something is back in store … It’s so easy for an SA to create and send messages, establishing and managing direct, personal and tailored relationships that truly make a difference.
Today, you can combine the more traditional asynchronous communication channels like email and SMS, with instant messaging features that open the way to real dialogues in real-time.
Your brand and your Sales Associates can count on One, the clienteling application designed to create and manage long-lasting multi-channel conversations. Find out how to get an official WhatsApp Business account and start using the application now.
One for Azure available in Microsoft’s AppSource Anyone browsing for a clienteling application among those available for Azure on the Microsoft portal, can, from today, also find One. The partnership that has, in fact, been operational for some months now, recently resulted in this very important first…
Contactone, clienteling according to Contactlab Clienteling has evolved to provide sales associates with everything they need to create, develop and manage long-term relationships with customers. Relationships based on the associates’ knowledge and the shoppers’ preferences, habits and buying behavior. Clienteling is not just a simple…
Contactlab’s Top 10 Product Developments of 2018 2018 was an important year for Contactlab's customer engagement platform. Here, we've tried to select 10 news articles that recall a year of compelling releases and considerable excitement, although they are not necessarily shown in order of importance.
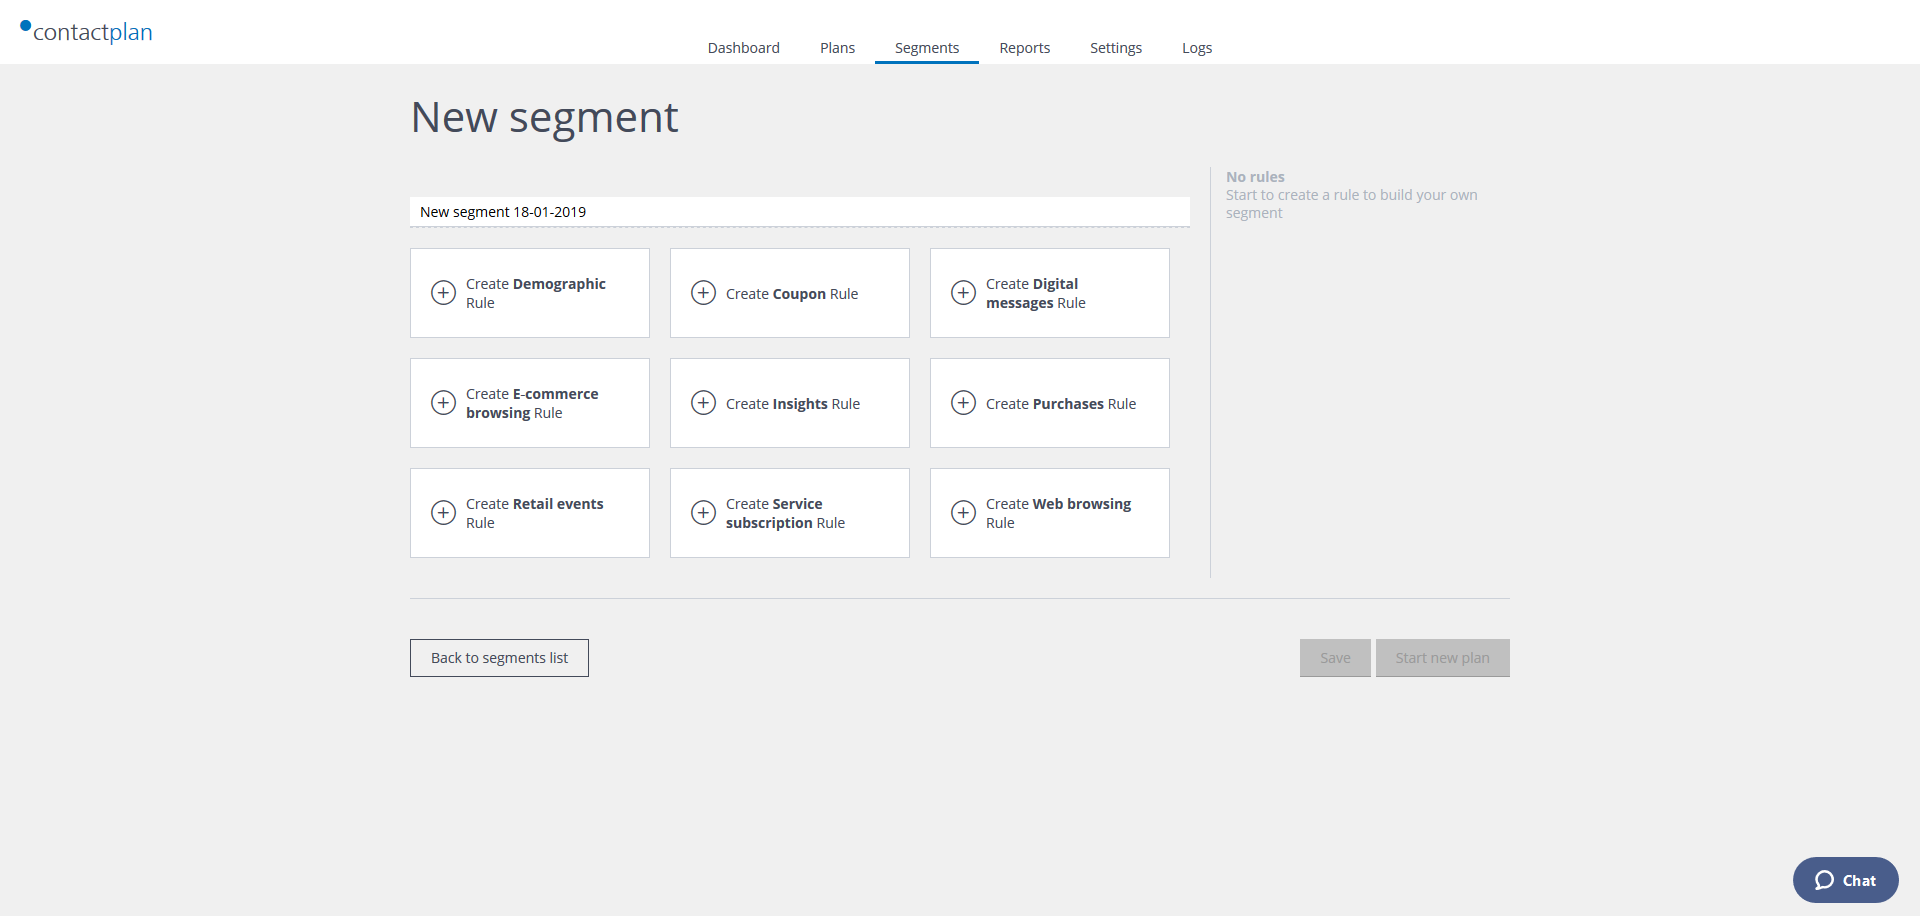
The platform has been enhanced with a new feature: By querying the data available in Plan, you can discover the behavior of your contacts in the time frame that interests you most. You can search for information:
Within a time and date range.
From a selected point until today.
For example, during the last month, in the last two years and so on.
From the date when the contact appeared in Plan. Note:
Contacts in your database may not necessarily be available in Plan. For example, those in a suppression list may be excluded, or basic filters may be set.
Query your data and get snapshots that provide compelling information about your contacts’ actions:
For your entire database.
or:
For a particular segment that you want to understand better.
And do it for the time period you require.
Discover all your contacts’ behavior
Know a particular segment better
Collect and integrate information about your contacts from multiple sources, then analyze it to define dedicated engagement campaigns and make data-supported business decisions.
Contactlab included among the main vendors in the first Gartner Market… Gartner has released their first Market Guide for Customer Data Platforms for Marketing, and Contactlab has been listed among the Representative Vendors globally, as a technology that enables brands to integrate contact data collected from different sources, into individual profiles.
Analytics arrives and your data takes shape Today, Contactlab announces Analytics, the new platform module and the latest great news of 2018. More and more each day, the future of companies resides in data. Being able to query it in a structured and speedy way, while allowing the…
Why is it important to calculate the CLV for each of your customers? “Will my existing customers keep on buying my brand in the future? How much will my best customers buy in the next 2 weeks? Which customers are at risk of churning? Who will be my top spender in the next…
Security on the Web should be the rule, not the exception. This statement is quickly encouraging the adoption of the HTTPS protocol on more and more websites.
What does this mean to email marketeers? For sure, it has considerable impact on deliverability and brand reputation. Let’s dig deeper.
HTTPS – an acronym for HyperText Transfer Protocol over Secure Socket Layer – is an evolution of HTTP, the main protocol used to exchange information on the Web. An evolution designed to deliver greater data exchange security and reliability, through new encryption and control systems that protect against eavesdropping and tampering with communications.
The Send module natively supports HTTPS completely. Not only for message composition – for example, images within email templates have HTTPS paths – but also for other services, such as links in double opt-in confirmation emails, and tracking URLs, which register click rates and make the details available in campaign stats.
We also suggest to our customers that they ensure all the links they include in an email use, whenever possible, HTTPS. If not, the links may be reported as ‘insecure’ and even blocked by browsers.
This highlights the extent to which the lack of this secure protocol may consistently result in a negative impact on message deliverability and reputation. This impact is likely to increase in the future, because the adoption of HTTPS as a standard, is being pushed strongly by many companies and organizations. At the forefront is Google, whose Chrome browser marks any site without HTTPS as being ‘not secure’, in its latest releases.
For these reasons, it’s very important to use secure URLs in your email communications, and Send helps you achieve this goal easily.
If you have any questions about this topic, please contact our Customer Service. For further information about how to use Send, see the user guide.
Changes to Sign in and SFTP space management to make your data even more secure To increase our customers’ data security levels even further and enhance its management in our systems, we are introducing technical changes and new policies. For more details, please read the following information. Increased security levels when accessing our platform…
Welcome Email Designer: Building emails in the platform has never been so easy A new email content editor is being added to the Contactlab Marketing Cloud, enriching its already impressive capabilities even further. Email Designer is built to make the already straightforward editing experience of our customers even easier and to further enhance…
The magical world of bounces: Emails with no reachable addresses –… Without doubt, the communications bounce rate has become increasingly important to companies in recent times. But few realize, however, that there is a rich, varied and valuable world of information and recommendations behind the word bounce, which even today, is…


 Bring unforgettable experiences to your contacts. Create
 Facebook Messenger, Line, Telegram, WeChat and WhatsApp… you can chat with your contacts on all the available communication channels from a single platform. In fact,
 It’s not just emails that you can use in your engagement plans, but SMS messages too! After all, the SMS channel can guarantee opening rates in excess of 98%. In addition, 90% of openings take place within three minutes of message delivery (source: Forbes) while 74% of those who read an SMS, then interact with the brand (source: SMS Advantage Report). Contactlab has, of course, been thinking about helping you take full advantage of
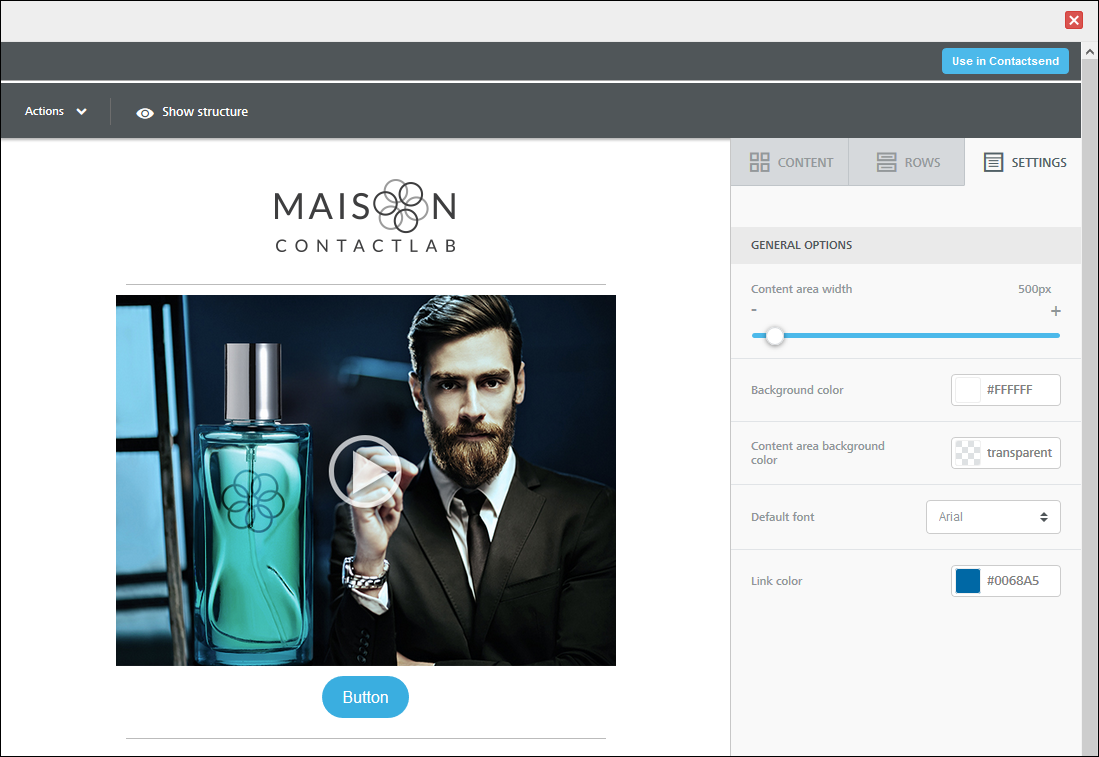

 More power, more control