
Scope
In this tutorial, you will learn how to use Contactplan to plan an email delivery that reminds your customers about the location, date and start time of your event.
Procedure
Imagine you have arranged an exclusive presentation of your new spring & summer collection, to which you have invited the most loyal customers from your Milan store. Now, you want to plan to send them an email to remind them date and start time of your event.
Note:
Because the plan results in an email delivery, you need to have created the message using PageBuilder or prepared and saved the message, using an HTML editor of your choice.
To create the plan, do the following:
- Sign in to the platform and select Contactplan
- Click the Plans to display the My plans page and click Create new plan to display the New plan
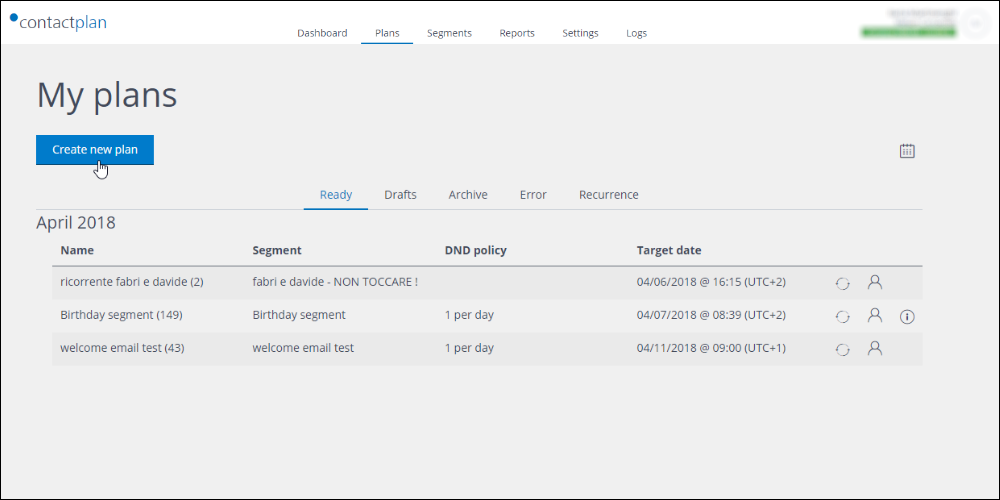
- Enter a unique and recognizable name for the plan.
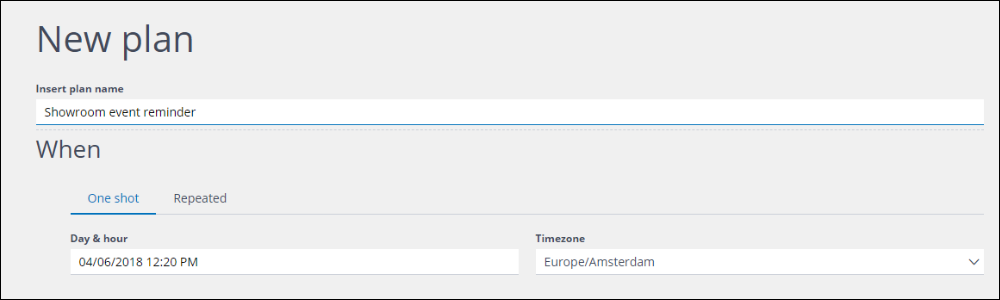
- Under When, click the One shot tab, if it is not already selected.
Note:
If you want to send the same email more than once to the same audience, you should click Repeated, then define the appropriate delivery frequency. If you want to send different emails at diverse times to the same audience, you should create a plan for each email. - Under Day & hour, define the delivery date and time.
Using the example here, the delivery date should be one day before the event. Update the Time zone, if required.
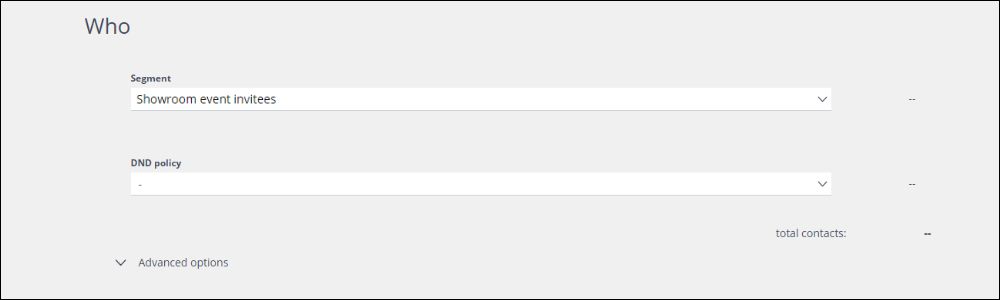
- Under Who, select the appropriate Segment that you have previously defined.
If you have enabled the Event management events in Contacthub, you will be able to create a segment with a Retail events rule in Contactplan, to identify all the customers who have been invited to the event and subsequently accepted. - In this instance, you probably should not select a DND policy.
The aim is to send the email to all event invitees who have accepted. If you select a DND policy, you may exclude some of the intended recipients. If you want to ensure that the customers who are to receive this email are not sent, for example, too many other emails from you on the same day or in the same week, an appropriate DND policy should be applied to any other relevant plans.
- Under Action, select Create Delivery in Send as the Consumer and click Create.
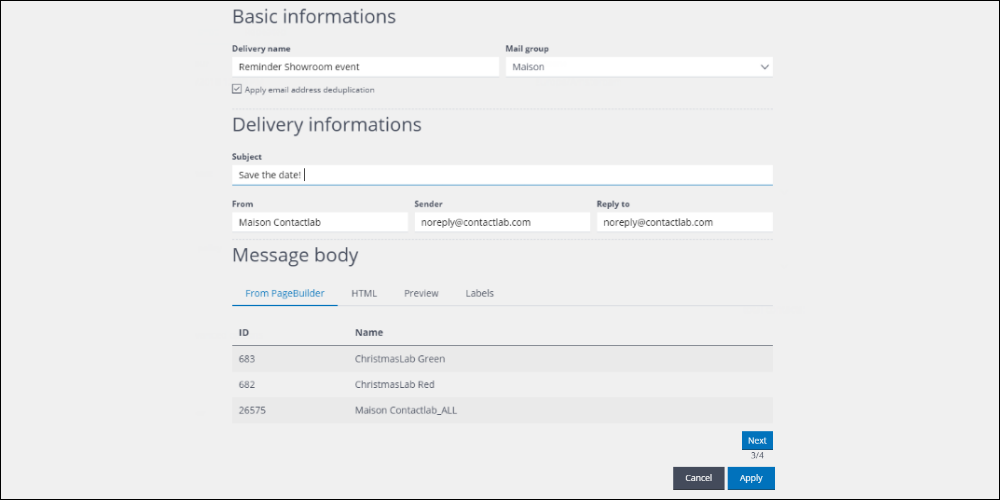
The new delivery template page displays. - Under Basic information, enter the Delivery name, select the relevant Contactsend Mail group and click Next.
- Under Delivery information, enter the email Subject and the appropriate From, Sender and Reply to details, if required, then click Next.
- Under Message body add your message to the delivery. If you have used PageBuilder to create your message, click From PageBuilder and select the appropriate message.
If you have used a different method to create your message, click HTML and copy and paste your message into the box provided. - Under Test list, select or define the appropriate list, and click Send test to send the email for review, if required.
- When you completed the delivery template, click
You are returned to the New plan page.
- When you have finished, click Save As Draft to be able to make changes to the plan later, or Save if it is ready.
If you click Save, you have now created a plan that will be run by Contactsend on the date and time you have defined.
Note:
You can reopen any plan that has been saved as Ready at any time, but you can only edit it up until the time and date that it is due to run. Draft plans can be edited at any time.
See the Contactplan Guide for more about creating plans, or contact Customer Care.