
Scope
In this tutorial, you will learn how simple it is to immediately and automatically add contacts to a Flow automation, as soon as they conform with the event condition/s you have defined. For example, add each woman to an automation, as soon as she views the bags category on your e-commerce site.
Procedure
Note:
The following uses the example described above for demonstration purposes. However, the events and categories that are actually available to you, depend upon how Hub has been configured for the relevant workspace.
To define the conditions that should be applied to select the contacts who join an automation, do the following:
- Sign in to the platform and select Contactflow.
The My automations page displays by default. - Click Create new automation, complete the appropriate fields on the New automation page, ensuring you select the Real-Time source option, then click Create automation.
The Automation configuration page displays.
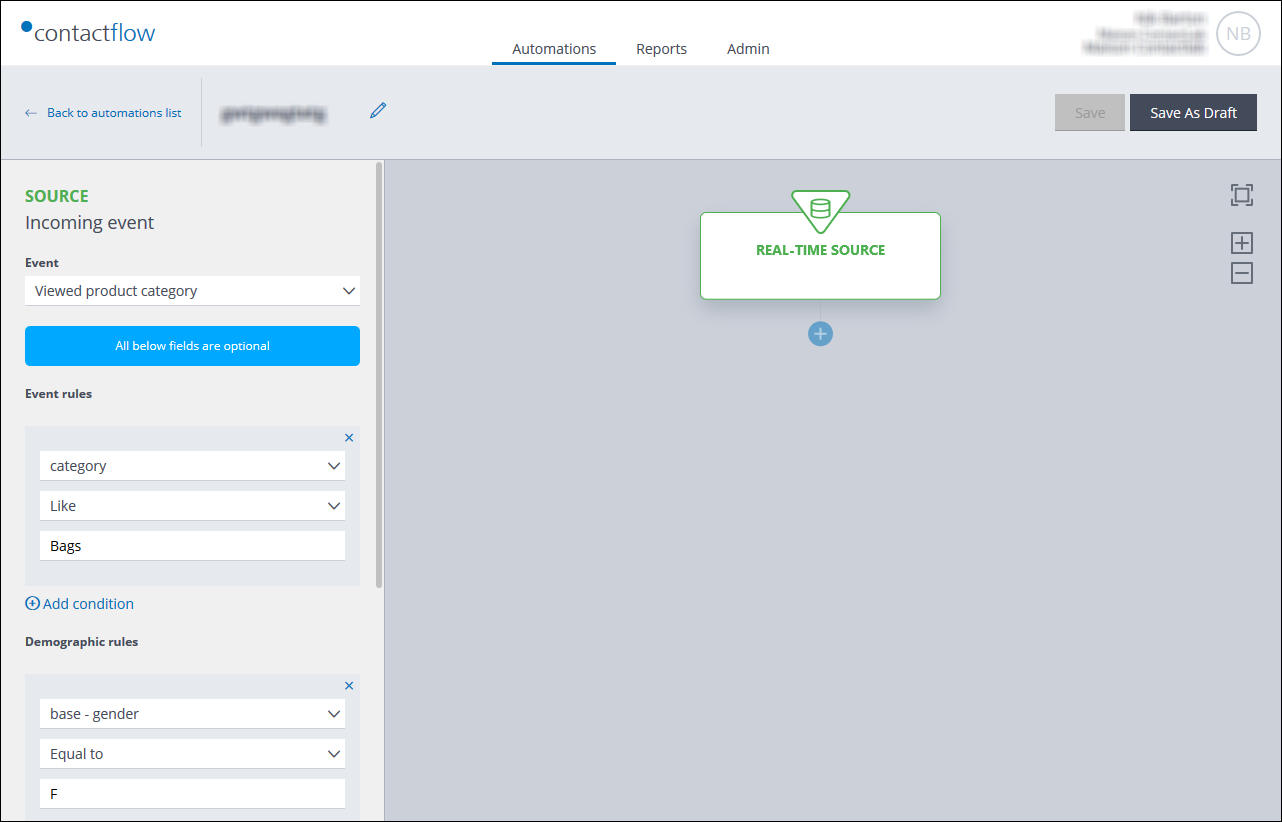
Example of the Automation configuration page, with a real-time source
- Click the Real-time Source panel, then under Incoming event in the Sidebar, select the event that will trigger a contact being added to the automation.
For example, View product category. - Under Event rules, add a condition to refine the incoming event, as follows:
- Click Add condition, then select the appropriate one from the drop-down list.
For example, category.
Note:
The available event rule conditions vary, according to the Incoming event that is selected. - Select the required operator type.
For example, Like. - In the next field, enter the appropriate value or text, according to the type of condition selected.
For example, Bags.
You can continue to add further event rule conditions, if required.
- Click Add condition, then select the appropriate one from the drop-down list.
- Under Demographic rules, add a customer-related demographic property condition, to further refine the incoming event, as follows:
- Click Add condition, then select the appropriate one from the drop-down list.
For example, base – gender.
Note:
The available conditions include both base and extended properties. - Select the required operator type.
For example, Equal to. - In the next field, enter the appropriate value or text, according to the type of condition selected.
For example, F.
You can continue to add further demographic rule conditions, if required.
- Click Add condition, then select the appropriate one from the drop-down list.
- Continue to define the real-time source, according to your needs.
For example, select a Removing event to determine what must happen, to trigger a contact to be removed from the automation.
See the Flow Guide for more about configuring a Real-Time source. - When you are finished, return to the Automation configuration panel, to continue creating the automation, by adding Action, Check, Delay and End steps, as required.
The result is a tailored Flow automation to which contacts are added in real-time, according to their actions, and/or the demographics in their individual profile.
For more details, see the appropriate pages in the Contactflow Guide, or contact our Customer Care.