To access the Integrations section, click configure in the main menu and then click the integrations panel. The Integrations page displays (figure 1).
Click the appropriate link below to scroll to the information you require:
- The Overview.
- Integration examples.
Overview
The integrations section enables you to integrate Send with various web analytics systems.
All integration settings are configured and managed from the Integrations page.
The page is subdivided into a series of panels, which you can click to access the relevant configuration sections. To be able to use an integration, it needs to be activated for your account, and you also require the appropriate permissions. A panel appears gray if it is not available to you.
Integration examples
The following describes how to configure a selection of the most popular integrations. Click the appropriate link for more about the following:
Google analytics
Contactsend enables you to track your deliveries with Google analytics for free. Do the following:
- Click the Google Analytics panel on the Integrations page.
The Google Analytics page displays.
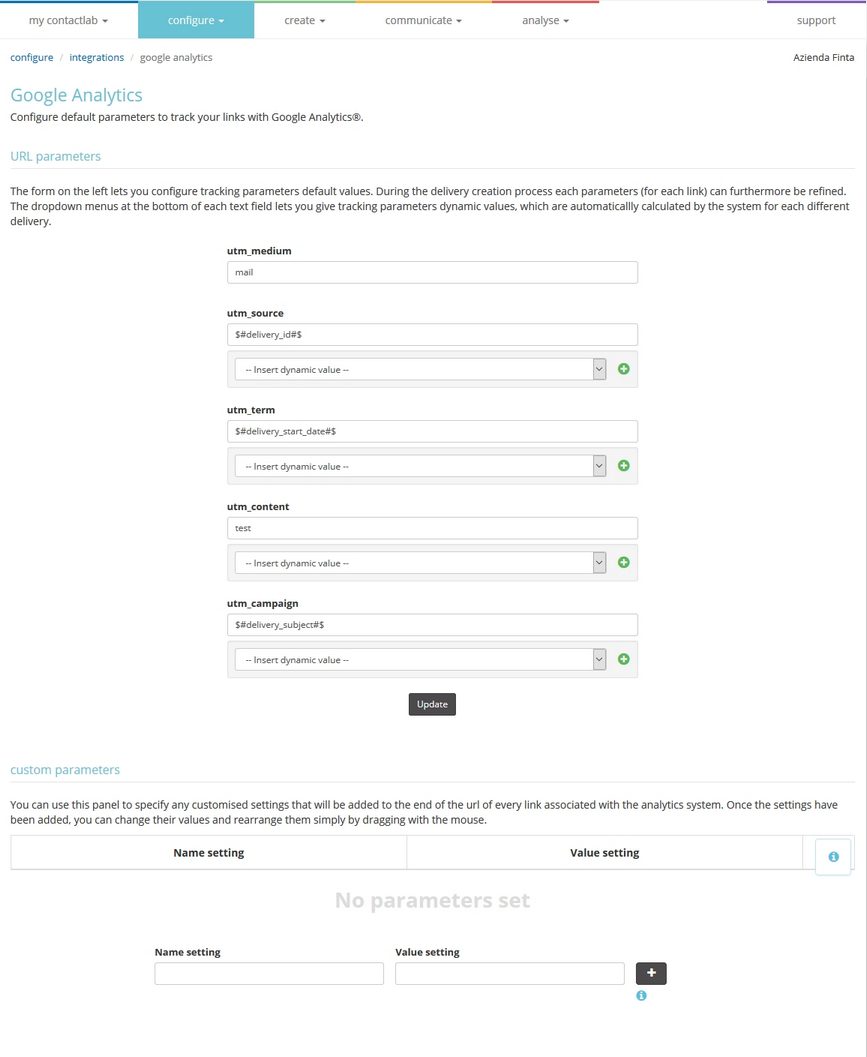
Figure 5: The Google Analytics page
You can use fixed or dynamic values for Google analytics parameters. To add a dynamic parameter, select it from the appropriate drop-down menu. The values are calculated by the system for every delivery.
- Under utm_medium, enter the delivery type.
For example, e-mail. - Under utm_source, enter or select the delivery identifier.
For example, the campaign ID, in the $#delivery_id#$ variable format. - Under utm_term, enter or select when the delivery is to start.
Use the $#delivery_start_date#$ variable format. - Under utm_content, enter or select the content type.
For example, test. - Under utm_campaign, enter or select the campaign subject.
Use the $#delivery_subject#$ variable format.
Other variable formats:
- $#customer_id#$
- $#link_id#$
- $#delivery_title#$
You can also add custom parameters, for example, a Company ID, for a multiple-company account, or a Link ID. Do the following:
- Under Name setting and Value setting, enter the relevant name and value.
- When you are finished, click +.
- Repeat steps 1 and 2 to continue to add further custom parameters, as required.
When creating an email campaign and defining link tracking, you can enter different values for each link.
To track all links:
- Under Links found in the text, select Google Analytics in the drop-down list (figure 6).
See Create > Email campaign for more about the creation process.
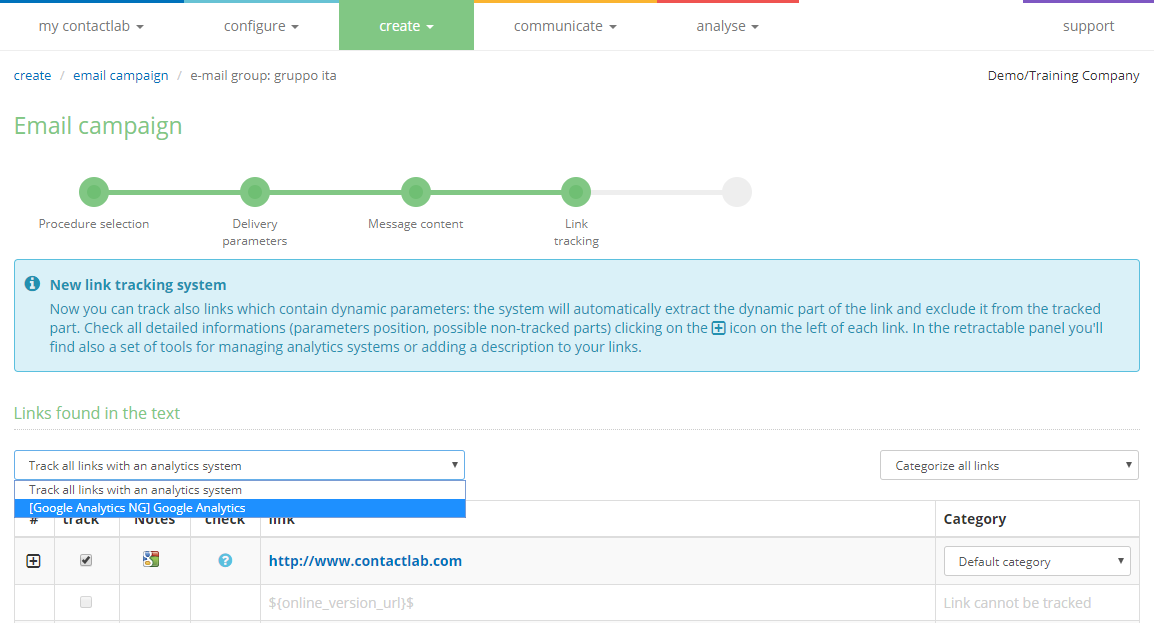
Figure 6: The Google Analytics option on the Create Link tracking page
To track only selected links:
- Click the + icon to the left of the appropriate link.
The Link details display.
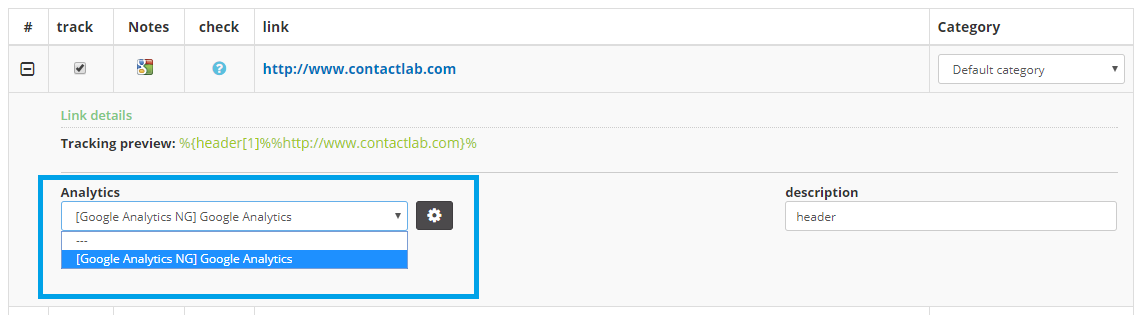
Figure 7: The Google Analytics option in the Link details
- Under Analytics, select Google Analytics from the drop-down list.
To define or edit the Google Analytics parameters for a link:
- Ensure that Google Analytics is selected in the Analytics panel, and click the Cog icon positioned to the right (figure 8).
The relevant details display (figure 9).

Figure 8: The Cog icon in the Analytics panel
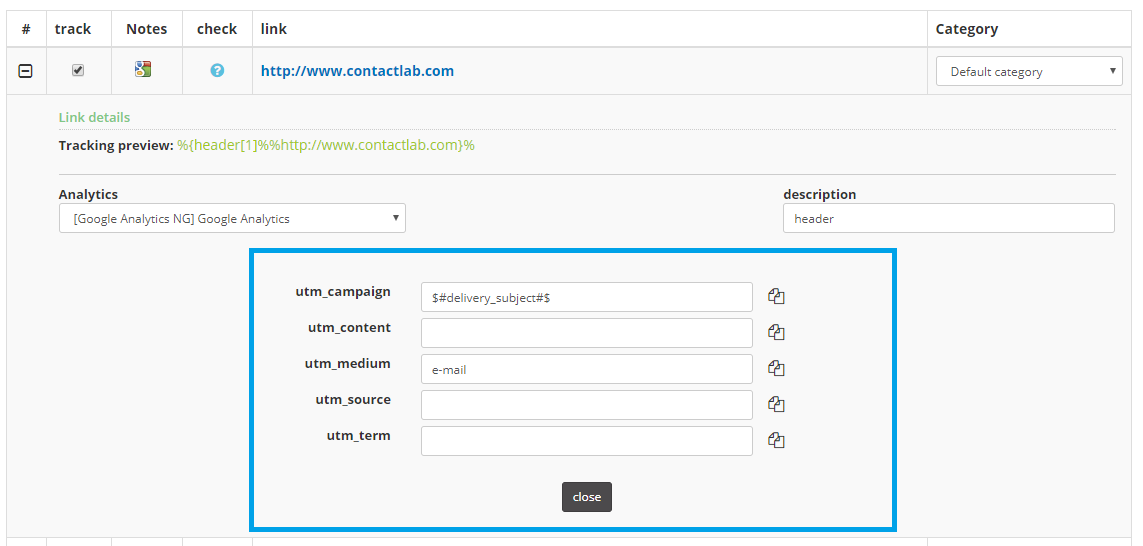
Figure 9: The Google Analytics parameters for the link
- Edit the values, as required.
NOTE: As the delivery title is not a mandatory field when creating the campaign, if this option is chosen, the default parameter is the delivery subject. - If you want to copy a value to other links, click the
 icon, positioned to the right of the appropriate parameter.
 - When you are finished, click close.
- Continue to create the delivery, as described in Create > Email campaign.
Schema.org
Gmail has recently introduced a new (Beta) way of viewing emails in the Promotions tab. With this new grid layout mode, emails are displayed with a graphic preview, which can use an image that is not in the email itself. You can configure items to appear in this new grid layout view using Schema.org markup syntax, which is a project created by Google, Microsoft, and Yahoo!, working in collaboration.
To enable you use this feature, the Send Schema.org integration has been made available. Please note that you need the appropriate permissions to use this integration.
Do the following:
- Click the Schema.org panel on the Integrations page.
The Schema.org page displays. - Click Create new organization.
The Schema.org new organization page displays.
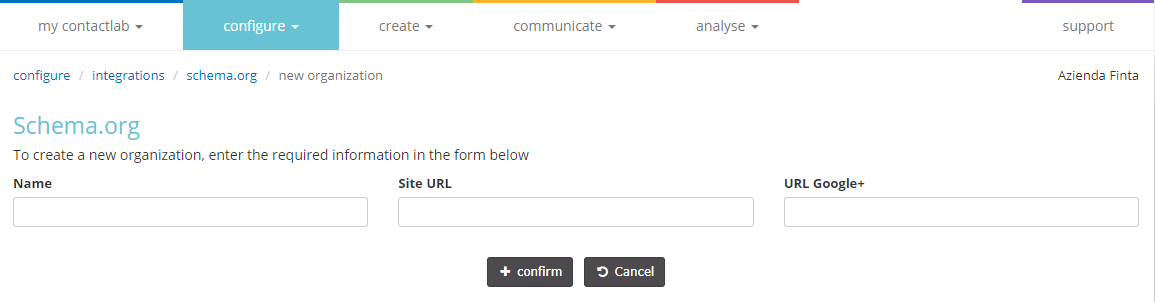
Figure 10: The Schema.org new organization page
- Enter the following details:
- Name
- Site URL.
- URL Google+.
- When you are finished, click + confirm.
Once you have configured the integration, you can automatically include a portion of Schema.org code when you create a delivery, so that emails to Gmail recipients are already optimized for the grid view. Do the following:
- On the Message contents page of the Create a new campaign wizard, in the panel beneath the HTML content, click Gmail Feature.
The Gmail Feature panel displays.
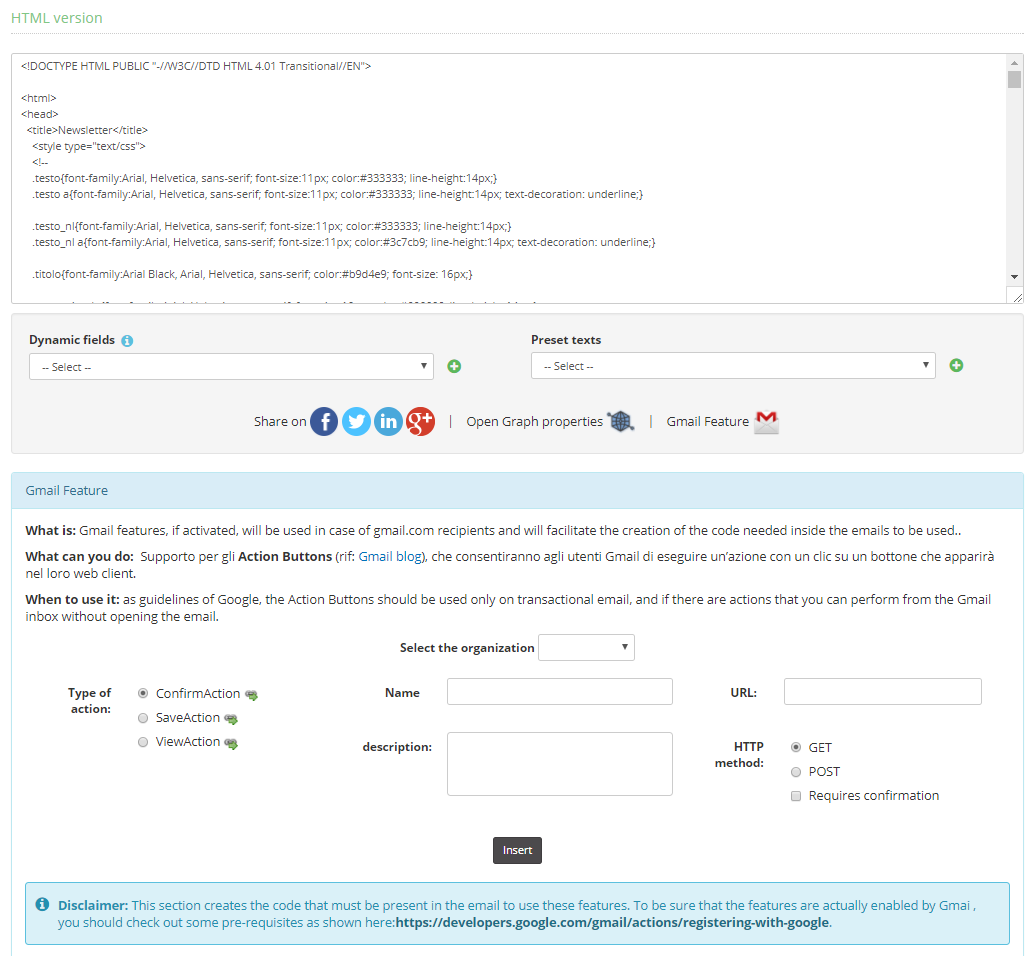
Figure 11: The Gmail Feature panel on the Message contents page of the Create a new campaign wizard
- Under Select the organization, choose the appropriate organization.
- Select the check (tick) box next to Promotions tab.
- Click Browse… to upload the image that you want to appear in the preview.
The icon will automatically be taken from the linked Google+ page. - When you are finished, continue to create the delivery, as described in Create > Email campaign.
To use custom audiences or lead ads, you must link at least one Facebook Ads account to Contactsend. You can configure and link up to 10 accounts. The configuration steps must be carried out for every Facebook Ads account, but they do not need to be repeated to upload contacts (users) as custom audiences.
To configure a Facebook Ads account, do the following:
- Click the Facebook panel on the Integrations page.
The Facebook page displays.
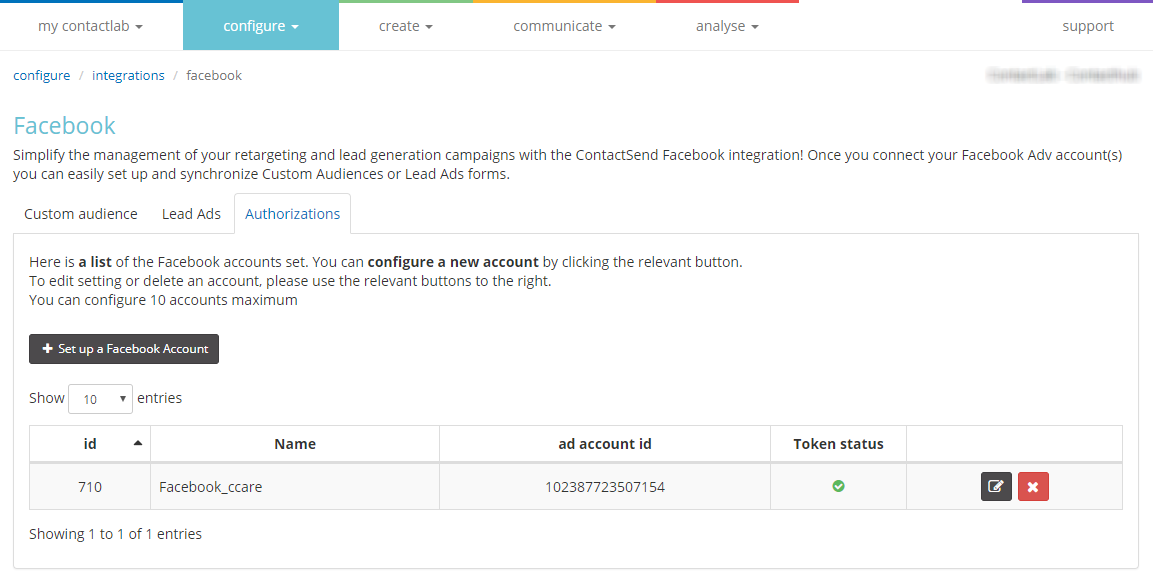
Figure 12: The Facebook page with the Authorizations tab selected
- Select the Authorizations tab.
Any existing Facebook Ads accounts are displayed in the Accounts list. - Click + Set up a Facebook Account.
The Facebook new account page displays.
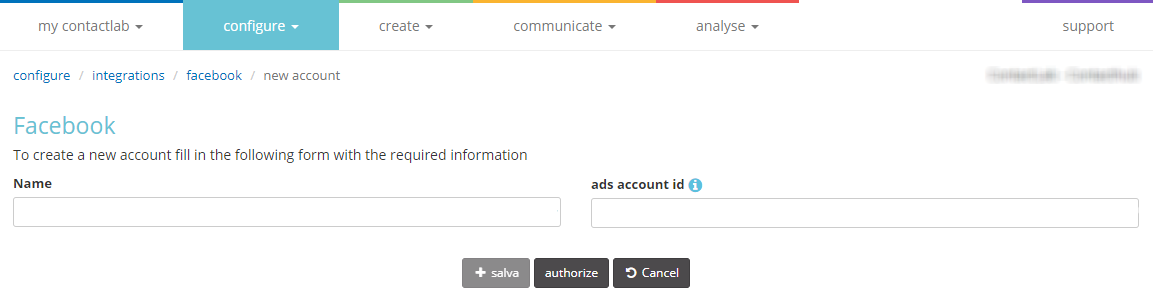
Figure 13: The Facebook new account page
- Enter the following:
- Under Name, a recognizable name for the Facebook Ads account.
- Under Ads account ID, the numeric ID for the Facebook Ads account.
- Click authorize to automatically request and retrieve an access token.
When requesting the access token, Facebook will ask you to give Contactlab permission to access the Ads account. This is needed to create and upload custom audience contacts (users).
Note:
The access token is tied to the relevant Facebook user. If you have already logged in to Facebook, then that account will be used. Otherwise, you need to log in to Facebook as the user who has the appropriate permissions for the Facebook Ads account. - Once you have the access token, click save.
The account is added to the accounts list on the Authorizations tab of the Facebook page (figure 12). Here, you can edit or delete the Ads account, and display the relevant details.
Note:
Facebook access token has an unlimited time validity.
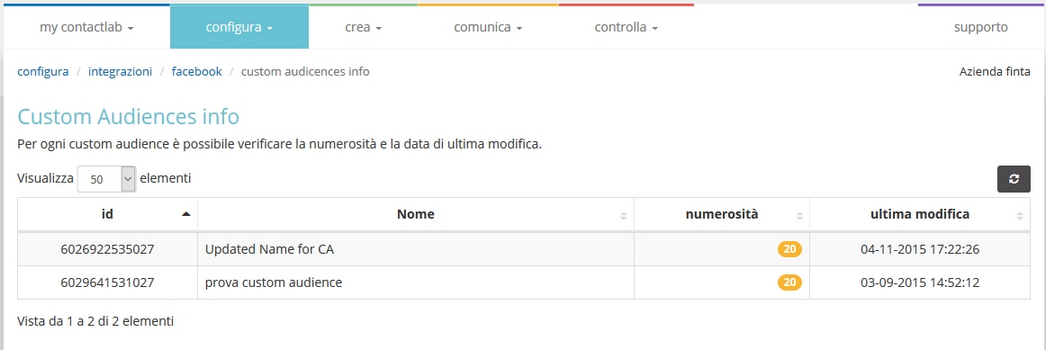
Figure 14: The Custom Audiences info page
Once you have completed the configuration, Contactsend will be able to access the Ads account, and you can upload and manage custom audiences as required.
Custom audiences
You can start from an exinsting db in Contactsend or a part of it (filter) to create a new custom audience on Facebook or add users to one existing audience. You can do this via the db admin panel, under configure > user db by clicking the db name and then the links in the “custom audience” panel.
In the “configure > integrations > facebook” area you can see the existing synchronizations between Contactsend and Facebook custom audiences. If you select the Info icon in the appropriate row of the Accounts list, you can view the Custom Audiences info page for that account, which includes a list of all the relevant audiences, regardless of who created them, together with the number of contacts and the date of the last edit.
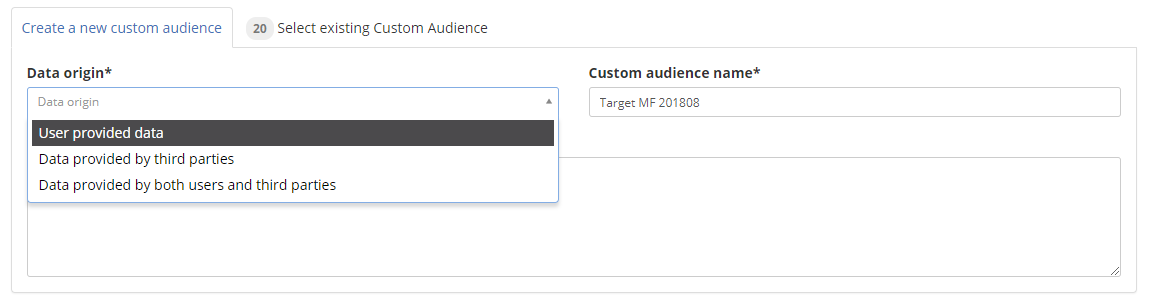
When a custom audience is loaded or synchronized, Facebook now requires you to indicate the origin of the data. Specifically, whether the contact data that is being uploaded was collected directly from the customers, came from third parties or originates from a combination of both of these sources.