
Pagebuilder is the editor you can find in Send in the Create > New campaign > Message contents section. This tool is used to modify the contents of templates – prepared for Pagebuilder – with no risk of damaging the html code and creating view errors.
The basic concept of Pagebuilder is to Outline the template into a series of elements, each of which can be edited separately. After modifying the editable elements, the result is saved in a new html file which can be immediately used in Contactlab.
This concept will be clearer in the following paragraphs.
Access
Pagebuilder can only be accessed by customers who have signed activation contracts. To find out whether it is available, simply check that the “Pagebuilder” link is present under the html code box (see fig.1)
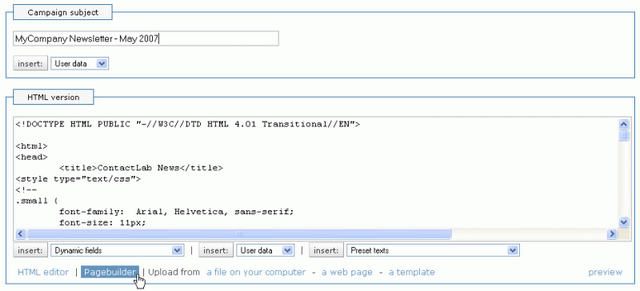
Figure 1: Opening Pagebuilder
Click on the link to open a pop-up window displaying the application (fig. 2).
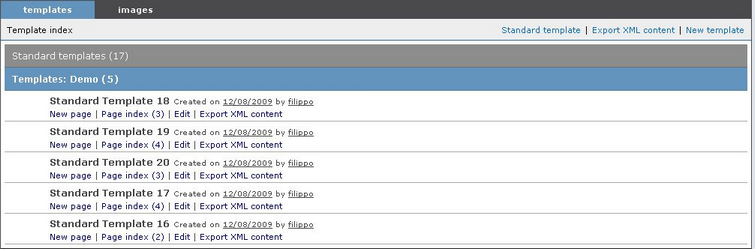
Figure 2: Pagebuilder main page
The main page is divided into two sections: templates and images. Templates are created and managed in the first, while images are created and managed in the second.
Using a template
Create a new page
You will find templates inside Pagebuilder. Each template can be considered as the matrix of die from which countless pages can be created.
Whenever you wish to update the contents of a certain template, simply create a new page from that template and then modify it.
Here is how you create a new page.
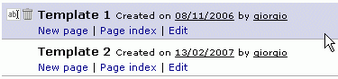 1.Click on the required template, in the example in the figure to the side, “Template for all”. Click on “New page”.
2.The new page is created and displayed automatically (fig. 3)
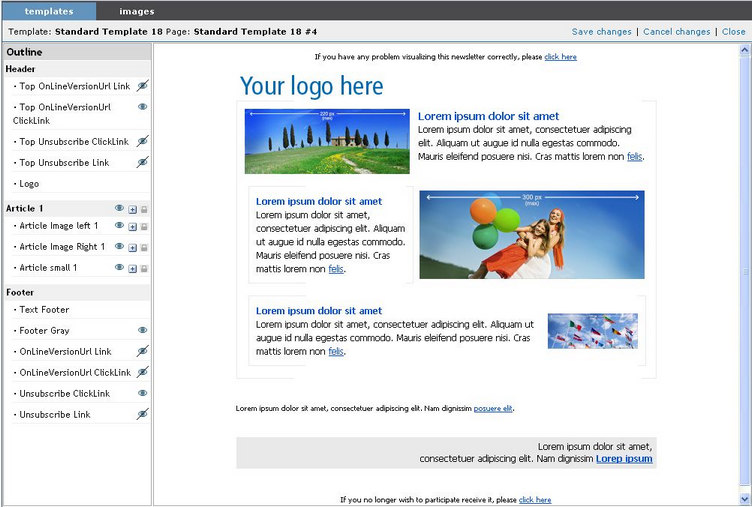
Figure 3: Page editing screen
Edit the page
3.Figure 3 shows the Outline of Pagebuilder: the window is divided into two sections. The page is previewed in the box to the right. The page is divided into blocks which are shown in the left-hand column. These blocks represent the “Outline” of the page. In the example in figure 3, the Outline comprises the following blocks: “Header”, “Article 1”, “footer”.. These in turn may contain other elements (e.g.: “Logo” and “Article small 1”). Click on an element to display it in a lightbox.
4.Now edit the content of the element and click on “Save” (fig. 4)

Figure 4: Modifying and previewing the content of an element
5.There are four types of editable element: images, one-line text, standard editor, advanced editor. These will be analysed one by one in the next paragraph. Now let us see how to save a page after modifying it.
6.After editing the required elements and previewing them by clicking on “Save”, it is best to save the modifications: to do so, simply click on the “Save modifications” link at the top of the page. If, instead, you wish to cancel all the modifications made up to now, click on Cancel modifications.
7.After saving the modifications, the updated page is saved. The system automatically takes you to the list of pages associated with that template.
Editable elements
The elements in the left-hand Outline column are divided into four categories. Let us take a close look at them.
.One-line text. These elements are used to enter a line of text, generally brief, without modifying the existing formatting. They are typically used for the titles of articles, link URLs or list bullets.
.Standard editor. These elements may be edited with a standard editor that can be used to change just a few graphic aspects: bold type, underlining, italics, inserting or removing links, etc… The icons in the standard editor and their functions are described below.
| buttons for formatting the text in bold type, italics and underlining | |
| buttons for cutting, copying and pasting the text | |
| used to copy text from txt or word files | |
| selects all the text | |
| undoes or redoes the last action | |
| justifies the text | |
| inserts or removes a link on a portion of selected text | |
| cancels all formatting and returns the original text to its default values. | |
To start on a new line without leaving a blank space, hold down Shift and then press Enter.
.Advanced editor. These elements can be modified with an editor which, apart from the functions of the standard editor
(see previous paragraph), also has others:
| enters an image on a server (e.g.: http://www.server.it/img/picture.gif ) | |
| enters a table; if the table is already present, it can be used to modify settings | |
| modifies the settings of a single cell | |
| these three buttons remove or insert rows in the table | |
| this button cleans “dirty” code | |
| text size can be selected from the drop-down menu | |
| centres the highlighted portion of text. | |
| changes the colour of the selected text | |
| inserts a special character (accented letters, euro symbol, etc…) |
To start on a new line without leaving a blank space, hold down Shift and then press Enter.
Images
If the element you are modifying is not a text but an image, you will see a screen similar to the one shown in figure 5:
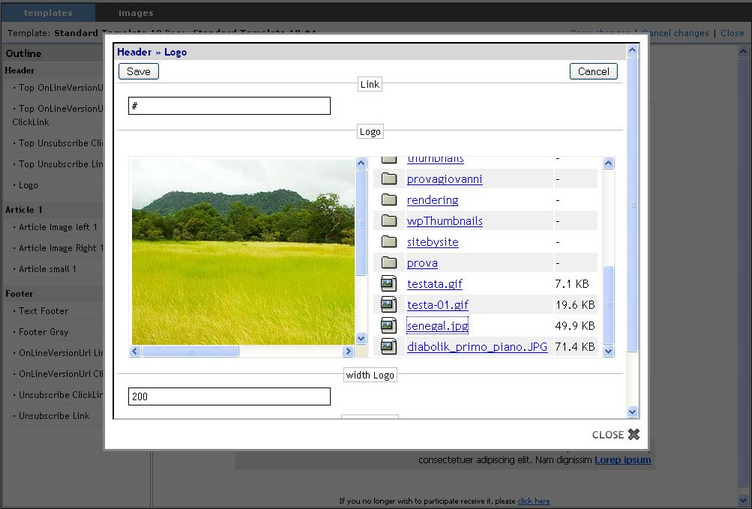
Figure 5: Selecting images in Pagebuilder
Click on the “Select” link under the image. This opens a small window containing a list of all the available images: simply click on the name of the image to select it. Now, click on the usual “Save” button to see the new image in the preview window. The image will be inserted in the page. This means an HTTPS image source tag will be placed in the relevant point of the HTML code of the page. The next paragraph concerns the management of images in Pagebuilder.
8.After making all the necessary modifications, remember to save them using the “Save modifications” link at the top of the page.
Upload images
As seen in the previous paragraph, if the element is an image, it can be changed by selecting another one from those available. To add an image to the list of available images, use the “Images” section of Pagebuilder.
When you enter “Images”, you will find the “Upload a file” and “Create a folder” links to the top right (see fig. 6).
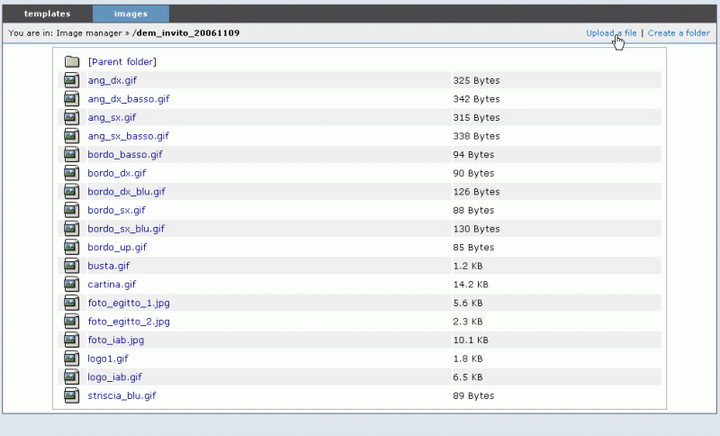
Figure 6: List of available images. Folders can be created and jpg and gif files uploaded
Use these links to load an image (jpg or gif format, the filenames may not contain blanks or special characters) or create a new folder. You may create as many folders as you wish but it is not possible to create subfolders.
Automatically insert products from the catalogue
Through a search engine, it is possible to select a specific product and retrieve contents from a catalogue in automatic mode. The result is the populating of a PageBuilder block with pre-configured elements, such as for example:
- Product name
- Description
- Picture
- Price
- Currency
- CTA
Through a daily synchronisation of the catalogue – via Dataexchange and possible ETL – the latest catalogue information is available and can be inserted automatically into the content block with a simple click.
In order to use the functionality both in Send and in the Marketing Cloud, it is necessary to request the configuration of the template and the relative product tables. This gives you access to a tool that significantly speeds up the loading of product content and ensures that it is always up to date.
The Outline column
As we have seen, the column to the left shows the Outline of the template.
Each element of the Outline may have special properties: if it does, you will find one of the following icons next to the element:
| this duplicates the element, creating an identical copy which can then be modified: if, for example, you have 2 articles you can create a third and a fourth, etc… using the same Outline and then edit the contents. | |
| this cancels the corresponding element; attention: if you cancel all the elements you will not be able to create new ones (if you have 3 articles in a section and you cancel all three, you will not be able to create a new article in that section). | |
| this is a kind of safety device: click on to it to release it and show the |
|
| this icon indicates that the safety device has been released; click on it to reapply. | |
| some elements may be hidden or displayed on request: when the eye icon is present, it means that this element is visible. Click on it to hide the element. | |
| this icon indicates that that element is hidden: click on it to display the element and the |
|
Save the page and use it in Contactlab
After modifying the page as required, a preview will appear in the bottom box. The modifications you see in the preview, however, have not yet been definitively saved!
To do this, click on the “Save modifications” link at the top of the page.
After saving the page (with the same or another name), then the system will take you directly to the Page list.
Now the page is updated with the required contents that were saved in the Page list: how do we insert it in Contactlab?
There is a special link “Paste to Contactlab” underneath the name of each page: click on it to automatically insert the page into the “Text in HTML format” box in Contactlab (fig. 7)
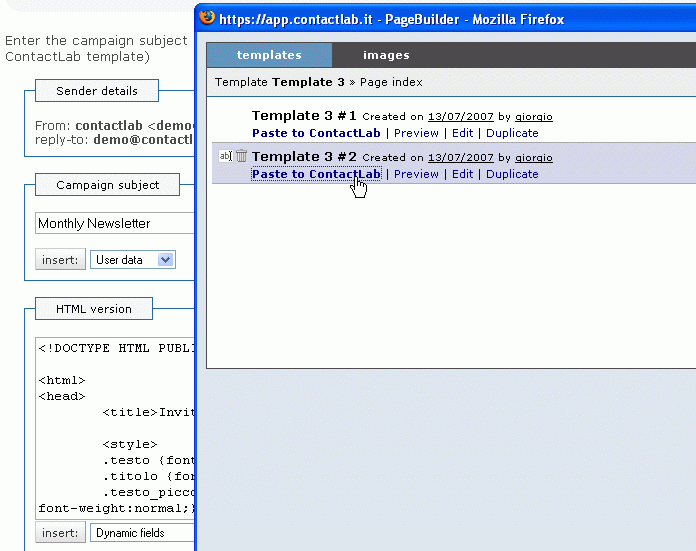
Figure 7: Entering the contents of a Pagebuilder page in Contactlab
The page has now been copied and you may continue the delivery process by clicking on “Next”.
ATTENTION: to allow the html code to be transferred from Pagebuilder to Contactlab, the Contactlab “Message content” screen (see fig. 7) must lie under the pop-up window of Pagebuilder. When clicking on “Use in Contactlab”, the background of the link should start flashing.
Other page operations
As can be seen in figure 8, as well as “Paste to Contactlab”, there are also other links under each page:
– Preview opens a pop-up window containing a preview of the page.
– Edit is used to enter the page Outline and modify it as described in the previous paragraphs.
– Duplicate creates an identical copy of the page, including all updates. The copy may be renamed and modified in turn.