
To access the profile or team sections:
- Hover your mouse over my contactlab in the main menu and click either the profile or team icon.
Click the appropriate link below to scroll to the information you require:
The profile section
This section consists of a series of tabs where you can view and manage your profile, change details such as your password, email address and similar, and review login attempts (figure 1).
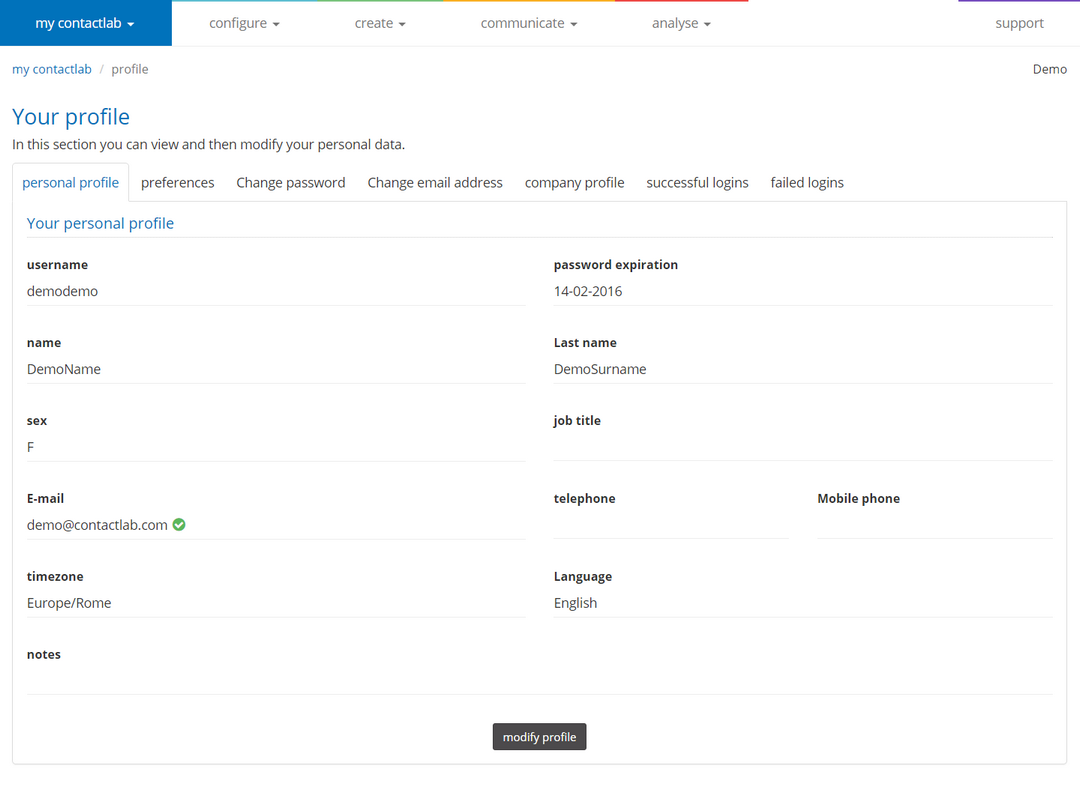
Figure 1
Editing your profile
Note:
You can only edit one tab at a time. When, for example, you are making updates to the personal profile tab, the remaining tabs are unavailable until you have either saved or cancelled your changes. The company profile, successful logins and failed logins tabs are read-only and cannot be edited.
Changing your personal profile details
To change your personal profile details:
- Click the personal profile tab, then click modify profile.
The modify profile tab displays (figure 2). - Update the information, such as your name, last name, default time zone and similar, as required.
Note:
You need to use the Change email address tab to update your email details. - When you are finished, click Save.
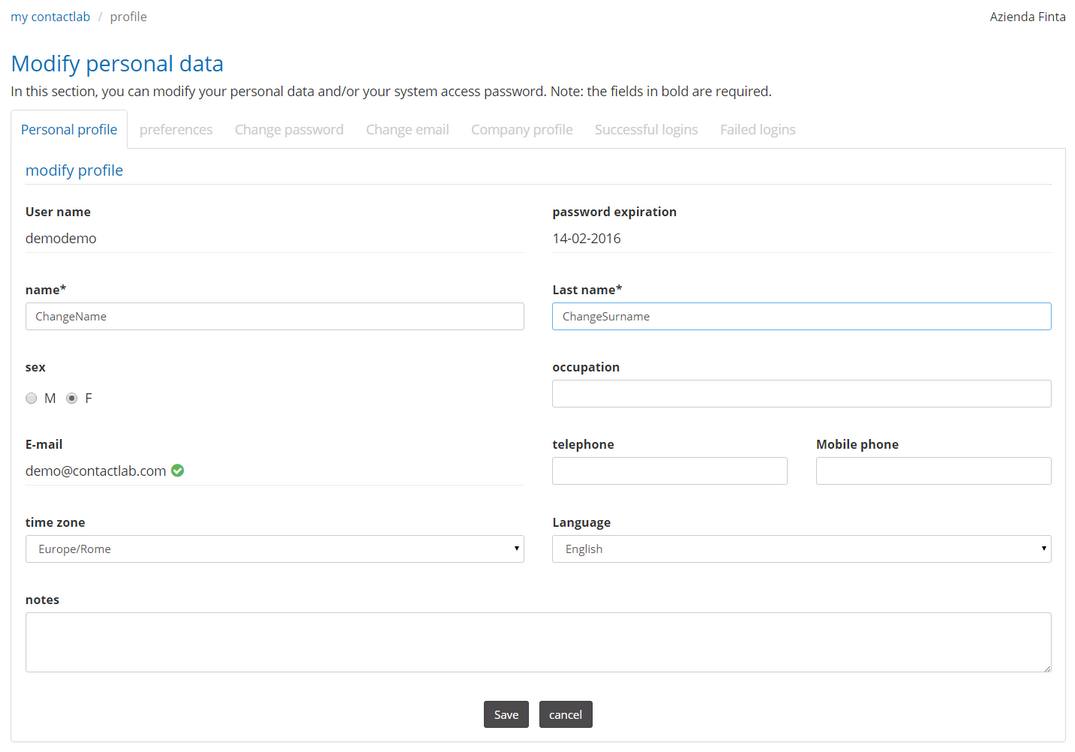
Figure 2
Changing your preferences
To change your preferences, click the preferences tab (figure 3).
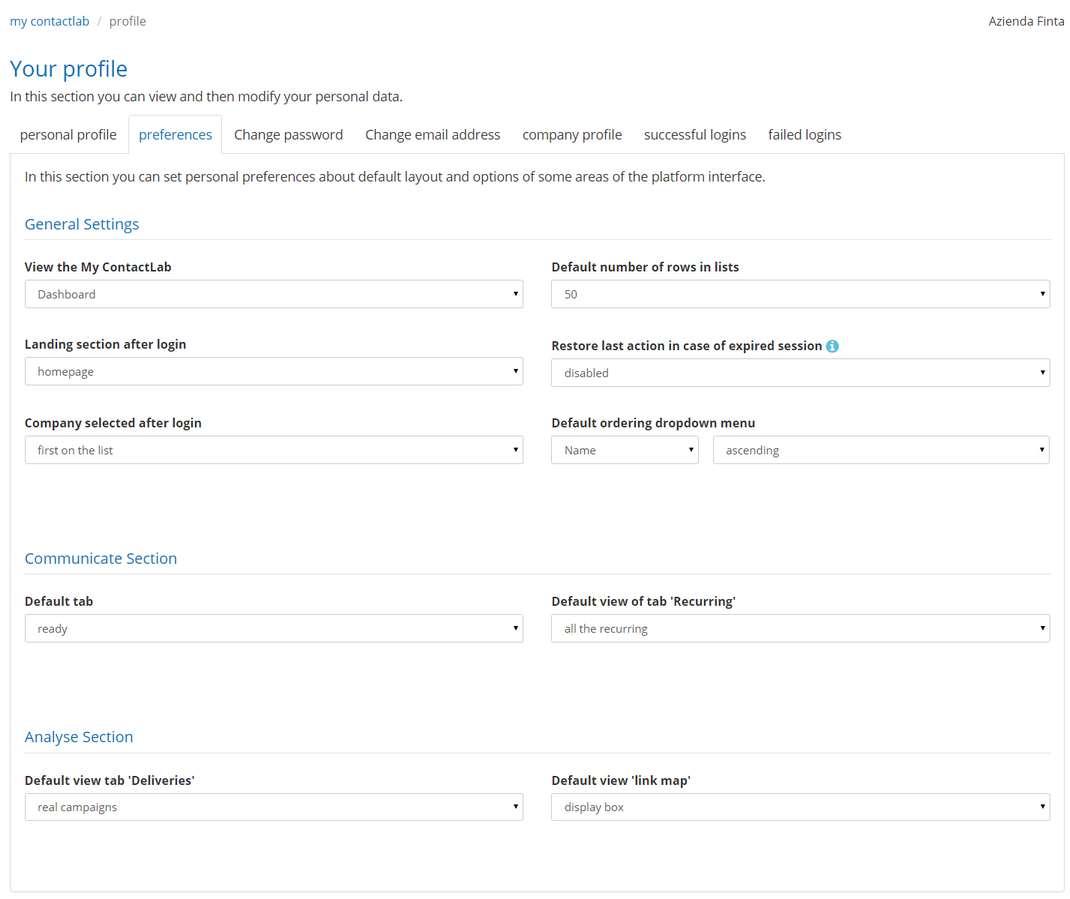
Figure 3
Here, you can update personal preferences, such as:
- Under General Settings:
- View in My Contactlab
Enables you to display either the dashboard or the static Welcome page in the my contactlab section. See the Welcome page of this guide for more about the dashboard and the static Welcome page. - Default number of rows in lists
Enables you to select whether 10, 25 or 50 rows are displayed in lists. - Landing section after login
Enables you to select whether the homepage, configure, create, communicate or analyse section is displayed after you log in. - Company selected after login
Enables you to select the default company, if you have access to several companies. - Restore last action in case of expired session
Enables you to determine whether the last company and last section that you were working in should automatically display, when you log in after an expired session. - Default ordering dropdown menu
Enables you to select whether drop-down menus should be sorted by Name or ID, in ascending or descending order.
- View in My Contactlab
- Under Communicate Section:
- Default tab
Enables you to select whether the processing, ready, recurring, scheduled or all tab should display by default in the communicate > email deliveries section. - Default view of tab ‘Recurring’
Enables you to select whether the All the recurring, the Active recurring only, or the Not active recurring only view should display by default in the recurring tab of the communicate > email deliveries section.
- Default tab
- Under Analyse Section:
- Default view tab ‘Deliveries’
Enables you to select whether the Real campaigns, the Test campaigns, or the All types view should display by default in the bulk deliveries, triggered deliveries and delivery immediate message tabs of the analyse > campaign archive section. - Default view ‘link map’
Enables you to select whether the Points view or Display box view should display by default in the analyse > link map section.
- Default view tab ‘Deliveries’
Changing your password
To change your password:
- Click the Change password tab (figure 3).
- Enter your Current password.
- Enter the New password and confirm it.
- When you are finished, click Edit.
You can change your password at any time, but for security reasons, it is valid for a maximum of 90 days, after which it must be renewed. If you don’t change your password before then, the system will insist that you enter a new one.
Fifteen days before the password expires, a message displays in Contactsend, which advises you to enter a new one. If you do not log in for more than 30 days, a new password must be created.
Changing your email address
To change your email address:
- Click the Change email tab (figure 3).
- Enter the new email address.
- When you are finished, click Edit.
Other tabs in the profile section
The profile section also includes the following read-only tabs:
- company profile
Enables you to view the details for the currently selected company. - successful logins
Enables you to view a list of recent successful logins. - failed logins
Enables you to view a list of recent failed logins.
The team section
This section (figure 4) includes tabs where you can view the details of team members and, subject to the permissions assigned to your account, create and manage new users, and define authorized IP addresses for accessing Contactsend.

Figure 4
The Your team tab
This tab is where you can view a list of team members who have access to Contactsend.
If you do not have the appropriate permissions to use the Account management tab and you want to create new users, contact our our helpdesk.
The Account management tab
FOR AUTHORIZED USERS ONLY:
To create a new user:
- Click the Account management tab.
- Click create a new account and enter the appropriate details.
Once the new user has been created, a confirmation email is sent to their address.
In the next screen:
- Click permissions to set the permissions for the new user.
- Select the permissions that you want to assign to the user for each section of the site, as follows:
- C = Create.
- R = Read.
- U = Update.
- D = Delete.
If you return to the Account management tab, you can:
- Assign the user to additional companies, if message deliveries are managed for multiple organizations.
- Update the user’s profile, by clicking edit.
- Remove the user by clicking delete.
Note:
You cannot modify a user that has been created by other team members.
The Authorized IP addresses tab
FOR AUTHORIZED USERS ONLY
You can configure the IP addresses from which it is possible to access the Contactsend interface (fig.5).
Attention: Setting one or more IP addresses disables any IP address inherited from higher level companies in the corporate hierarchy.
If no IP address range is set in this section, and no IP addresses are set on higher level companies in the hierarchy, the Contactsend interface is to be considered accessible from any IP address.
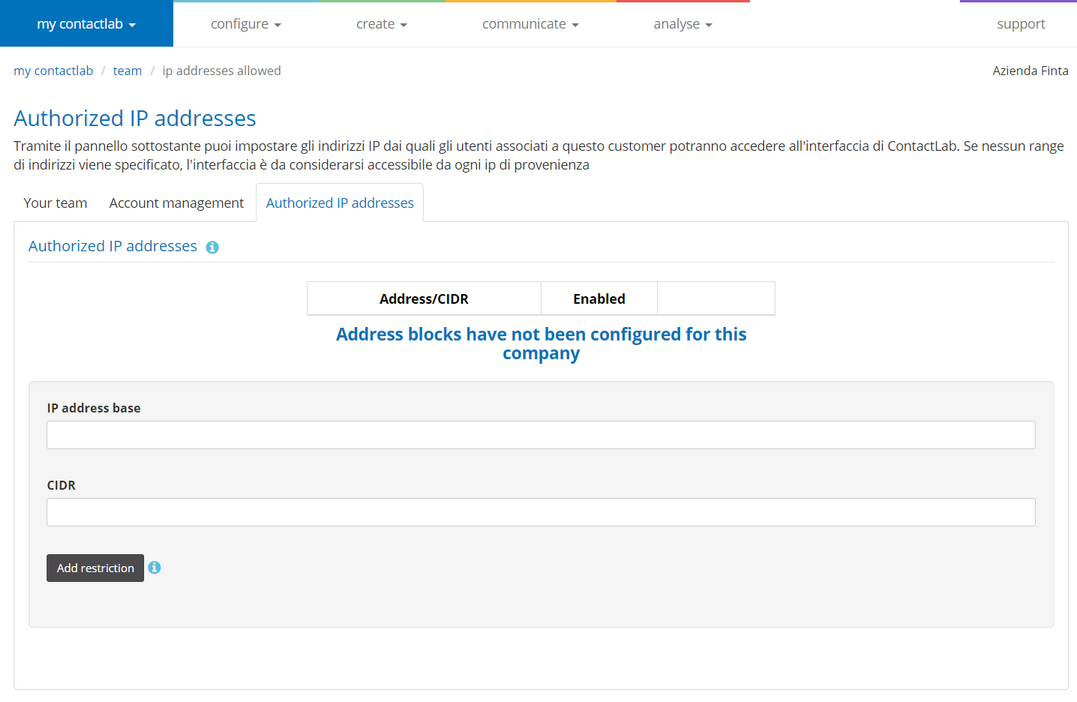
Figure 5