Prevent unauthorized access attempts to your platform data

Scope

In this tutorial you will learn how, with the appropriate admin. permissions, you can access the Failed logins page to monitor your team’s sign in activities. As a result, potentially unauthorized sign in attempts can be identified and managed.

Procedure

Failed sign in attempts are recorded by the platform. Using the appropriate page of Accountcentral, an Admin user can review any that relate to their team and, in the event of anomalies, intervene as required.

The following steps assume that you have the appropriate admin. permissions, otherwise the relevant sections of Accountcentral are not available to you.

Do the following:

  • Sign in to the platform and do one of the following:
    In the Failed logins panel of the Admin Dashboard, click View details.
    The Failed logins page displays.

or:

  • Click the Team tab in the Control bar, at the top of the page, then click the Failed logins

The Failed login page displays the Name, Surname, Email address and Username for each team member account that has resulted in a failed sign in. It also displays the number of Failed attempts for each account, and the number of Consecutive ones.

Click Details in the appropriate row, to display a comprehensive overview of the relevant failed attempts.
The page includes each failed sign in, together with the Date, Country, IP, Device, Operating System, Browser, Application and Activity.

Using these details, an Admin user has a clear breakdown of sign in activity and can take the appropriate action, as required.

See the appropriate section in the guide for more about managing failed sign ins, or contact our Customer Care.


Read more

Does your delivery result in customers who buy?

Scope

In this tutorial you will learn how to identify those contacts who not only click a link in a particular delivery, but also buy something shortly afterwards.

The steps are quite easy. You need to create a segment that includes a digital message rule and a purchases rule. Then you have to select the AND interaction condition between the two rules. This ensures that only those contacts who are identified by both rules are included in the segment. Finally, you need to create a time-based correlation between the rules.

Using the example here, these steps result in only those who clicked a link in the delivery and then bought something in the relevant time frame being included in the segment. An additional benefit of this approach is that it enables you analyze, in part, the revenue resulting out of the delivery and the associated purchases.

Procedure

Note:
When you are defining segmentation rules that are to be correlated later, as you will do here, it is important that they are created in the right order, to be able to establish the correct relationship between them.

Do the following:

  1. Sign in to the platform and click the Segments tab in the Control bar, at the top of the page, to display the My segments
  2. Click Create new segment to display the New segment
  3. Give the segment a unique and recognizable name, for example, ‘Delivery clicks and purchases’.
  4. Click Create Digital messages Rule, followed by Create custom Rule, on the next page.
    See here for more details.

Now you will define the first rule, which identifies those contacts who clicked a link in the delivery:

  1. Under Rule name, give the rule a recognizable name, for example, ‘Have clicked within the ‘Discover the new collection’ delivery’.
  2. Under Action, select Have clicked.
  3. Under Match, select ALL.
  4. Under Subject, select the delivery subject to identify the one you require.
    In the example here, the subject would be ‘Discover the new collection’.
  5. When you have finished, click Add.
    The first rule is added to the Segment Summary

Now you will define the second rule, which identifies those contacts who have made at least one purchase in the relevant time frame:

  1. Click Create Purchases Rule, followed by Create custom Rule, on the next page.
    See here for more details.

  1. Under Rule name, give the rule a recognizable name, for example, ‘Have bought’.
  2. Under Action, select Have purchased.
  3. Under Match, select ALL.
  4. When you have finished, click Add.
    The second rule is added to the Segment Summary panel, underneath the first one.

If you want to define the purchase rule further, you can, for example, add product category, name or product ID conditions. In the example here, you could add a ‘new collection’ condition.

  1. In the Segment Summary panel, click the AND interaction condition, positioned between the two rules.
    This ensures that only the contacts that conform with both rules are included in the total contacts for segment. See here for more about combining segmentation rules.

Now you need to create a time-based correlation between the two rules.

  1. Click the Correlate events icon, positioned to the left, between the two rules.
    The Create correlation page displays.

  1. Under Event 1, select First.
    If the contact clicks within the delivery more than once, only the first occurrence is taken into account.
  2. Under Event 2, select Last.
    If the contact makes more than one purchase, only the last one is taken into account.
  3. Under Time interval, select Equals or less than and enter 30
    Purchases made after 30 days are not taken into account.

  1. Click Confirm to apply the correlation.
    The Create correlationpage closes and the Segment summary panel changes to display the correlation.
  2. When you are finished, click Save to use the segment later, or Start new plan, to use it immediately.

As a result, you can identify contacts who clicked a link in your delivery and then went on to buy something within the defined time frame.

See the appropriate section in the guide for more information, or contact our Customer Care.

Read more

Share your Newsletters on Social Networks

Scope

In this tutorial, you will see how to insert a link in your email communications to share, for example, your newsletter on social networks such as Facebook, Twitter, LinkedIn and Google+. The link points to a static HTML, which is then automatically shared by the Contactlab platform.

Procedure

The following uses Facebook as an example. To insert the link in your emails, do the following:

  1. Sign in to the platform and navigate to the appropriate template, which was created previously with Pagebuilder.
  2. Locate the precise point in the HTML code where the sharing option should be inserted and position your mouse cursor there.
    Click the appropriate social network logo, such as Facebook, positioned towards the bottom of the page.
    The relevant code is inserted where you have placed your mouse

The HTML code insertion point and the social network logos

The HTML code insertion point with the appropriate Facebook code inserted

All available social network-related code snippets

When sharing on Facebook, the recipient can not only see the link to the newsletter, but also a title, a description and an image. Because of this, we recommend that you add Open Graph properties to your email, which make it easier to include the required text and main image for Facebook sharing. See the Contactsend Guide > Create and How to… for more details.

Continue as follows:

  1. Locate the precise point in the HTML code where the meta tags should be inserted and position your mouse cursor there.
  2. Click Open Graph properties and define the Title, Description and Image.0

The meta tags insertion point and the Open Graph properties window

  1. When you are finished, click insert.
    The meta tags are inserted where you have placed your mouse.

The meta tags inserted in the HTML code

  1. Because the link points to a static HTML page, it needs to be published online, using Contactsend.
  2. It will be published automatically during the Confirm step of creating an email delivery, when the following page is displayed.
    The following options are available:

    • Upload an alternative template.
    • Define the publication URL.
      The static HTML is selected automatically.
    • Rename the HTML page.
      The .html file extension must be included, to ensure that it displays correctly.
    • View a preview of the published web version.
    • Modify the current template with an HTML editor.

If you do not make any changes, the newsletter that is delivered will be the same as the one published on the web.

Because the shared links only work correctly in delivered messages, we recommend that you send a test delivery to your email address, to check that everything works as you expect.

For more information read the guide or contact our Customer Care.

Read more

Track your customers’ behavior with Google UTM

Scope

When you create a marketing delivery, it is essential that you track audience behavior afterwards. In this way, you can ascertain whether, for example, someone clicking a link, or buying something from your e-commerce site, may be the direct result of the delivery.

Procedure

Imagine you have just sent a newsletter to your customer base, which presents the new spring and summer collection from your e-commerce site. You want to check whether the daily purchases made from there, include ones that are the direct result of the marketing delivery.

Contacthub allows you to track the parameters of a marketing delivery, to identify whether customers undertook particular actions as a result. You can readily track, for example, purchases from your website, or actions such as completing a form and similar.

And now, Contacthub supports Google Analytics UTM. You can readily associate the standard parameters with each event, including utm_source, utm_campaign, utm_medium, utm_term and utm_content.

You can make the association in two ways:

  • Manually, using the Contacthub API.
    If you want to insert the event manually using the API, you can add Google Analytic parameters to the tracking section.
    Click here for an example of inserting events.


  • Automatically, using the JavaScript library provided by Contactlab.
    The JavaScript, which is integrated in the web/e-commerce site, intercepts the campaign parameters that relate to how a customer arrived at the website and then started carrying out particular actions. Every appropriate action is recorded as an event, which includes the relevant delivery parameters.
    The Browser SDK includes an example.

See this tutorial to find out how to capture someone’s web navigation in just a few steps.

Read Contacthub guide for more information or contact the Customer Service.

Read more

Manage important team-related security issues in one place

Scope

In this tutorial, you will learn how use Accountcentral to view and manage potential team-related security problems.

Procedure

If you are an Admin user, such as a team leader, Accountcentral enables you to view and manage the details of individual team members, as well as monitor important security-related issues. For example, the Team > Issues page, which is only available to Admin users and to the Customer Care, displays a summary of potential security problems associated with individual team members.

To access these details, do the following:

  1. Sign in to the platform and click the Team tab in the Control bar, at the top of the page, to access the Team
    The Users page displays by default, where you can view and manage the details of all team members.
  2. Click the Issues
    A read-only list displays, showing the Name, Surname, Email and Username of the individual team members who have a potential security issue.
    The Issues column, positioned to the right of the page, displays a short description of the problem.

  1. There are 3 kind of problems:
  • User suspended.
    The user account is currently inactive and needs to be reactivated by the Customer Care.
  • PIN not active.
    The PIN sent by email has not been activated.
  • Password blocked.
    For example, the current password has expired.

Note:
More than one issue can apply to a team member. For example, a user could have an inactive PIN and their password could be blocked.

This type of information simplifies teamwork. For example, if a user has sign in problems, the team leader can use the Issues page to review the situation and, in just a few steps, potentially resolve any questions.

See the appropriate page in the Accountcentral Guide for more details, or contact our Customer Care.

Read more

Identify your 100 top customers according to their spending level

Scope

In this tutorial, you will see how to identify a target group of contacts within a segment, to be able to send them customized offers, or message deliveries as required.
For this example, you will learn how to select the top 100 customers that, in the previous year, had the highest online spending levels. You can then go on to send them a promotional code for use online, or similar.

Procedure

You will start by creating a segment that is made up of just one rule, which includes all the conditions required to identify the customers who have made online purchases in 2017. Then you will learn how to refine the segment further, resulting in an audience that consists of the top 100 customers, with the highest online spending levels during that year.
To initially define the appropriate segment, do the following:

  1. Sign in to the platform and click the Segments tab in the Control bar, at the top of the page, to display the My segments page.
  2. Click Create new segment.
    The New segment page displays.
  3. Give the segment a unique and recognizable name, for example, ‘Top 100 E-commerce customers 2017’.
  4. Click Create Purchases Rule, followed by Create custom Rule, on the next page.

Now, you need to define the rule that determines the segment for 2017 spending levels.

  1. Give the rule a name of your choice, for example, ‘2017 online purchases’.
  2. Under Action, select Have purchased.
  3. Under Time frame, select In date range, then January 1, 2017 in the first field, and December 31, 2017 in the second one.
    This condition limits the rule to purchases made during 2017.
  4. Under Match, select ALL.
    This ensures that only the contacts who satisfy all the conditions you define for the rule are included in the segment.
  5. Under Store category, select Equal to and E-commerce.
    Note:
    If Store category is not displayed by default, under Add condition, click the downwards pointing arrow to the right of the box, and select it from the drop-down list.
  6. When you have finished defining the conditions that identify the customers who have made online purchases in 2017, click Add.
    You are returned to the New Segment page and the rule is added to the Segment Summary panel, which is displayed, together with the appropriate number of contacts, to the right of the page.

Next, you need to refine the segment to identify the top 100 customers with the highest online spending levels:

  1. In the Segment Summary panel, click Refine your selection.
    The Refinements controls display in the main panel.

  1. Give the refinement a name of your choice, for example, ‘Top 100 e-commerce customers 2017’.
  2. Under By, select Spending level.
  3. Under Number of contacts, enter 100, then under Narrowed to, select Top.
    These two steps determine that the top 100 customers are to be identified.
  4. Under Time frame, select In date range, then January 1, 2017 in the first field, and December 31, 2017 in the second one.
  5. When you are finished, click Add to apply the refinement to the segment.
    The refinement is added to the Segment Summary panel, and the number of contacts in the Result box is reduced to 100.

  1. Click Save to be able to apply the segment to future deliveries, or Start new plan, to use it immediately.

Once you have defined the segment and the corresponding refinement, you can continue to plan a promotional delivery to the top 100 customers, with the highest online spending levels in 2017.

For more details, see the dedicated section in the Contactplan Guide or contact our Customer Service.

Read more

Securely verify your sign in credentials with just an SMS

Scope

In this tutorial, you will see how to safely and securely verify your sign in credentials, when required, using a one-time password.

Procedure

In certain circumstances, the Contactlab platform might ask you to verify your access credentials when signing in. This is done to avoid unauthorized access and to preserve the integrity of your account details.

Verification can be done either with numbers from your PIN, or if you choose beforehand, by using a one-time password (OTP) which is generated in real-time and sent by SMS to your verified mobile phone.

This is how you set up and use OTPs:

  1. Sign in to Accountcentral  and click the Account tab in the Control bar, at the top of the page.
    Here, you can see all the details about your account.
  2. Click Personal info, if the page is not already displayed.
    Your security mobile phone number needs to be verified before you can use it for OTPs.
    The Contacts > Security mobile phone field displays whether this is the case.
  1. If you have not already verified your mobile phone number, under Contacts, do the following:
    1. Under Security mobile phone, enter the appropriate number.
    2. In the Mobile phone verification panel, check that the correct mobile number is displayed, and click Send code.
      An SMS with a verification code is sent to the number.
    3. Enter the code in the displayed form and click Confirm.
      The phone number is verified.
  2. In the Use a One-time Password sent by SMS panel, toggle the switch to enable the OTP option.
    The switch turns green when OTPs are enabled.

  1. When you are finished, click Save.

In future, the Contactlab platform will send an OTP by SMS to your verified mobile phone, if you need to confirm your access credentials when signing in. Enter the password in the appropriate field if asked to do so.

Note:
An SMS can take some time to arrive for various reasons, but especially if, for example, you are roaming.
If you enable one-time passwords by SMS, you can no longer use the verification by PIN option until you disable OTPs.

See the Accountcentral Guide for more about using a PIN and OTPs or contact our Customer Service.

Read more

Capture contact web navigation in just a few steps

Scope

In this tutorial you will learn how to capture customer navigation in just a few steps, then how to save the information in Contacthub.

Procedure

Contactlab platform users often need to track customer web navigation, to understand, for example, how they move through a web or e-commerce site, the sections they visit, and which links are clicked the most.

The easiest way to achieve this, is first of all to apply the open source JavaScript that is available here, which can be used by everyone.
It not only saves information about known customers, it also enables as yet unknown ones to be tracked. The relevant unknown customer details are saved in a different location for a predefined period, according to predetermined usage conditions. The data is stored until the customer is later identified in Contacthub, and the information can then be associated with the correct profile.

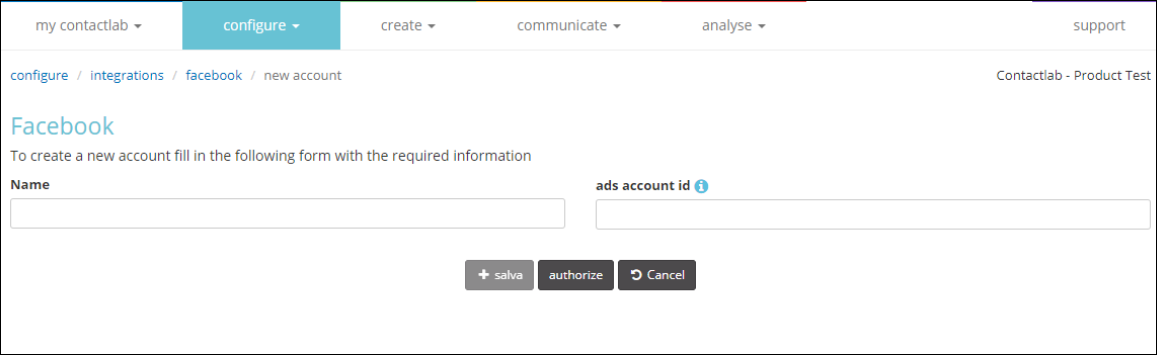
To continue the web navigation tracking configuration, you must include the script that is contained on our servers and available here, in all your web or e-commerce site pages.

Next, you must define where all the tracked data should be stored and available to use.
To do so, you need to use the parameters that are required to identify the workspace/node and the token. For more details, read here. In a similar way to the script described above, these parameters must be defined and included in each individual page.

Unlike other web analytic apps, however, including and configuring the script is only the first step towards creating and accurately recording events in Contacthub. To insert and save an event, you must define what type it is, together with its properties. For more details, click here. Do the following:

  • In the type field, enter a valid event type.
  • In the properties field, enter the appropriate properties that correlate with the defined event type.
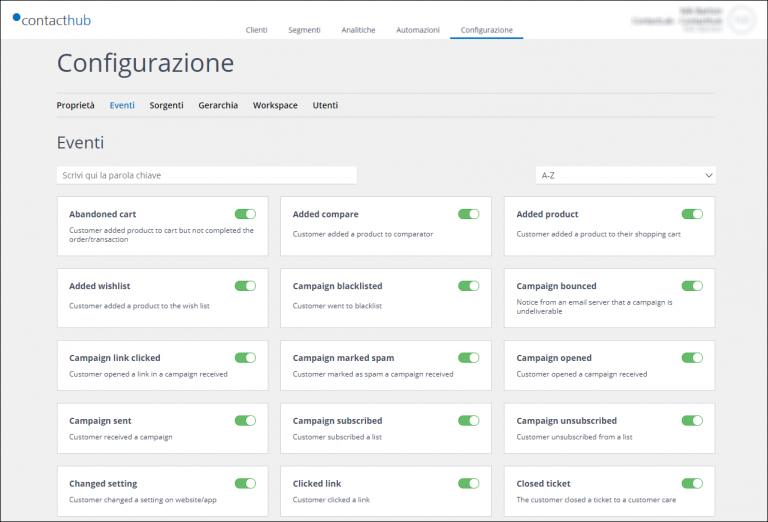
    Here is a list of available event types and their associated properties.

Note:  viewedPage is the only event for which proprieties are automatically extracted by the script. In this case, the URL, title, referrer and path proprieties are automatically calculated.


But how can you define the contacts with whom you want to associate events?


In Contacthub we consider for Contacts all the customers registered and inserd inside the platforrm.  You can associate events to them in two ways.
Do one of the following:

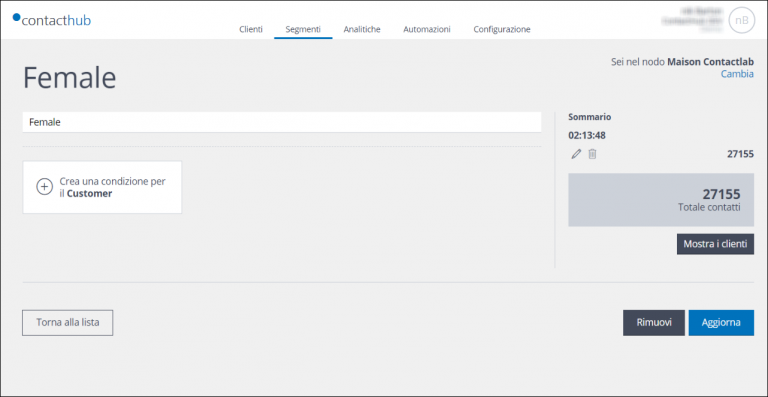
  • Specify the customers in the relevant page. For more details read here.

or:

  • Enter the appropriate Contacthub customer ID within the clabId parameter in a query string (?clabId=A_VALID_CONTACTHUB_ID).

Once the customer has been identified, the script saves their ID in the cookie and, from that point onwards, all the events related to the cookie will automatically be associated with that customer.

But there is more. By using the Google utm_ tag, the script will automatically be able to track them, while all the relevant events that are saved in Contacthub, will have the tracking values included within their proprieties. Here there are more details.

As a result, you can very easily track customer web navigation. You can, for example, identify how they navigate through your website, which products they are interested in and what they are looking for. In this way, you can have more complete and accurate customer profiles, and be able to offer them the products and services that satisfy their needs.


For full information and technical details, please visit this GitHub section.


Image source

Read more

Select your audience according to the spending level and monitor their purchases in time

Scope

In this tutorial, you will see how to segment your audience by comparing spending levels, enabling you to send specifically targeted marketing deliveries and engage effectively with your customers.

Procedure

Today, it is very important for customers to receive the right offer, at just the right time. But it is not only the right product or service and timing that are significant. To maintain an advantage, you also need to consider customer behavior, their comparative spending levels in the past and now, and if there is an appropriate target audience, how big it is.

Knowledge about the audience, including the economic aspects, is paramount for a brand, if your offer is going to match customer needs. With Contactplan, it is very easy to create segments according to spending levels over time, then engage with the resulting audiences in different ways.

This, for example, is how you can compare changing spending levels between 2016 and 2017:

  1. Sign in to Contactplan and click the Segments tab in the Control bar, at the top of the page, to display the My segments
  2. Click Create new segment.
    The New segment page displays.
  3. Give the segment a unique and recognizable name, for example, ‘Customers with decreasing spending level’.
  4. Click Create Purchases Rule, followed by Create custom Rule, on the next page.

Now, you need to define the rule that determines the 2016 spending levels for the segment you want to create.

  1. Give the first rule a name of your choice, for example, ‘2016 purchases’.
  2. Under Action, select Have purchased.
  3. Under Occurrences, select Equal to or greater than and 1.
    For this type of segment, the focus is on the brand spend level, not the number of products or services purchased.
  4. Select the Time frame.
    As we are interested in audience behavior during 2016, do the following:

    1. Select the In date range radio button.
    2. Select January 1, 2016 in the first field, and December 31, 2016 in the second one.
  5. Under Match, select ALL.
    This ensures that only the contacts who satisfy all the conditions you define for the rule are included in the segment.
  6. Under Order total sale, select Sum, Equal to or greater than and enter 1000.
    As you add conditions to a rule, the total number of contacts reduces.

  1. When you are finished, click Add.
    You are returned to the New Segment page and the rule is added to the Segment Summary panel, which is displayed, together with the appropriate number of contacts, to the right of the page.

Now you need to define a similar rule, which covers 2017 spending levels:

  1. Starting from the New segment page, repeat steps 4 to 9 above, this time giving the rule a name such as ‘2017 purchases’ and setting the time frame to January 1, 2017 to December 31, 2017.
  2. Under Order total sale, select Sum, Equal to or less than and enter 100. The purchase amount is extremely low if compared with the year before because we want to identify the audience that reduced a lot the spending level.

  1. When you are finished, click Add.
    You are returned to the New Segment page and both rules display in the Segment Summary panel.

Next, you have to determine how the two rules interact with each other:

  1. In the Segment Summary panel, select the AND interaction condition, positioned between the two rules.
    This ensures that only the contacts that conform with both rules are included in the segment.

  1. When you are finished, click Save to be able to apply the segment to future deliveries, or Start new plan, to use it immediately.

With this kind of segmentation, you can also do refinement on your audience. You can in fact identify those who were top or worst spender in a certain year and see their spending level in other periods.

As a result, only those customers whose spending reduced significantly from 1000 or more in 2016, to 100 or less in 2017, are included in the segment. You can then, for example, use the results to send engagement deliveries that are tailored to resolving the specific marketing need.

See the the dideicate section in Contactplan Guide for more about creating purchases rules.

Read more

Map your existing data structure in Contacthub

Scope

In this tutorial, you will learn how to map your data structure to Contacthub in the most effective way. Depending upon how your company is organized, it can be useful to create different nodes in Contacthub, which can then communicate with each other in distinct ways. But first, it is important to understand what a Node is.

What is a Node?

In Contacthub, data is stored in nodes, which can be regarded as containers where you can add, subdivide and archive data. There are two types of node:

  • Entry nodes: Where customer and event data is written.
    At least one Entry node is needed for Contacthub to work.
  • View Nodes: Containers that cannot be directly written to, but are where data from other nodes can be aggregated, according to the Tree hierarchy configuration and the defined Matching Policies.
    See “Understanding Nodes and Trees” in Contacthub Guide for more about it.

How are nodes created?

For this example, let’s take a simple, single brand company. The data structure should resemble how the company is organized. Since we are talking about a company that only has one brand, there will only be one entry node. This means one container for all the customer data that is collected.

How do I create an Entry Node?

Entry nodes are created using the New Entry node page. Do the following:

  1. Sign in to Contacthub and click the Settings tab in the Control bar at the top of the page.
  2. Click Hierarchy and ensure that the Entry tab is selected.

  1. Click Add to display the New Entry node page, where you can define the parameters for the new node.
  2. Under Image, enter the URL of the image that is to represent the node, if required.
  3. Under Name, replace the New “entry” node text with a name for the node.
    Ensure that the name you choose is easily recognizable.
  4. Under Mandatory Fields, select all the properties that the node must have.
    Remember, however, that a node does not need to have mandatory properties in Contacthub, so it can be created without selecting any of those listed. The Mandatory Fields are those that the node you want to create must have, according to your needs.

  1. Click Save to create the node.
    You are returned to the Hierarchy tab and the new node is added to the list.
  2. If you don’t want to save the new entry node, click the X button, positioned in the top right-hand corner of the page.

How do I create a View Node?

View nodes are created using the New View Node page. Do the following:

  1. Ensure that View on the Hierarchy tab of the Settings page is selected.

  1. Click Add.
    The New View Node page displays.
  2. Under Image, enter the URL of the image that is to represent the node, if required.
  3. Under Name, replace the New “view” node text with a name for the node.
    Ensure that the name you choose is easily recognizable.
  4. Click Save to save the node, or the X button, positioned in the top right-hand corner of the page, to abort the process.

You are returned to the Hierarchy tab and the new node is added to the list.

But how does this work for a company with a more complex and diverse organization?

Let’s take a company with two product divisions as an example. One division is involved in pet nutrition, while the other markets beverages.

In turn, each division has two different brands, with distinct target audiences. The pet-focused division has brand A for dog products, and brand B for cats. The beverage division sells water under brand C, and tea under brand D.

In Contacthub, each brand equates to one of four separate and distinct entry nodes. Each node is where information about the relevant customers, and their activities related to the individual brand, is collected.

Data for each division can be aggregated by creating two view nodes, each of which collates either the data from both pet nutrition brand entry nodes, or the two beverage brands. To provide the company with an overview of all the available brand information, a further view node can be created, which aggregates all the data from both divisions and their respective brands.

Subject to their access permissions, a Contacthub user can view the appropriate brand entry node/s and potentially, the relevant divisional view node/s.

through an analysis of your data structure and company organization you can use Contacthub in the best way according to your reality.

Read more