
Scope
In this tutorial, you will learn how to create Automations in Contacthub, and manage them as required.
What are Contacthub automations?
Automations allow selected actions to be carried out automatically, after defined events have taken place. Sending a welcome email when a registration event is received, is a simple example. Automations may interact with the whole Contactlab Engagement Marketing platform, triggering the appropriate processes according to the defined timeframe.
Creating an automation
To create an automation, do the following:
- Sign in to Contacthub and click the Automations tab in the Control bar at the top of the page, to display the Automations management.
- Click Create a new automation.
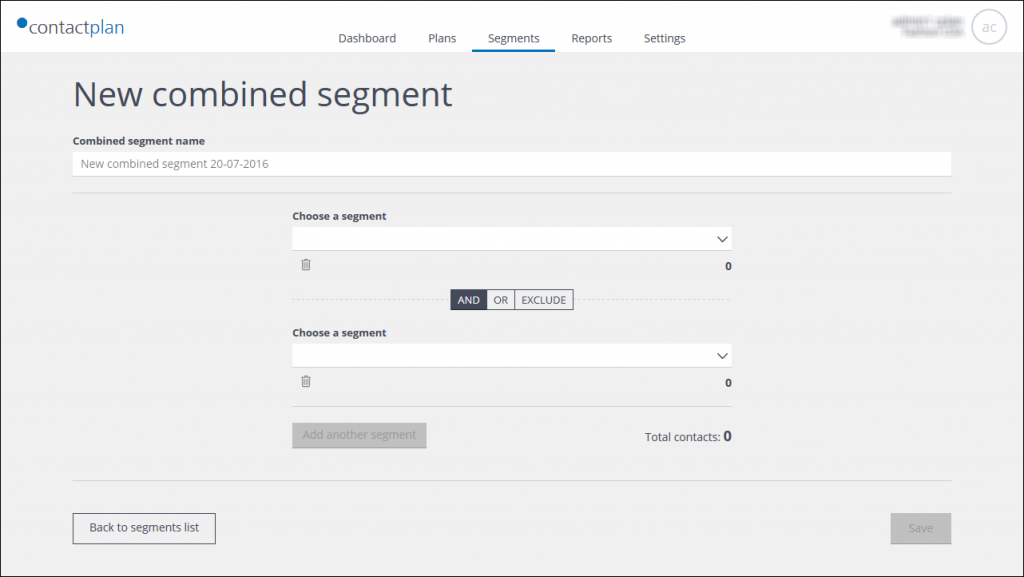
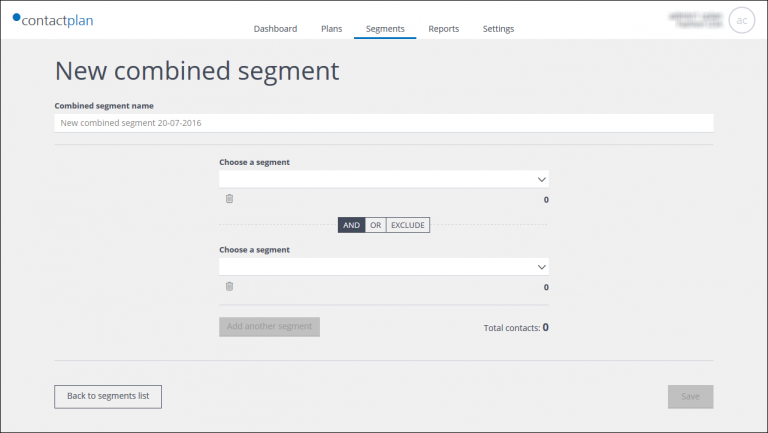
The Automation configuration page displays, with a system-generated name and the appropriate configuration fields.

- Select the system-generated name and enter a unique and recognizable Automation name of your choice.
- Under Active nodes > Add nodes, select the node/s to which the automation should be applied.
The name of each selected node displays within a black box, directly under the field.
The automation will be triggered by the appropriate event, if it involves customers belonging to the selected nodes.
- If you want to remove one of the nodes from the automation, click the X icon, positioned to the right of the appropriate node name.
- In the Trigger panel, select:
- The event that will trigger the automation like for example abandoned cart, viewed product, etc.
When you select an event, the Advanced options field displays. Click it to apply conditions to the event.
The available conditions depend upon the type of event you have selected. For example, an Abandoned cart event may have price, product or date-related conditions.
You can add multiple conditions as required which must be verified.
If you want to remove a condition, click the Bin icon, positioned to the right of the appropriate field. - Whether the event applies to an anonymous, known or any customer.
- The event context.
You can select whether it is, for example, an E-commerce, retail, Web or similar event, to refine how it is applied.
- The event that will trigger the automation like for example abandoned cart, viewed product, etc.
- Define the Delay.
This is the length of time Contacthub waits after an event has taken place, before triggering an automation. For example, wait 24 hours after an Abandoned cart event, before sending an email.
Delays are measured in seconds, and can have a maximum duration of one week.
- Under Action, define what should happen when the event takes place. There are three categories:
- Tag
Use an event property or a constant to modify or enrich the Contacthub customer properties. For example, you can select the Contact details > mobile number field for the contents to be updated. - Webhook
Send information to external applications, by calling a defined URL, to enable them to carry out the appropriate action. - Send Email
Send a transactional email to the customer that the event relates to, using Contactsend, or deliver a notification to a fixed address.
Note:
The following must be defined to integrate Contacthub with your Contactsend configuration:- Your Contactsend apiKey and userKey
- The Campaign ID to be used by the automation.
- The relevant recipient email address. This can be fixed or defined by information available in Contacthub.
- Tag
- When you are finished, click Save.
You are returned to the Automations management page and the automation is added to the list.
Note: An automation is saved as active by default. To deactivate an automation:
- Move the Enable slider, positioned to the right of the appropriate automation in the Automations table, to the left.
If the switch is gray, the automation is deactivated.
Modifying an automation
Do the following:
- Sign in to Contacthub and click the Automations tab in the Control bar at the top of the page.
- Click the desired automation.
The Edit automation page displays. - Edit the settings as required.
- If you want to remove the automation, click Delete.
Note:
This action cannot be reversed. - Otherwise, when you are finished, click Update to save the changes, or Back to list to abort the process.
You are returned to the Automations management
Do you want to see an example of how an automation works?
Click this link to discover how to remind your customer that they have an abandoned cart, by sending them automatic emails.