17 December 2017 | Contactlab
Share on
Export to pdf

![]()
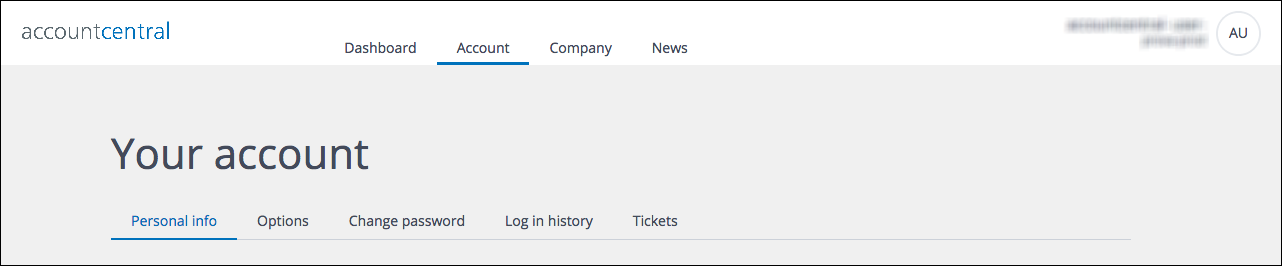
The Account section
The Account section enables you to view the details of your account for the selected company, and edit a range of settings. It includes the following tabs:
When you open the Account section, the Personal info page displays by default.
Previous page: The Dashboards | Next page: The Personal info page
Read more
17 December 2017 | Contactlab
Share on
Export to pdf
![]()
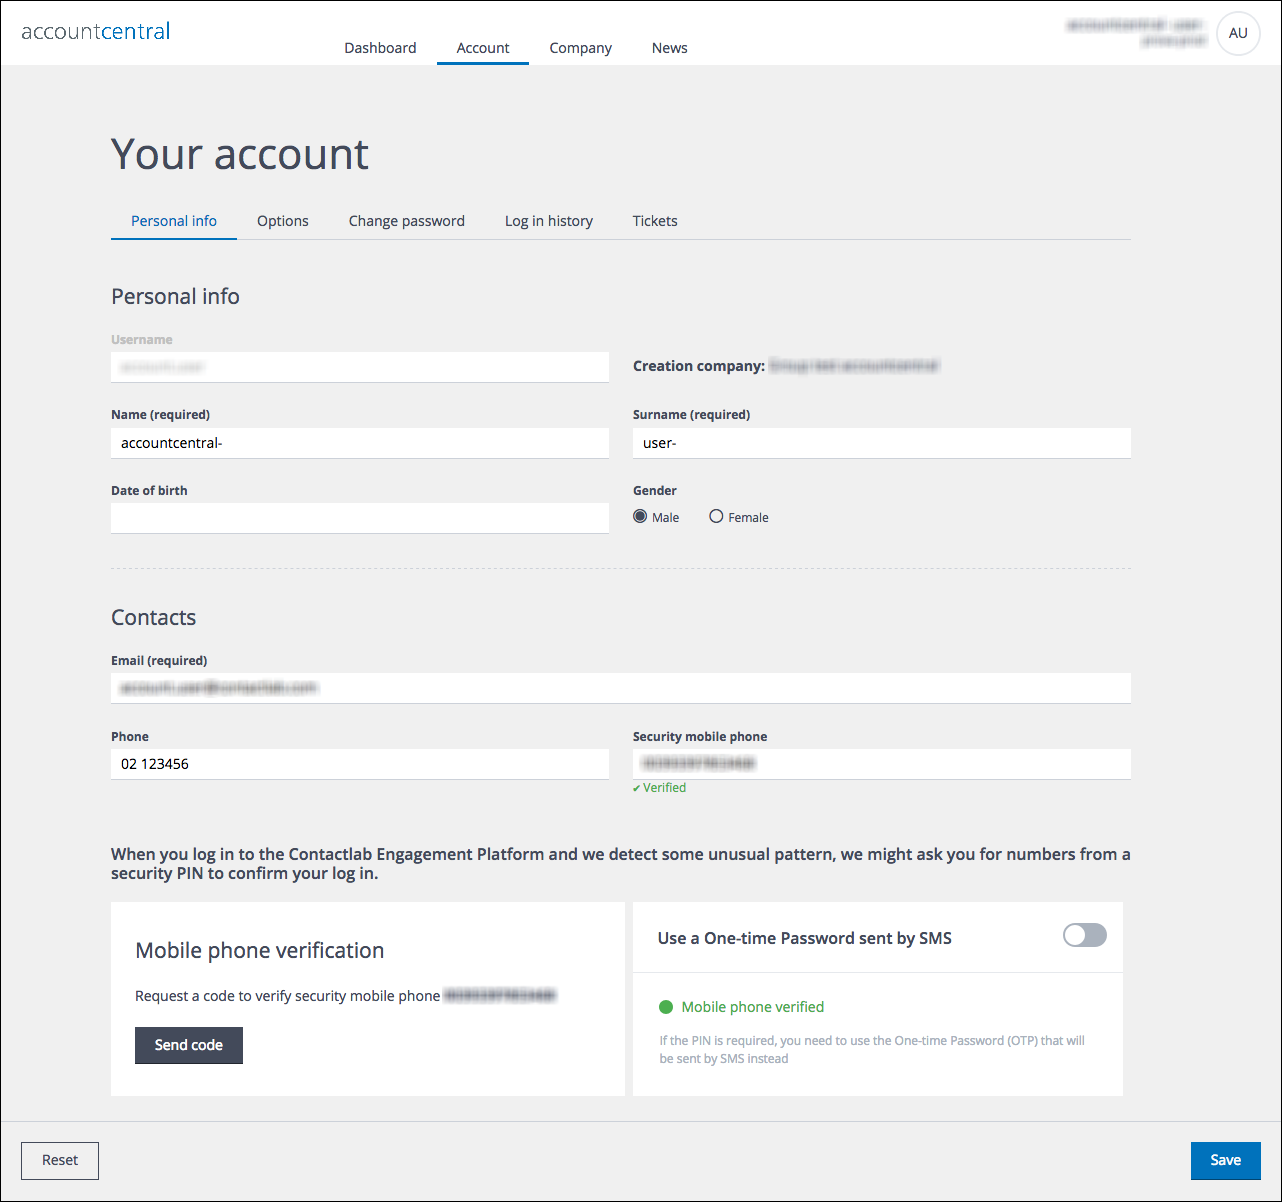
Example of the Personal info page
The Personal info page is divided into the Personal info and Contacts sections. It enables you to view, add and change a range of information, such as your:
- Name
- Surname
- Date of birth
- Gender
- Email address.
- Phone number.
- Security mobile phone number.
The UI displays whether the relevant number has been verified.
You cannot change the Username.
The name of the company where your user account was created is displayed next to the Creation company field.
The Contacts section also includes the following panels:
- Mobile phone verification.
Enables you to request a code to verify the Security mobile phone number.
- Use a One-time Password sent by SMS.
Enables a one-time password (OTP) to be sent by SMS to the verified Security mobile phone number, each time one is required. This replaces the need to use the PIN that was sent to you by email, either when the account was activated, or subsequently.
Adding or changing a security mobile phone number
A Security mobile phone number must be verified before it can be used. Do the following:
- Under Contacts > Security mobile phone, enter the appropriate number.
- Under Mobile phone verification, check that the correct mobile number is displayed, and click Send code.
An SMS with a verification code is sent to the number.
- Enter the code in the displayed form and click Confirm.
The phone number is verified.
Verification code limitations
The following conditions apply to verification codes:
- A code is valid for 10 minutes.
- You can request a maximum of 10 codes per hour.
Note:
A verification code can take some time to arrive, especially if, for example, you are roaming. As a result, it may be invalid when it does arrive, and you will need to request a new one.
Using an OTP sent by SMS
Note:
You must register and verify a Security mobile phone number to be able to use an OTP sent by SMS. The Use a One-time Password sent by SMS panel displays whether a mobile phone has been verified.
Assuming you have verified a phone number, do the following:
- Toggle the switch in the Use a One-time Password sent by SMS panel to enable or disable the OTP by SMS option.
The switch is green when the option is enabled.
Note:
Once you have made any required changes, ensure that you click Save, otherwise all updates will be lost.
Previous page: The Account section | Next page: The Options page
Read more
17 December 2017 | Contactlab
Share on
Export to pdf
![]()
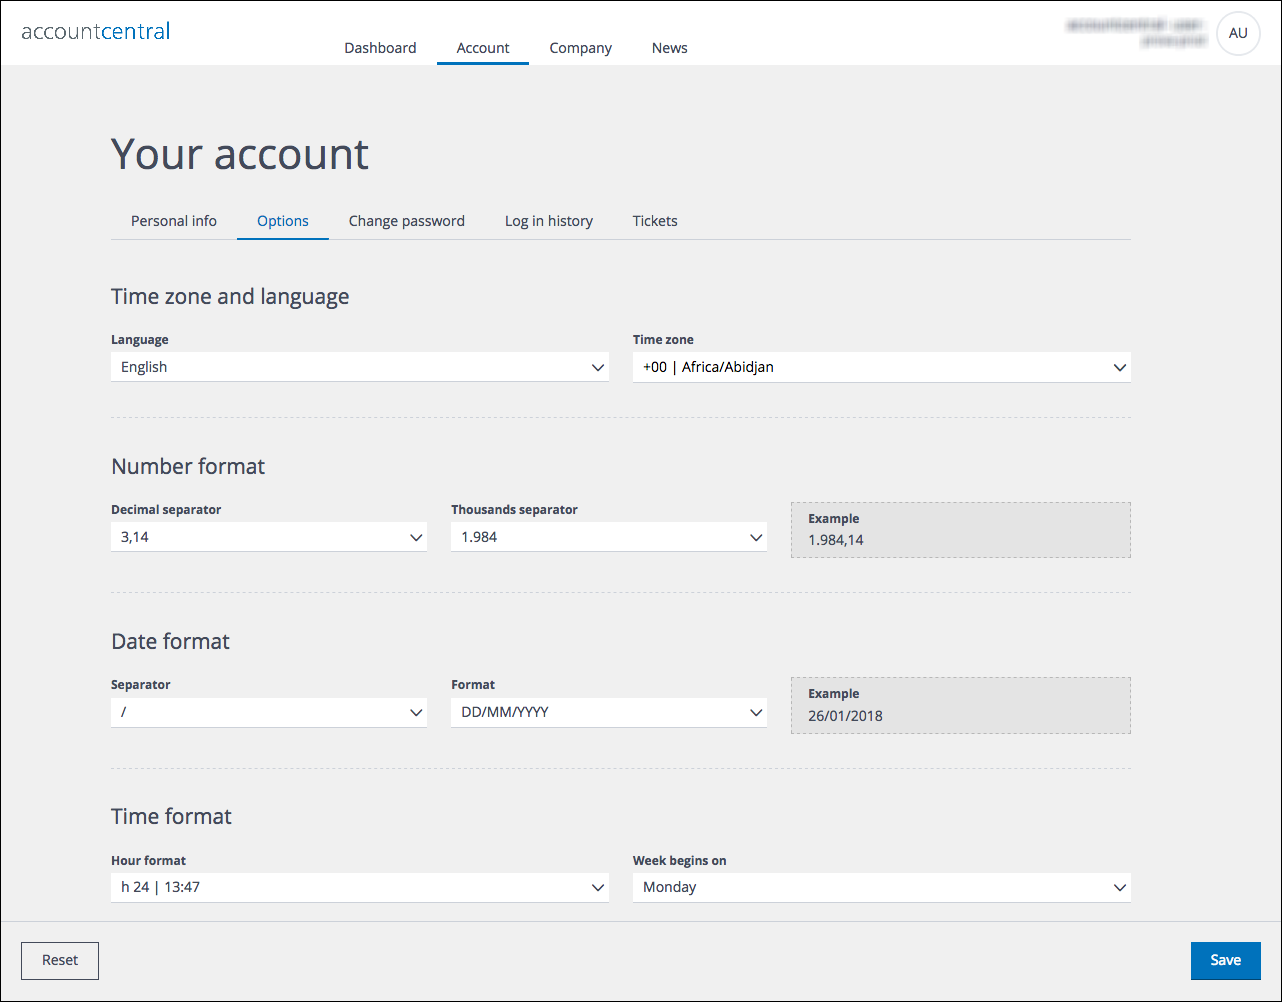
Example of the Options page
The Options page enables you to view, configure and change your UI preferences and defaults, such as:
- The display Language.
- The Time zone.
- The Number format.
- The Date format.
- The Time format.
Note:
Once you have made any required changes, ensure that you click Save, otherwise all updates will be lost.
Previous page: The Personal info page | Next page: The Change password page
Read more
17 December 2017 | Contactlab
Share on
Export to pdf
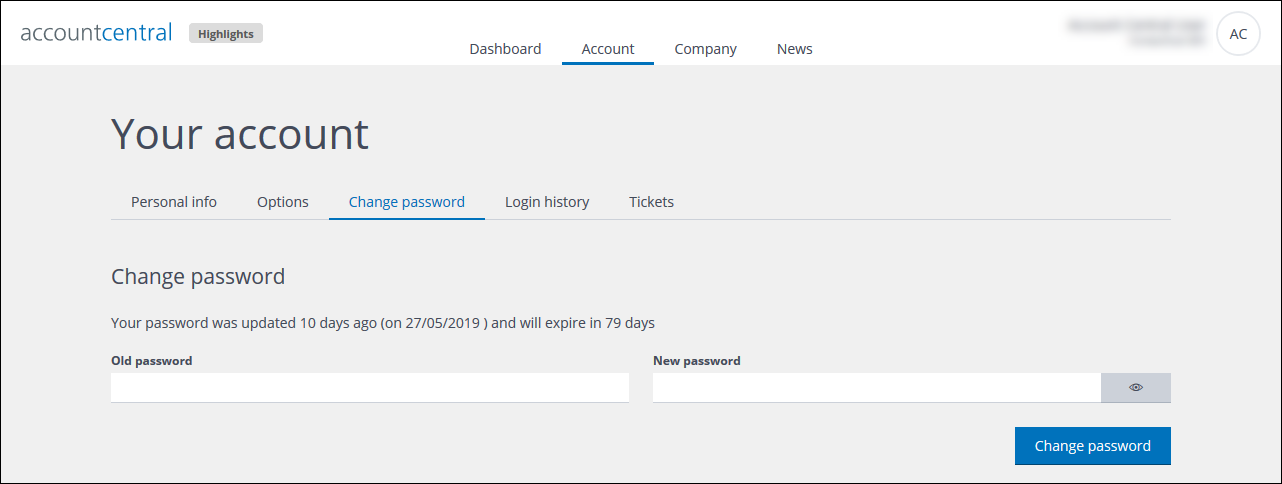
Example of the Change password page
The Change password page enables you to enter a new password.
Note:
You must change your password at least every three months. Only you can change your password.
An administrator can, however, invalidate your password and send you a new one by email. You must then change this password the next time you sign in. See Forgetting your password for more details.
Changing your password
Do the following:
- Under Reset password > Old password, enter the current password.
- Under New password, enter a new password that at least matches the security requirements.
- Click the Eye icon, positioned to the right of the field, to review what you have entered, and make any changes if required.
Note:
If you do not review what you have entered, the password may be saved with errors and as a result, you will be unable to sign in. See Forgetting your password for more about what you should do, if this happens.
- When you are finished, click Change password.
The password is updated, and the expiry period is reset to 3 months.
Note:
If the password you entered does not match requirements, the system tells you what they are, and you must re-enter a new password, then click Change password again.
Previous page: The Options page | Next page: The Log in history page
Read more
17 December 2017 | Contactlab
Share on
Export to pdf
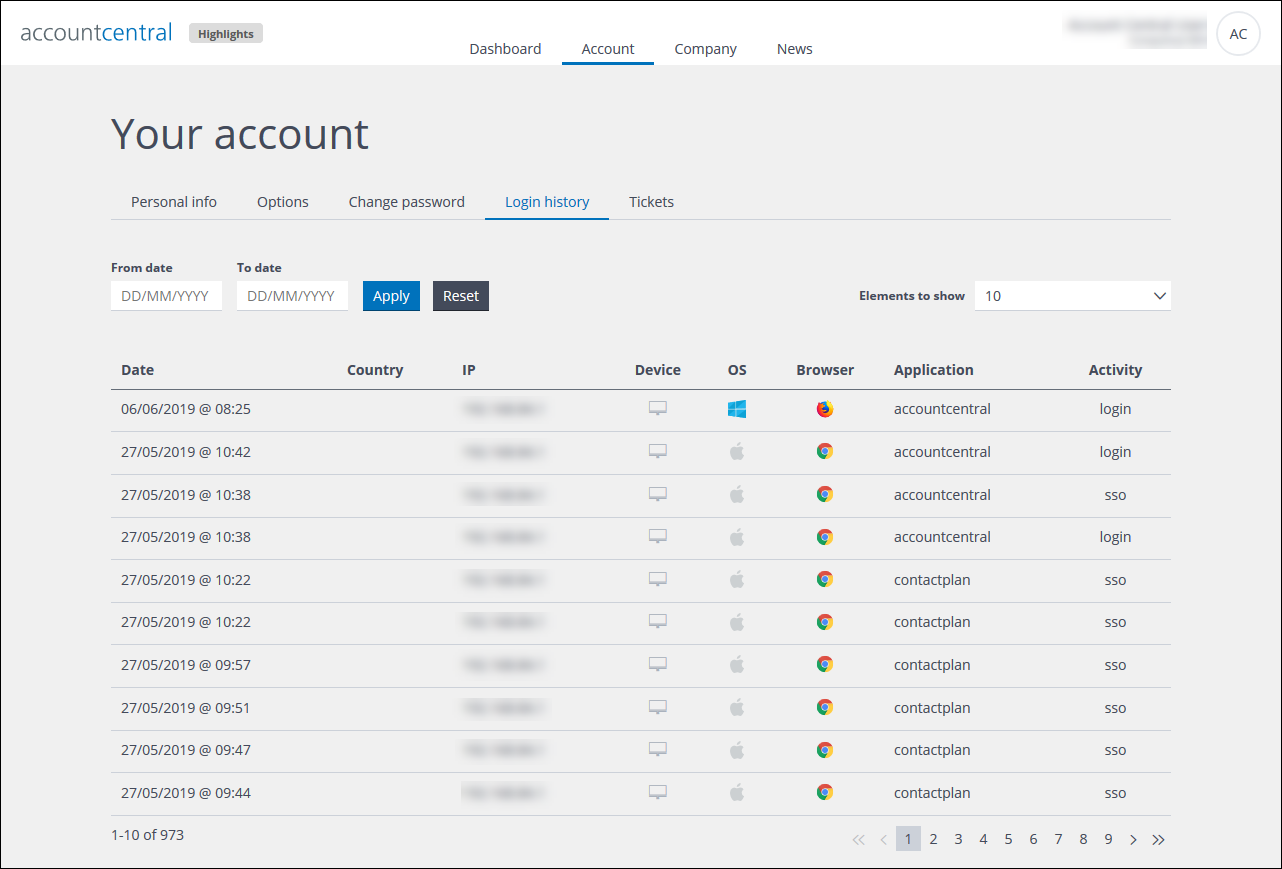
Example of the Log in history page
The Log in history page is read-only and displays the details of every sign in attempt you have made, together with information about other account-related activities.
The Activity column shows what took place. For example, you signed in, you used your email PIN or a One-time Password by SMS when you signed in, or you changed your password and similar. The following lists the possible entries and their meanings:
- login
The sign in attempt was successful.
- login failed
The sign in attempt failed.
- login attempt with blocked account
The account that was used for the sign in attempt has been blocked.
- login attempt with disabled account
The account that was used for the sign in attempt has been disabled.
- login attempt with blocked password
The password that was used for the sign in attempt has been blocked.
- pin requested
Numbers from your PIN were requested during sign in.
- login with pin
The sign in attempt with numbers from your PIN was successful.
- login with pin failed
The sign in attempt with numbers from your PIN failed.
- otp requested
An OTP was requested during sign in.
- login with otp
The sign in attempt with an OTP was successful.
- login with otp failed
The sign in attempt with an OTP failed.
- account blocked
The account has been blocked.
- sso
The Single Sign On (SSO) feature was used when signing in.
SSO enables you to sign in once to access multiple Engagement Marketing platform applications, according to your account permissions.
- pin reset
The PIN has been reset by an administrator.
- pin activated
The PIN has been activated.
- password changed
The password has been changed.
- password recovered
The password was recovered after it was forgotten.
- password reset
The password has been reset by an administrator.
If you want to view sign in attempts for a specific time frame:
- Enter the From date and To date in the appropriate fields.
- Click Reset to return the date fields to the default, if required.
- When you are finished, click Apply to filter the list.
Previous page: The Change password page | Next page: The Tickets page
Read more
17 December 2017 | Contactlab
Share on
Export to pdf
Accountcentral is a very intuitive, web-based UI, requiring no local installation steps on your part, which enables you to:
- View your User Dashboard.
Displays, for example:
- The details of your account and security status.
- When you last accessed each module.
- The latest news.
- Your recent support requests.
- View and update your Account details, through a series of tabs:
- Your Personal info and contact details, together with mobile phone verification and PIN or one-time password options.
Note:
You cannot change your username.
- The selected Options for your account, such as the default language, time zone and similar.
- The Change password page.
- Your Log in history.
- All your Tickets.
- View the details of the selected Company.
- View the latest News.
- Change the selected company, if you have access to more than one.
Admin users
If you have the appropriate admin. permissions, you can in addition:
- View the Admin Dashboard.
Displays similar information to the User Dashboard, but includes Failed logins and Issues in place of the Latest news.
- Change the company Information and Manager details in the Company section.
- View the list of users in the relevant company Team and:
- Review the Data model for the currently selected company.
- Review the settings for other resources.
IMPORTANT:
An Admin user can only edit the details and reset the PIN or password for a user that has been created within the company for which they have admin. permissions. See Viewing and editing a user’s details for more information.
The Accountcentral UI
The UI is sub-divided into a series of tabs, organized according to the type of information that they include. See Viewing and using the UI sections for more about each tab. The Dashboard displays by default when you start the UI.
Previous page: Introduction | Next page: Getting started, signing in and signing out
Read more
17 December 2017 | Contactlab
Share on
Export to pdf
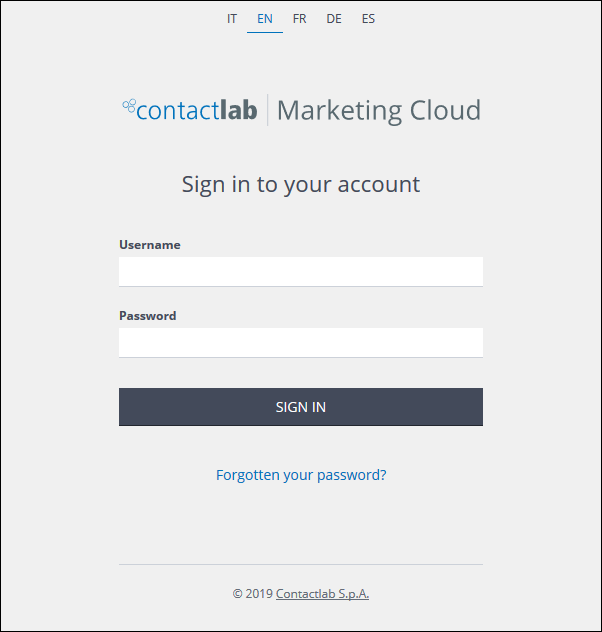
The Contactlab Marketing Cloud Sign in page
Starting the UI
To start the UI, do the following:
- Go to https://account.contactlab.it.
The Contactlab platform Sign in page displays.
- Select the appropriate language from the options displayed at the top of the page.
- Enter your Username and Password.
If you cannot remember your password, see Forgetting your password.
If you enter the wrong Username or Password, see Entering the wrong Username or Password for more details.
- Click SIGN IN.
If this is the first time that you have signed in, you are asked to change the password you received by email to one of your choice.
Note:
If you attempt to sign in to the Contactlab Engagement Marketing platform from a different country, or a location that is far away from your usual one, you are asked for further verification. This will either be numbers from your PIN, or your one-time password (OTP), if you have chosen to receive OTPs by SMS. See Using your PIN and one-time passwords and Personal info for more details.
If this happens do one of the following:
- If you are asked for a PIN, the following window displays:
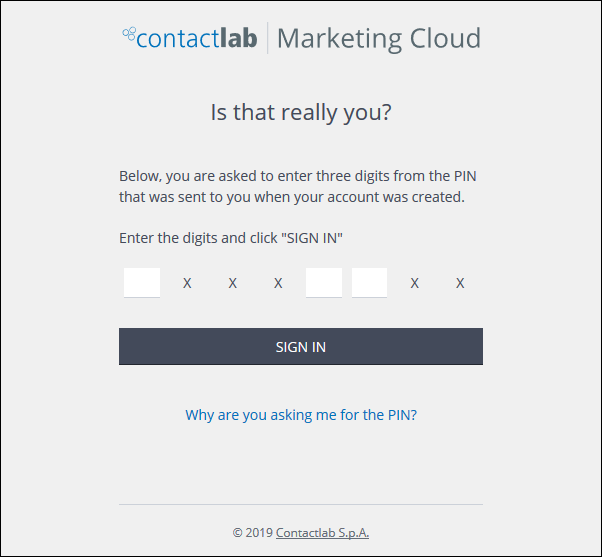
Example of the PIN confirmation window
- Enter the appropriate numbers from your PIN.
- Click SIGN IN.
or:
- If you have chosen to receive OTPs to your verified mobile phone, the following window displays:
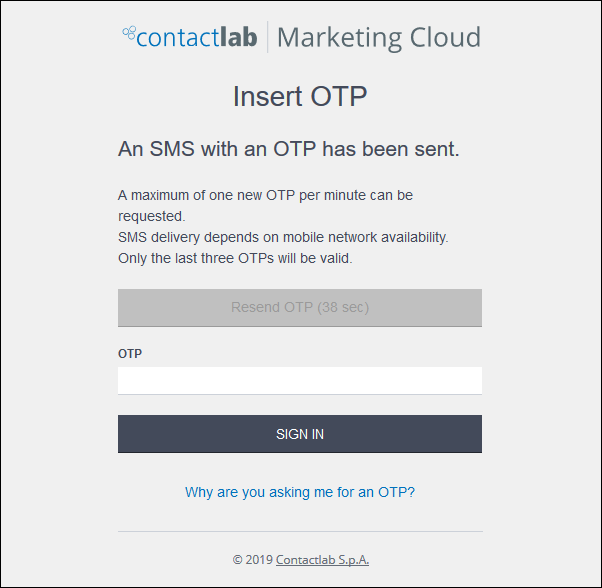
Example of the OTP confirmation window
- Enter the OTP from the SMS message you have received.
Note:
If you have not received the SMS message after a reasonable length of time, click Resend OTP to request a new one. The resend button also displays how long you must wait before requesting a new OTP.
See Using your PIN and one-time passwords for more about using an OTP, and OTPs by SMS limitations for more about the conditions that apply to multiple OTPs by SMS.
- Click SIGN IN.
When you have signed in, your User Dashboard for the selected company displays by default.
Note:
If you have the appropriate admin. permissions, the Admin Dashboard displays.
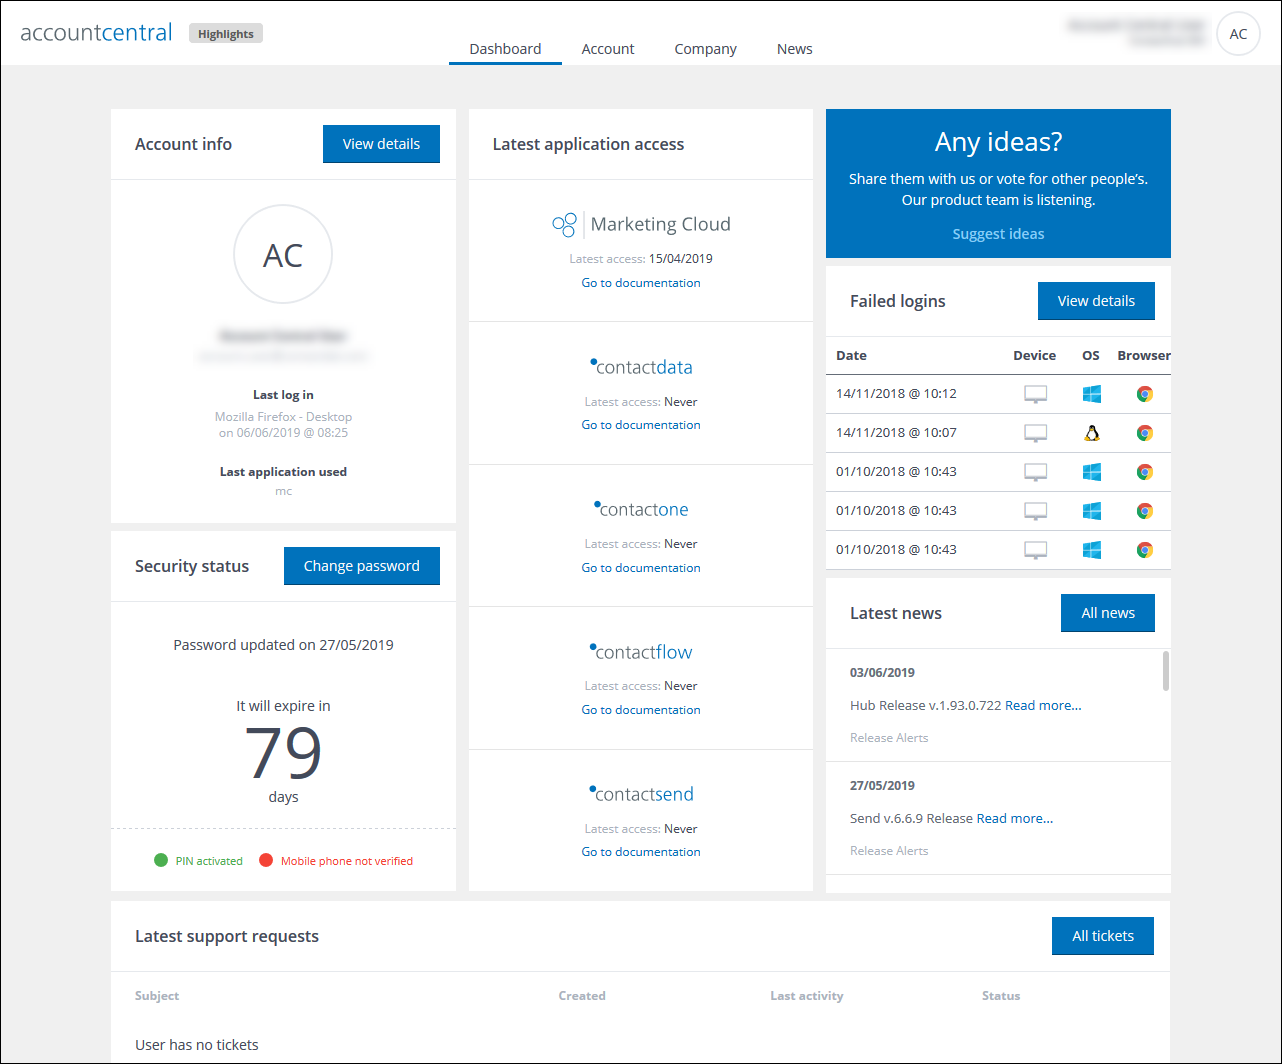
Example of the User Dashboard
See The Dashboards for a full description of the User and Admin Dashboards.
In the normal view, the page is displayed as it is generally intended to be used, with all controls and tabs readily available. The page includes:
- The Control bar, including:
- The Accountcentral logo.
Click at any time, to return to the Dashboard.
- The Dashboard, Account, Company and News tabs.
Note:
If you have the appropriate admin. permissions, the Team, Data model and Other resources tabs also display.
Click the appropriate tab to navigate to the required management page.
- The User information panel.
Displays the name of the current user and the company that is currently selected.
Click the panel to display the Settings and Sign out buttons.
- Click the Settings button to select a different company, if available for your account.
- Click the Sign out button to end the current session.
- The appropriate Dashboard or Management page.
Signing out
To end the current session, do the following:
- Click the User information panel, positioned to the right in the Control bar.
The Settings and Sign out buttons display.
- Click Sign out.
The application closes and you are returned to the Contactlab Sign in page.
Previous page: Understanding Accountcentral | Next page: General security policy
Read more