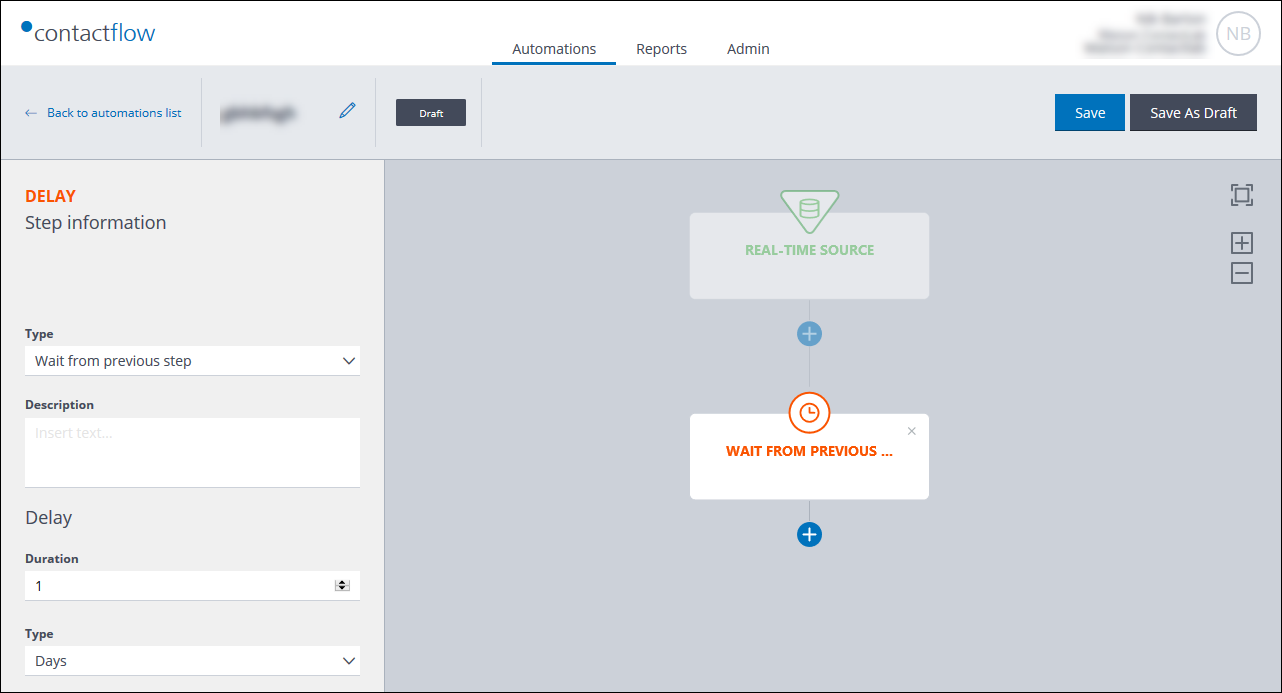
To add a Delay step to an automation, do the following:
- Click DELAY in the Steps selection panel.
A delay panel is added to the Automation configuration flow diagram, with the name Choose Type.
See Creating an automation for more about the Steps selection panel. - Click the Choose Type panel.
The Delay configuration options display in the Sidebar.

The Delay configuration options
- Under Type, select the required delay.
Currently, Wait from previous step is the only available option.
As soon as the delay type is selected, the name of the delay panel in the flow diagram is updated accordingly. - Enter a Description, if required.
- Under Delay, define the length of the delay.
- When you have finished defining the Delay step, continue to add further actions and steps, as required:
If you have finished defining the automation, follow the steps given under Completing the automation.
Also see:
Previous page: Adding Check step paths | Next page: Adding an End step
