
To add a Check step to an automation, do the following:
- Click CHECK in the Steps selection panel.
A check panel is added to the Automation configuration flow diagram, with the name Choose Type.
Beneath the check panel, a Path button also displays
See Creating an automation for more about the Steps selection panel, and Adding Check step paths for more about paths.
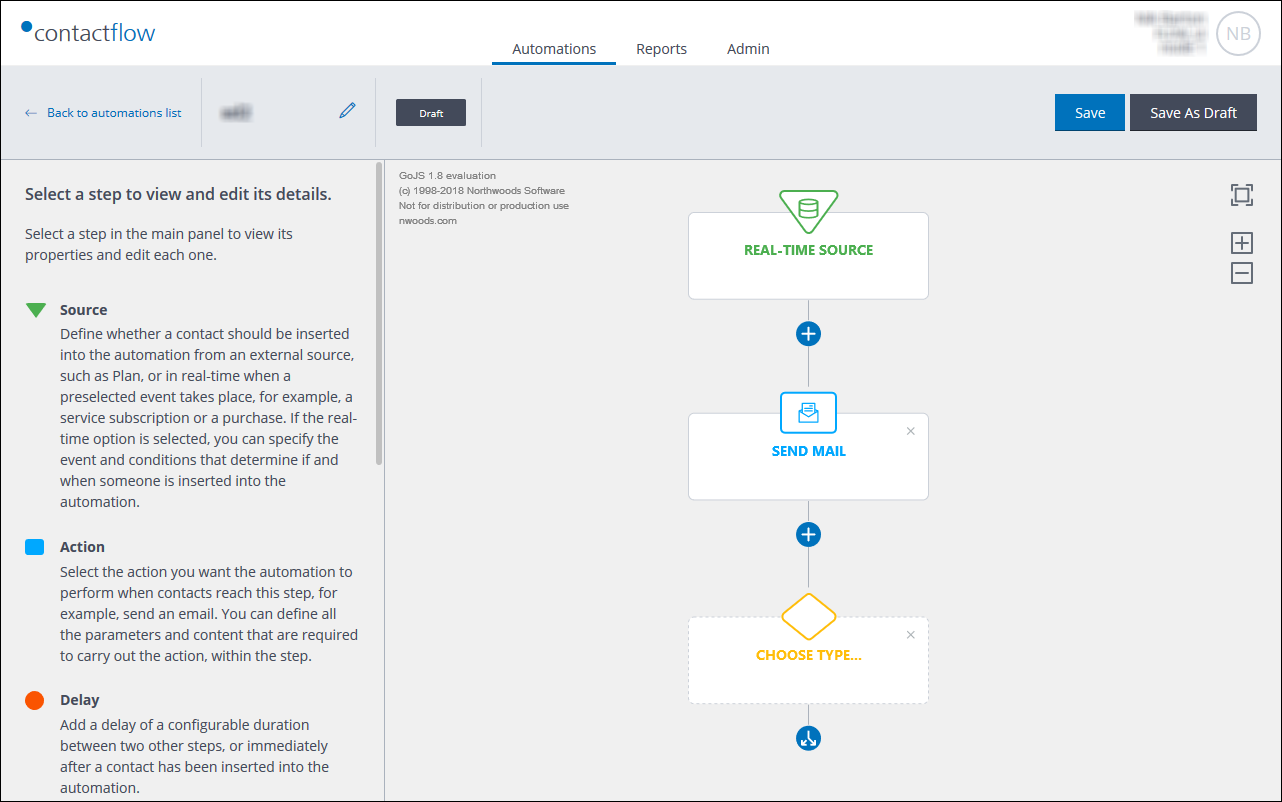
The check Choose Type panel and Path button
- Click the Choose Type panel.
The initial Check configuration options display in the Sidebar. - Under Type, select:
- Wait for Trigger
Pauses the automation until the selected Event takes place. If the event does not happen within a defined time frame, the default path is taken.
or: - Wait then Check
Pauses the automation for a defined period of time and enables you to use an Event, or a Customer profile property, to check against. Following the wait, a contact is moved to the path where they fit the conditions, or to the default path if there is no match.
- Wait for Trigger
As soon as the check type is selected, further configuration options display and the name of the check panel in the flow diagram is updated accordingly.
Configuring a Wait for Trigger step
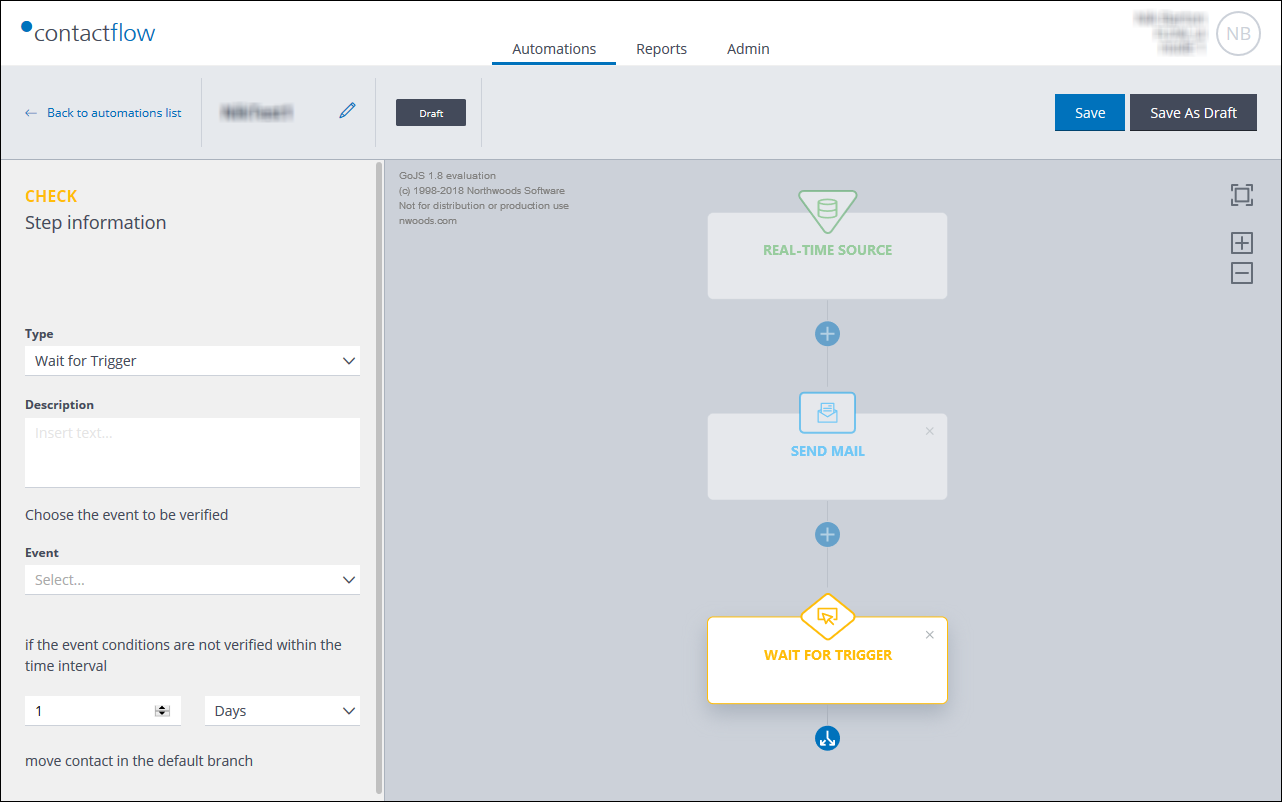
Example of the Wait for Trigger type
To configure a Wait for Trigger step type, do the following:
- Enter a Description, if required.
- Under Event, select the appropriate trigger event.
See Creating an automation for more about defining events and rule conditions.
Note:
The event list includes all the ones that are configured in Hub for the selected workspace. The event you choose influences the options that are available when you create alternative paths. See Adding Check step paths for more details.
The flow diagram is updated accordingly. - Under If not verified within the time interval, select the appropriate period.
- When you have finished the Check step, click the Path button beneath the check panel, to define the default path and at least one positive path. See Adding Check step paths for more details.
Configuring a Wait then Check step
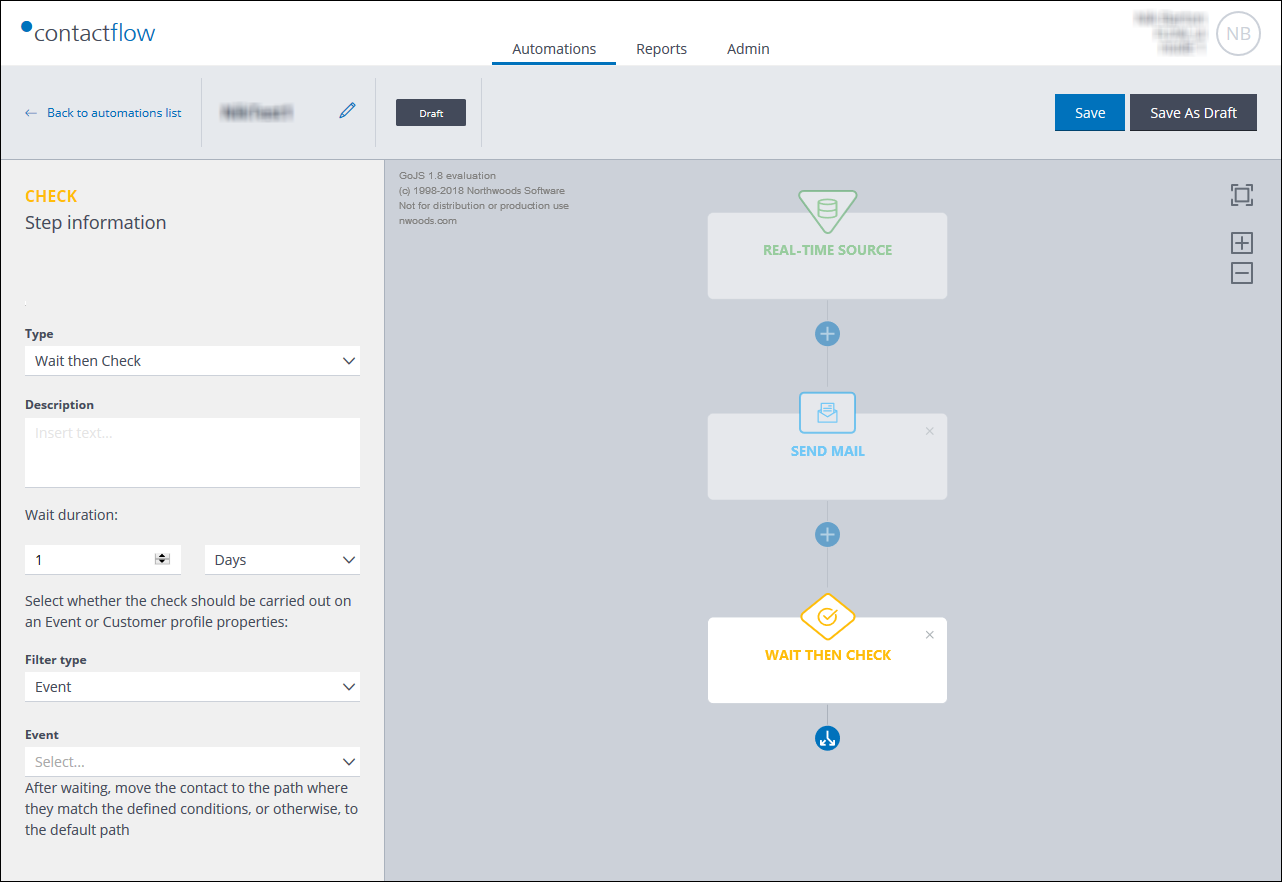
Example of the Wait then Check type with an Event selected as the filter
To configure a Wait then Check step type, do the following:
- Enter a Description, if required.
- Define the wait duration.
- Under Filter type, select whether the check should be carried out on:
- An Event.
- A Customer profile property.
- If you select Event as the filter type, select the appropriate trigger event.
See Creating an automation for more about defining events and rule conditions.
Note:
The event list includes all the ones that are configured in Hub for the selected workspace. The event you choose influences the options that are available when you create alternative paths. See Adding Check step paths for more details. - When you have finished the Check step, click the Path button beneath the check panel, to define the default path and at least one positive path. See Adding Check step paths for more details.
Also see:
Previous page: Adding an Action step | Next page: Adding Check step paths