
Scope
In this tutorial you will discover what Facebook Custom Audiences are and how they can be used, together with your existing Contactsend database, to build social media-focused deliveries.
Procedure
A Facebook Custom Audience enables you to create specifically targeted social media-based deliveries, while being able to select which contacts to include. The goal is to maximize communication effectiveness by targeting an audience with distinct characteristics.
The Contactlab platform can easily be integrated with Facebook, enabling you to use your Contactsend database to create Custom Audience deliveries.
As an example, imagine you sent your female audience an email to introduce your brand’s new lipsticks line. Now you want to strengthen the message with a dedicated Facebook delivery, making use of your current customer database. Contactsend can automatically select the contacts that you want to target with your marketing delivery and search for a match on social networks.
Note:
To be able to use a Custom Audience, you need to have linked at least one Facebook Ads account with the Contactlab platform. If you haven’t already linked your account, see this tutorial for all the required steps.
To define and use a Custom Audience, do the following:
- Sign in to the platform and click Configure > User db.
The User database page displays.

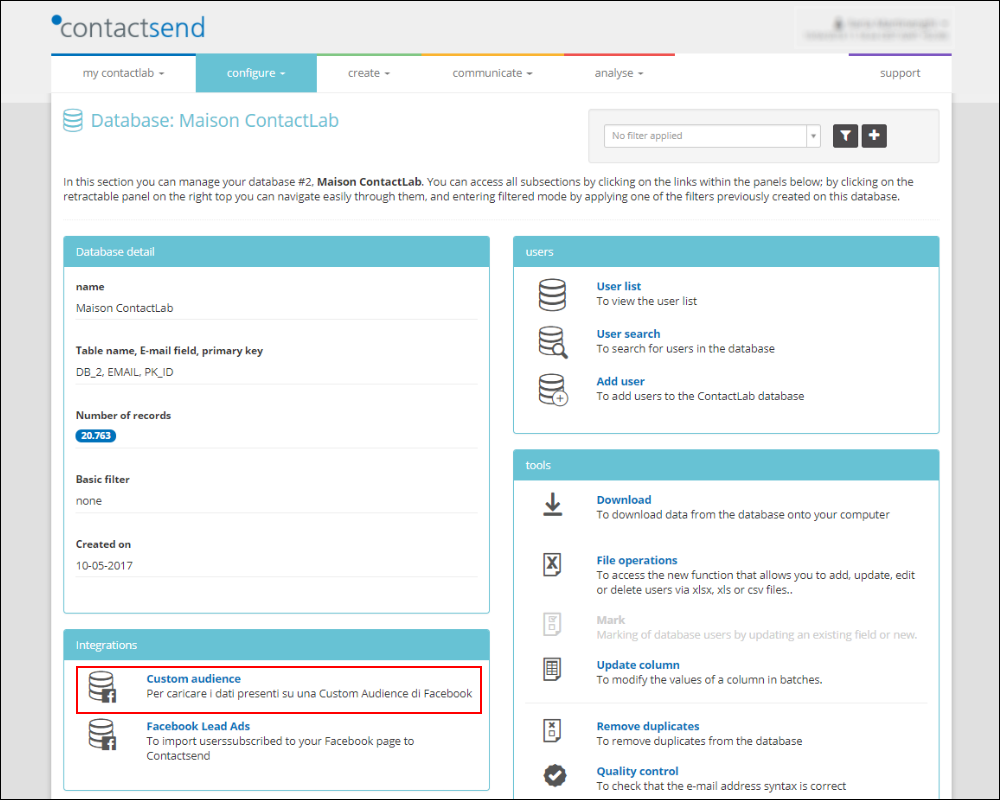
- Click the required database, and under Integrations, click Custom audience.
The Custom audience tab of the Facebook page displays, with any currently available Custom Audience synchronizations.
- Click + new synchronization.
The Synchronization settings page displays, with the name of the selected database in the Source > Db name This page enables you to define the parameters to select the appropriate Custom Audience.- Using the example here, under Filter, select Female.
- Under Medium > Match by, select the variable you want to use to perform a match between your Contactsend and Facebook contacts.
For example, EMAIL. - Under Destination > Facebook Account, select the Facebook Ads account you want to use.
For example, Facebook Ads Account. - Select whether you want to Create a new custom audience or Select existing Custom Audience.
- Once you have completed the required fields or selected an existing audience, read the notification carefully and, if you agree, click Accept.
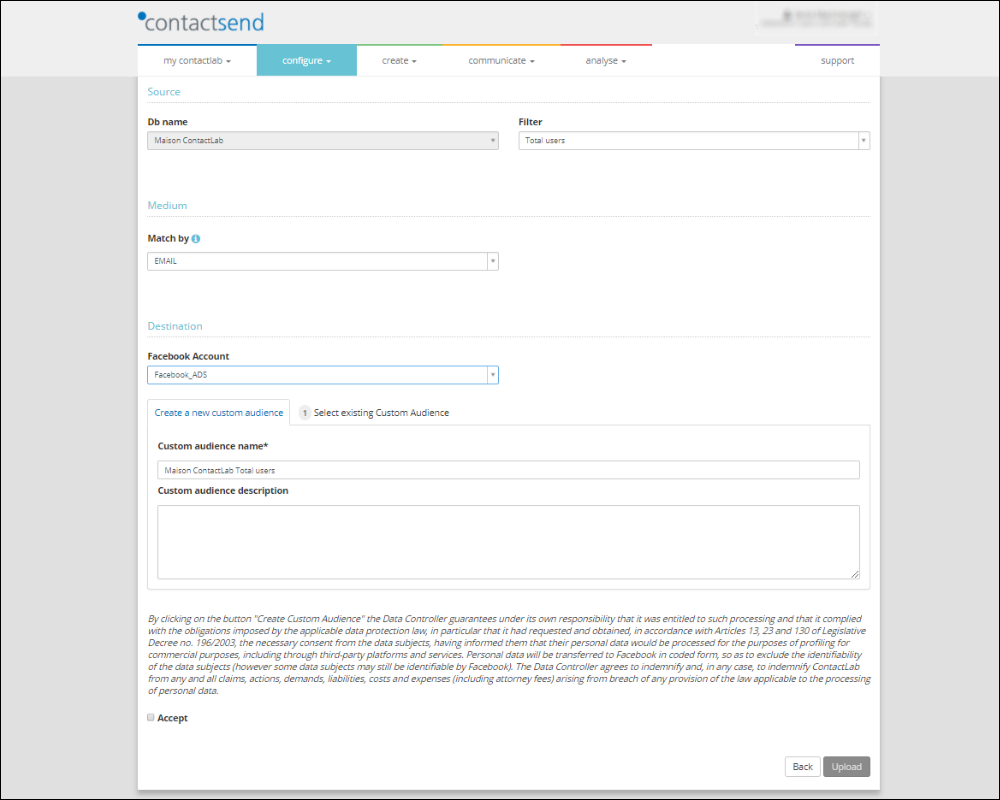
- When you are finished, click Upload.
You are returned to the Custom audience tab of the Facebook page, where you can see the status of the synchronization request, the number of contacts and whether there is any invalid data.
Note:
Because the upload request is asynchronous, it may take some time to complete.
As a result, you have now selected the female contacts in your Contactsend database, and automatically matched them with your Facebook Ads Account, using their email address as the appropriate variable. When the upload is complete, you can see exactly how many contacts are available for your social media-based delivery.
The Custom audience tab can also be accessed in Contactsend by clicking Configure > Integrations > Facebook. Here you can manage your Custom Audiences and, for example, schedule automatic uploads, which will populate your Custom Audience incrementally. See this tutorial for more details.
To find out more about Custom Audiences, see the Contactsend Guide, or contact our Customer Care.