
Scope
In this tutorial, you will see how to insert a Check step into a Contactflow automation. As a result, you can determine which of two communication paths a customer’s journey automatically follows, according to whether they carry out the chosen activity or not, within a defined time frame.
Procedure
Contacts who, for example, receive the same email, can react in completely different ways. One person might leave the email unopened, another perhaps just reads it, while a third could click a link in the message, to view more details about a particular product. Contactflow enables you to simply and automatically manage these different behaviors and what happens next in each case, using Check steps.
As its name implies, a Check step checks to see if a preselected trigger event takes place. It then determines which of two separate and potentially completely different paths a contact should follow, according to whether they have performed the trigger or not, within a defined time frame.
For clarity, the paths are called YES and NO paths in this tutorial, although their actual names in the Flow UI are slightly different.

There are two types of Check step:
- Wait for Trigger.
Pauses the automation only until the selected trigger event takes place. For example, the contact opens an email. If the event does not happen within a predefined time frame, the NO path is automatically followed. - Wait and Check.
Pauses the automation for a predefined period, then checks to see whether the selected trigger event has taken place. If the event has not happened after the predefined time frame, the NO path is automatically followed.
A Check step should only be inserted in an automation immediately after the appropriate Action step to which the relevant trigger refers, such as Send mail.
You can configure the separate YES and NO paths as required and, for example, add further check steps to each, according to the actions it includes.
Note:
An individual Check step can only verify a single Opened or Clicked trigger event. If, for example, you want to manage contacts who do not open an email in a different way to those who read the message, and the people who click a link differently again, you will need to use at least two Check steps, each positioned in the appropriate path.
A step can be added to a new automation, or one that you want to edit. This example describes how to add a Wait and Check step, with an Opened trigger event, to an existing ‘Welcome email’ automation, available in the Draft tab of the My automations page.
To add a Check step, do the following:
- Sign in to the platform and select
The My automations page displays. - Click the Draft tab, followed by the ‘Welcome email’
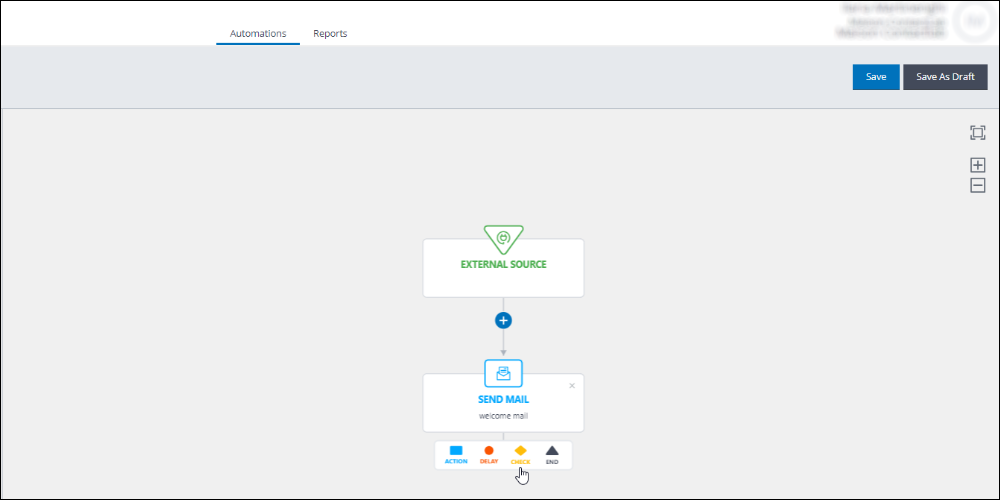
The relevant Automation configuration page displays. - Under the ‘Welcome’ Send Mail action step, click the + icon , then click Check in the Steps selection
A new Check step is added to the automation.
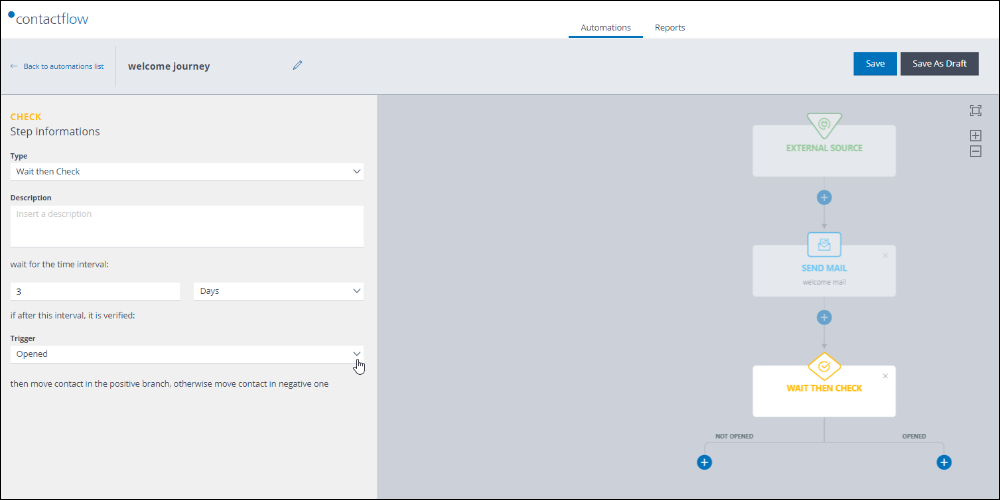
- Click the new step to display its configuration options in the Sidebar.
- Under Type, select Wait and Check.
- Enter a Description, if required.
- Under wait for the time interval, define how long the automation should wait before checking if the trigger event has taken place.
For example, 3 Days. - Under Trigger, select Opened.
The Check step is configured to wait three days before checking whether the ‘Welcome’ email has been opened.
You can now continue to define the actions and other steps that should be carried out in each of the two resulting paths.
If, in the above example, the Wait for Trigger step is selected instead, the automation chooses the YES path as soon as the contact opens the email. If, after three days they have not performed the trigger event, the contact follows the NO path.
For more details, see the appropriate pages of the Contactflow Guide, or contact our Customer Care.