
Scope
In this tutorial, you will see how to create a Send email action step within a Contactflow automation.
As a result, you can define the communications that should automatically be sent to your contacts.
Procedure
Creating a Send email automation step is very simple to do. But being able to add different types of customizable communications to an automated journey, then send them to the appropriate contacts according to their behavior and needs, can be extremely useful to a brand.
To create a Send email step, do the following:
- Access the platform and complete all the initial automation creation steps and the Automation configuration page displays, which is subdivided into two panels:
- The left Sidebar.
When a step is added to an automation, all its configuration options are displayed here. - The Automation configuration
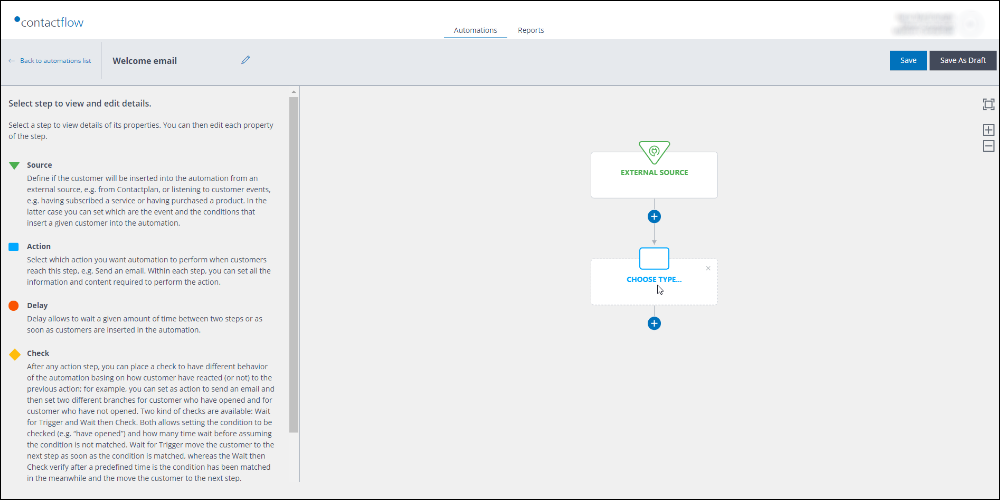
The area where you create an automation by adding steps. It initially displays the External Source panel, which acts as the start point for a new automation.
- The left Sidebar.
- Under the External Source step, click the + icon.
The Step selection panel displays, where you can choose the type of step you want to add. - Click Action.
A new action step is added to the automation. - Click the new step to display its configuration options in the Sidebar.
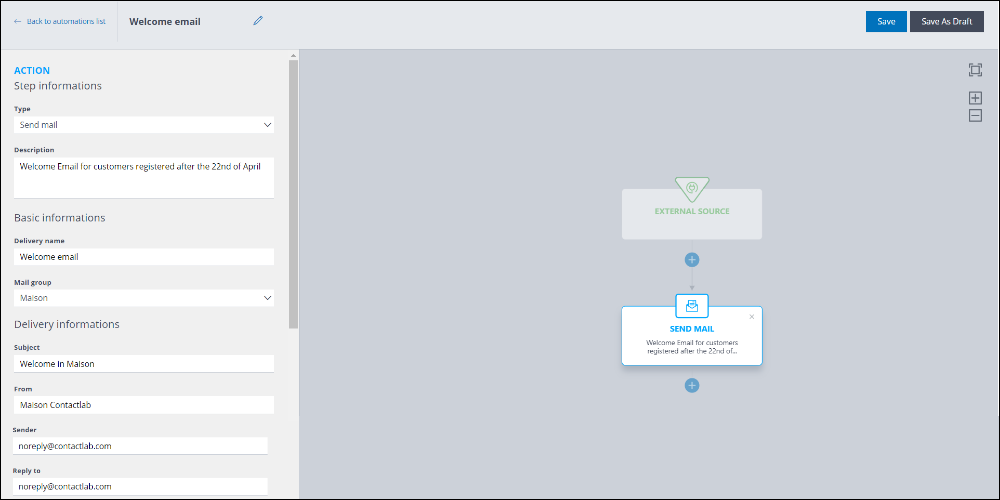
All the configuration fields must be completed to define the relevant action. - Under Type, select, for example, Send mail.
The name of the relevant action step in the Automation configuration panel is updated accordingly.
- Enter a Description, if required.
For example, ‘Welcome email’.
Displays in the relevant action panel to make it easier to identify later. - Under Basic Information:
- Enter a Delivery name.
- Select the Mail group that should be used for the delivery.
- Under Delivery Information, enter:
- The email Subject
- The appropriate From
The name that will be displayed as the email sender. - The Sender
- The appropriate Reply to
Note:
Depending upon the email group, certain fields may already be completed.
- Under Email template, click Edit template… to define the appropriate template.
The Email template page displays.
You have two options:
- Use an HTML template previously created with the Contactlab PageBuilder editor.
- Insert an externally created HTML.
Here, you can also see a Preview of the email.
- The Email template page also enables you to configure any delivery Labels.
The dynamic field link tracking and management is automatically and directly carried out from Contactflow.
You have now completed the Send email action step and can go on to configure the remaining automation steps, as required.
For more details, see the appropriate pages of the Contactflow Guide, or contact our Customer Care.