
To view the Trees page, do the following:
- Select the Hierarchy tab of the Settings page
- Select Trees, positioned under the title of the tab
The Tree page displays, with the current Tree configuration, if any
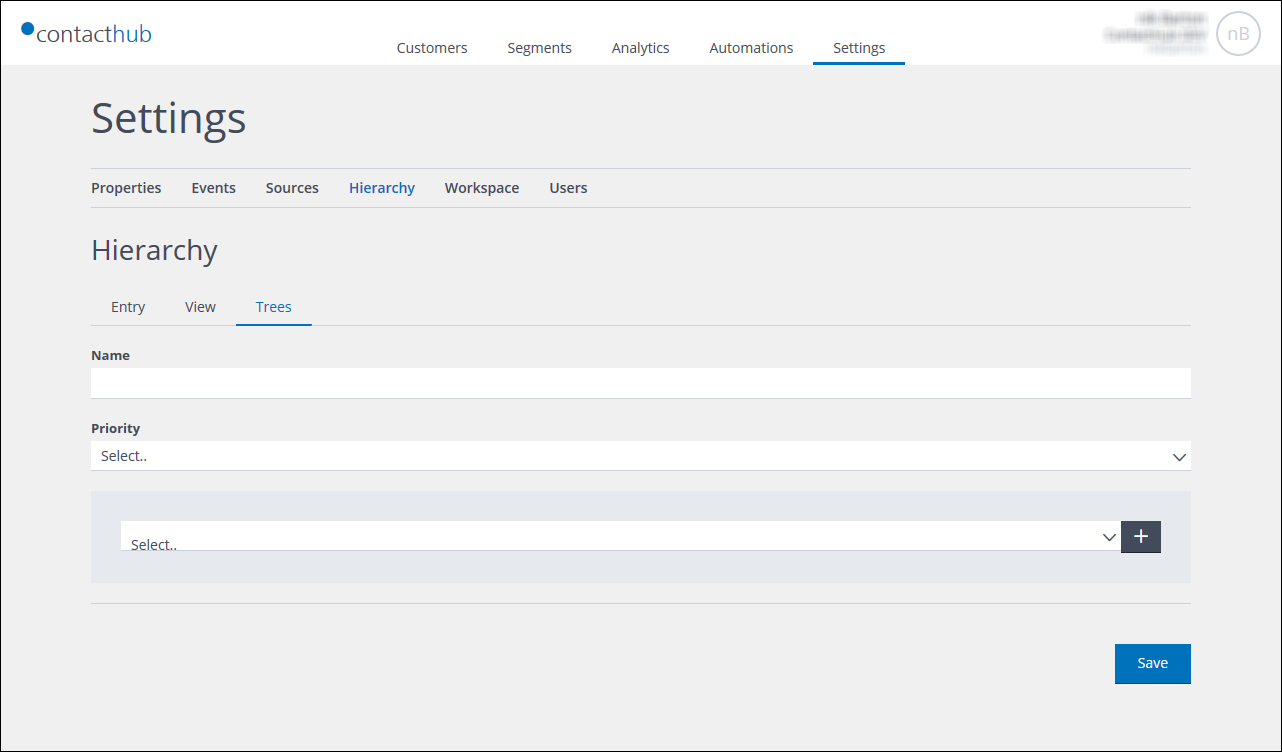
The Hierarchy tab of the Settings page, with Trees selected
Tree configuration rules
The following rules must be applied when configuring a Tree:
- The root node must always be a View node
- Leaf nodes must always be Entry nodes
- You cannot use an Entry node as an intermediate node in the tree
- A node can only be used once
Defining a Tree
To define a Tree, do the following:
- Ensure that Trees on the Hierarchy tab of the Settings page is selected
- Under Name, enter a name for the Tree
Ensure that the name you choose can be recognized by you and others later - Under Priority, click the downwards pointing arrow to the right of the box, and select the appropriate aggregation priority setting
- Time ensures that the latest data entered in the appropriate nodes is used
- Order ensures that the data contained in nodes is prioritized according to the position of the nodes in the tree, which is defined in the next steps
- Select the root View node by clicking the downwards pointing arrow, positioned to the right of the box highlighted with a gray border, and choosing the appropriate entry from the drop-down list
- Click the + button, positioned to the right of the box to add a further selection field
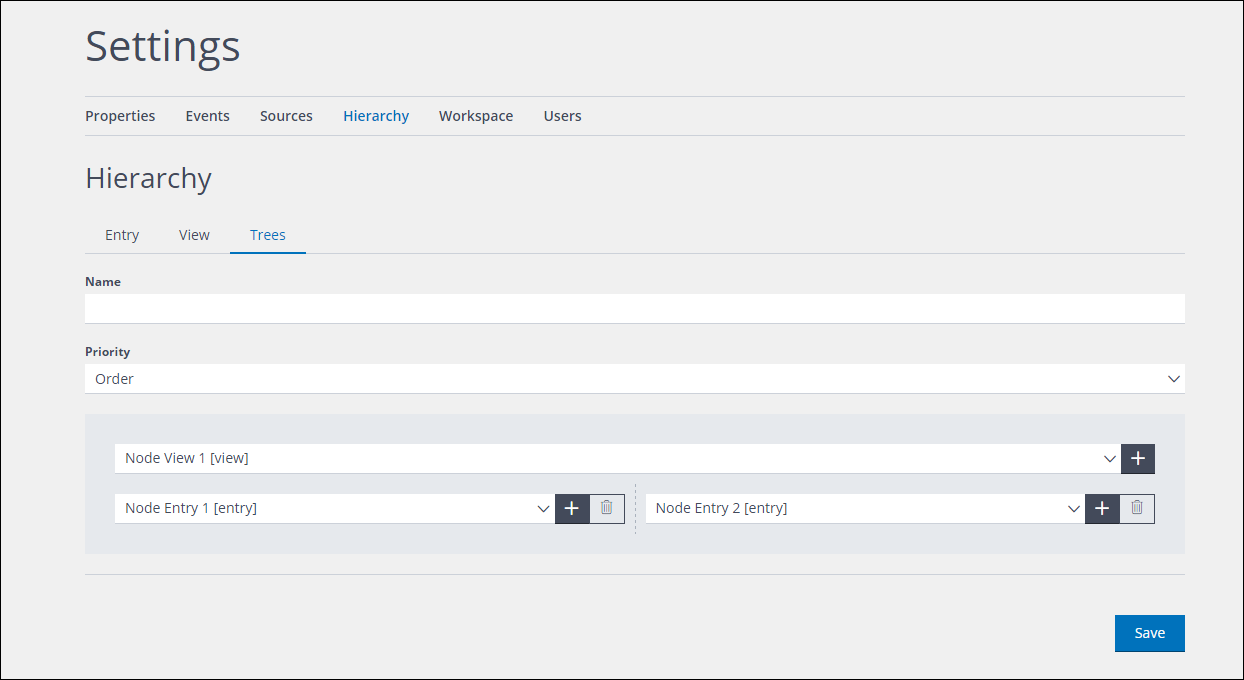
The Trees page with additional node selection fields
- Select either:
- The appropriate View node to use as an intermediate node
or: - The appropriate Entry node to use as a leaf
Note: An intermediate node requires either one or more Entry leaf node/s, or a child intermediate node with the appropriate Entry leaf node/s, from which data is gathered
- The appropriate View node to use as an intermediate node
- Continue to click the + button and select the appropriate nodes to create intermediate or leaf nodes, until the Tree is defined as required
Note: You can remove an entry in the tree by clicking the Delete icon, positioned to the right of the entries that can be deleted. The root node can only be changed, it cannot be deleted - When you are finished, click Save to save the Tree
Note:
If you do not click Save and navigate away from the Trees page, the definition will not be saved
Editing a Tree
To edit a Tree, do the following, as required:
- Ensure that Trees on the Hierarchy tab of the Settings page is selected
- Change the Name of the Tree
- Change the aggregation priority setting
- Add, change or delete Tree entries, ensuring that the result complies with the Tree configuration rules
- When you are finished, click Save to save your changes
Note: If you do not click Save and navigate away from the Trees page, the changes will not be saved.
Previous page: [previous_page] | Next page: [next_page]