
Scope
In this tutorial, you will learn how to create a subscription form and collect contact details. A newsletter from the Contactlab Maison website is used as an example.
Procedure
When you create a subscription in Contactsend, a subscription form, the links to the appropriate fields in the database, and the unsubscribe link are generated automatically.
To be able to create a subscription in Contactsend, you need to have set up a database where you can store the contact details, and the appropriate email group (a container that is used to group deliveries).
To create a subscription, do the following:
- Sign in to the platform, and click Configure.
- Click email groups.
A list of email groups that are associated with the company display, together with additional information. - Click the subscriptions
The email groups – subscriptions page displays, listing all the currently available subscriptions. - To create a new subscription, click + Create new form.
The email groups subscriptions form page displays.
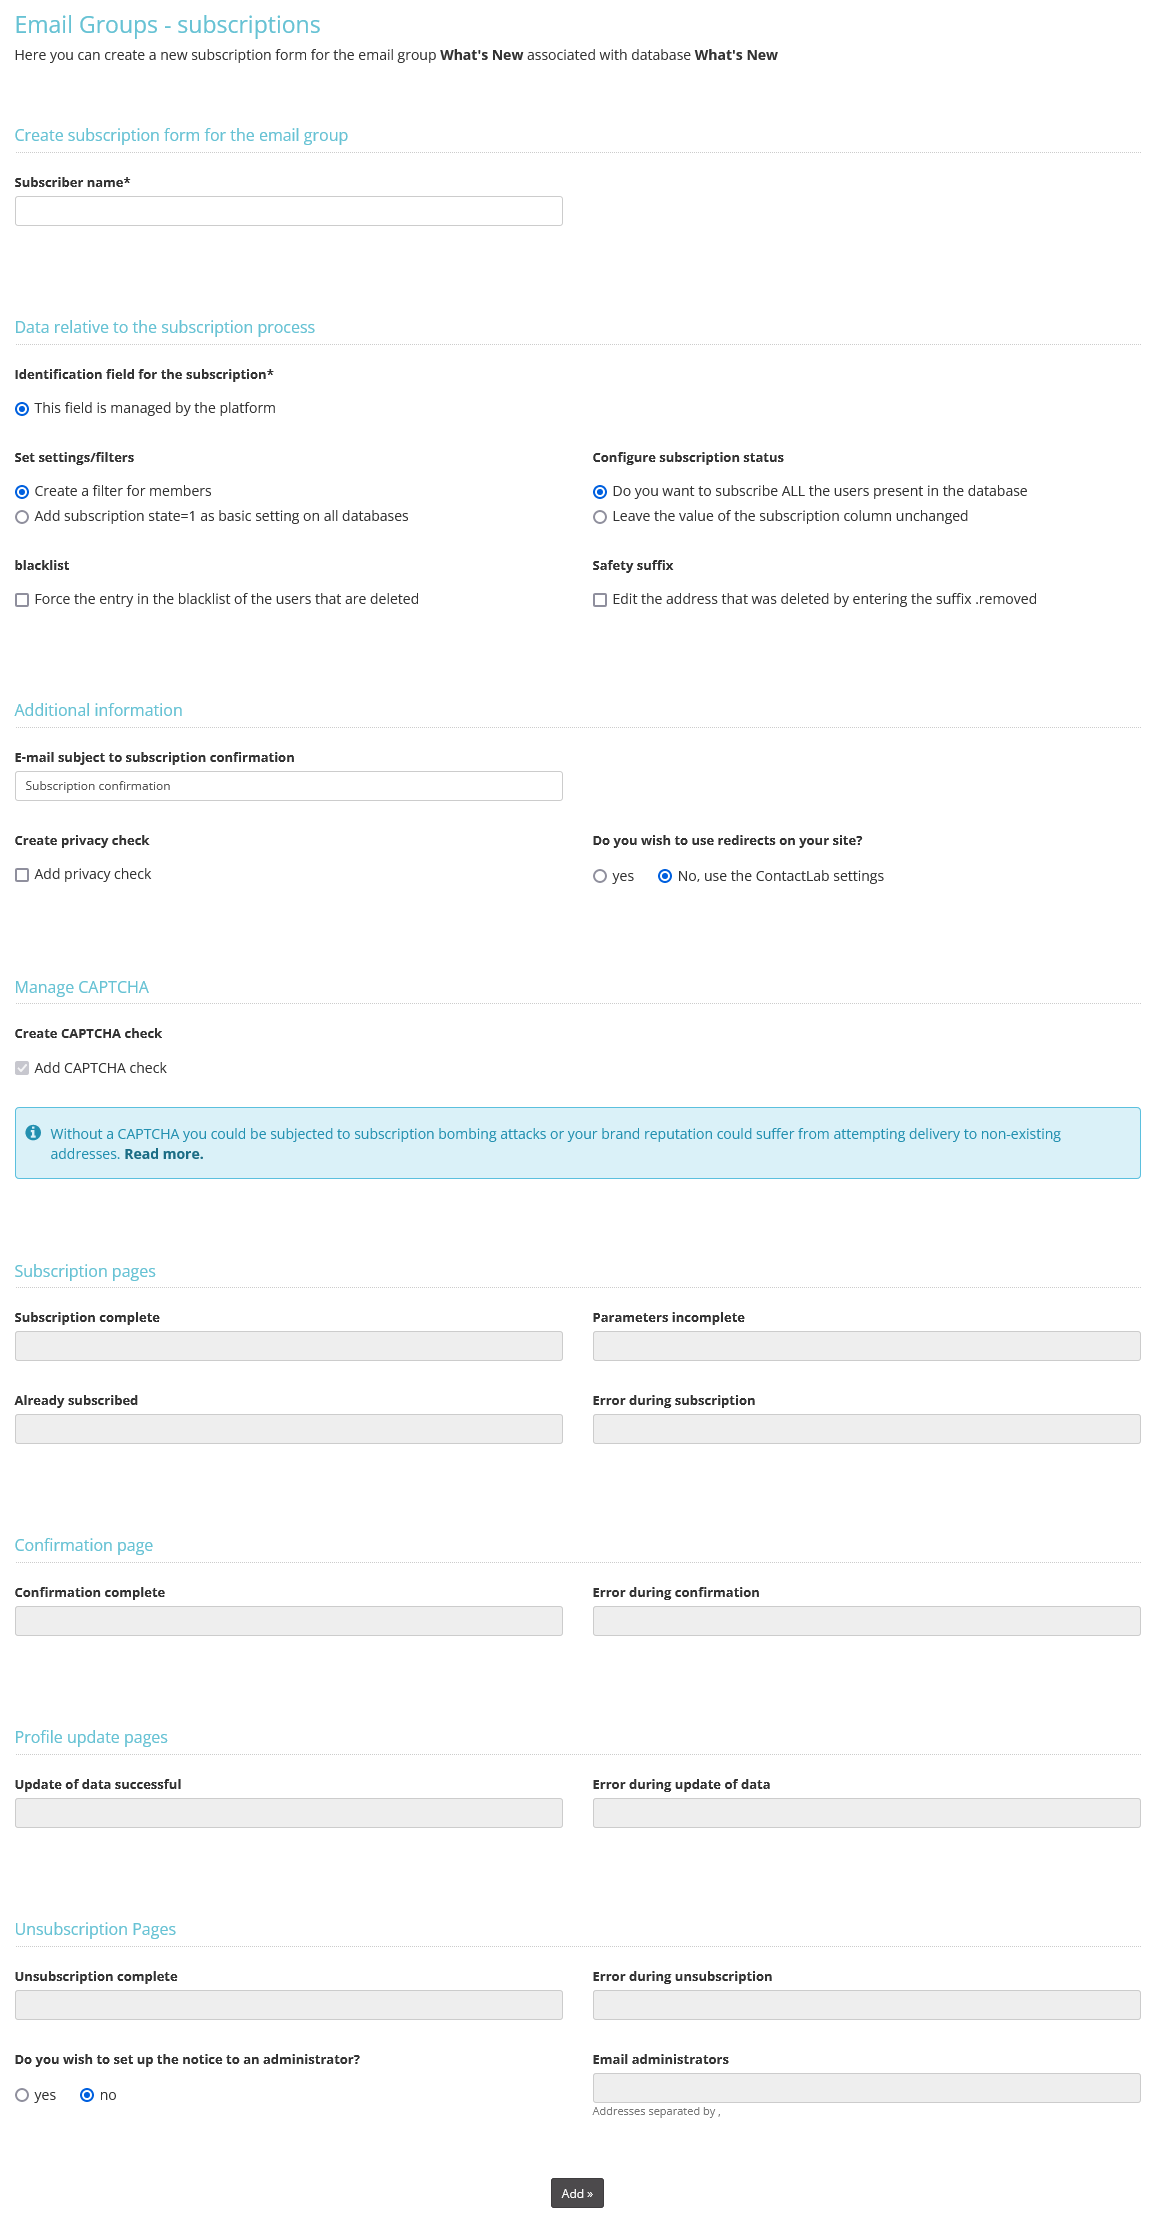
The email groups subscriptions form page
The email groups subscriptions form page enables you to define the properties of the subscription form, according to the selected email group and the associated database.
- Under Subscriber name, enter a unique and recognizable name for the form.
For example, ‘Maison Newsletter subscription’. - Under Data relative to the subscription process, complete the fields as required.
- Under Identification field for the subscription, select one of the following:
- This field is managed by the platform.
Choose this, if you want Contactsend to manage the subscription registration field in the form. The system automatically creates a new field in the database, with a name such as _cls, _cls1, _cls2 and so on. - This field is already present in the database.
Choose this, if you want Contactsend to use an existing database field.
- This field is managed by the platform.
- Under Identification field for the subscription, select one of the following:
Regardless of your choice, the subscription registration field for each contact will contain one of the following numerical values, according to the subscription status:
1: The contact has subscribed
-1: The contact has unsubscribed
0: The contact is pending.
- Under Set settings/filters, select either:
- Create a filter for members.
Choose this, to automatically create a filter for the database, which includes all the contacts who have subscribed.
or: - Add subscription state = 1 as basic setting on all databases.
The subscription registration field is set to 1 (subscribed) for all records. Any contacts set to 0 or -1 will not be displayed in the database.
- Create a filter for members.
- Under blacklist, select Force the entry in the blacklist of the users that are deleted, if required.
- Under Configure subscription status, select either:
- Do you want to subscribe ALL the users present in the database.
By default, Contactsend automatically sets the subscription registration field to 0. If you choose this option, all contacts will be set to 1 (subscribed).
or: - Leave the value of the subscription column unchanged.
- Do you want to subscribe ALL the users present in the database.
- Under Safety suffix, select Edit the address that was deleted by entering the suffix .removed, if required.
This helps avoid returning an unsubscribed contact to the subscription list.
The email groups subscriptions form page creates a double opt-in subscription process. You can customize some of these options.
- Under Additional information, do the following as required:
- Under E-mail subject to subscription confirmation, enter a new subject for the confirmation email, as appropriate.
- Under Create privacy check, select Add privacy check, if required.
This adds a privacy statement to the email, which contacts must accept before subscribing.
The subscription process requires different pages, to which contacts can be redirected, as needed. You can choose to let Contactsend manage these pages or use ones on your website.
Under Do you wish to use redirects on your site, select Yes or No.
- The CAPTCHA check, i.e. the test that checks whether the contact is human or a bot, is active by default and is the so-called invisible captcha. For more details, go to the subscription page.
- If you selected Yes under Do you wish to use redirects on your site, enter the appropriate URL for each page type under Subscription pages, Confirmation page, Profile update pages and Unsubscription pages.
- When you are finished, click Add >>.
You are returned to the email groups – subscriptions page and the subscription is added to the list.
To complete the example used here, the subscription form can now be added to the Contactlab ‘Maison’ website and used to collect contact details in the database.
See the Contactsend Guide for more abut creating and managing subscriptions.