
To view the details of an individual customer in the current workspace/node:
- Click the appropriate entry in the Table of customers.
The Customer details page displays.
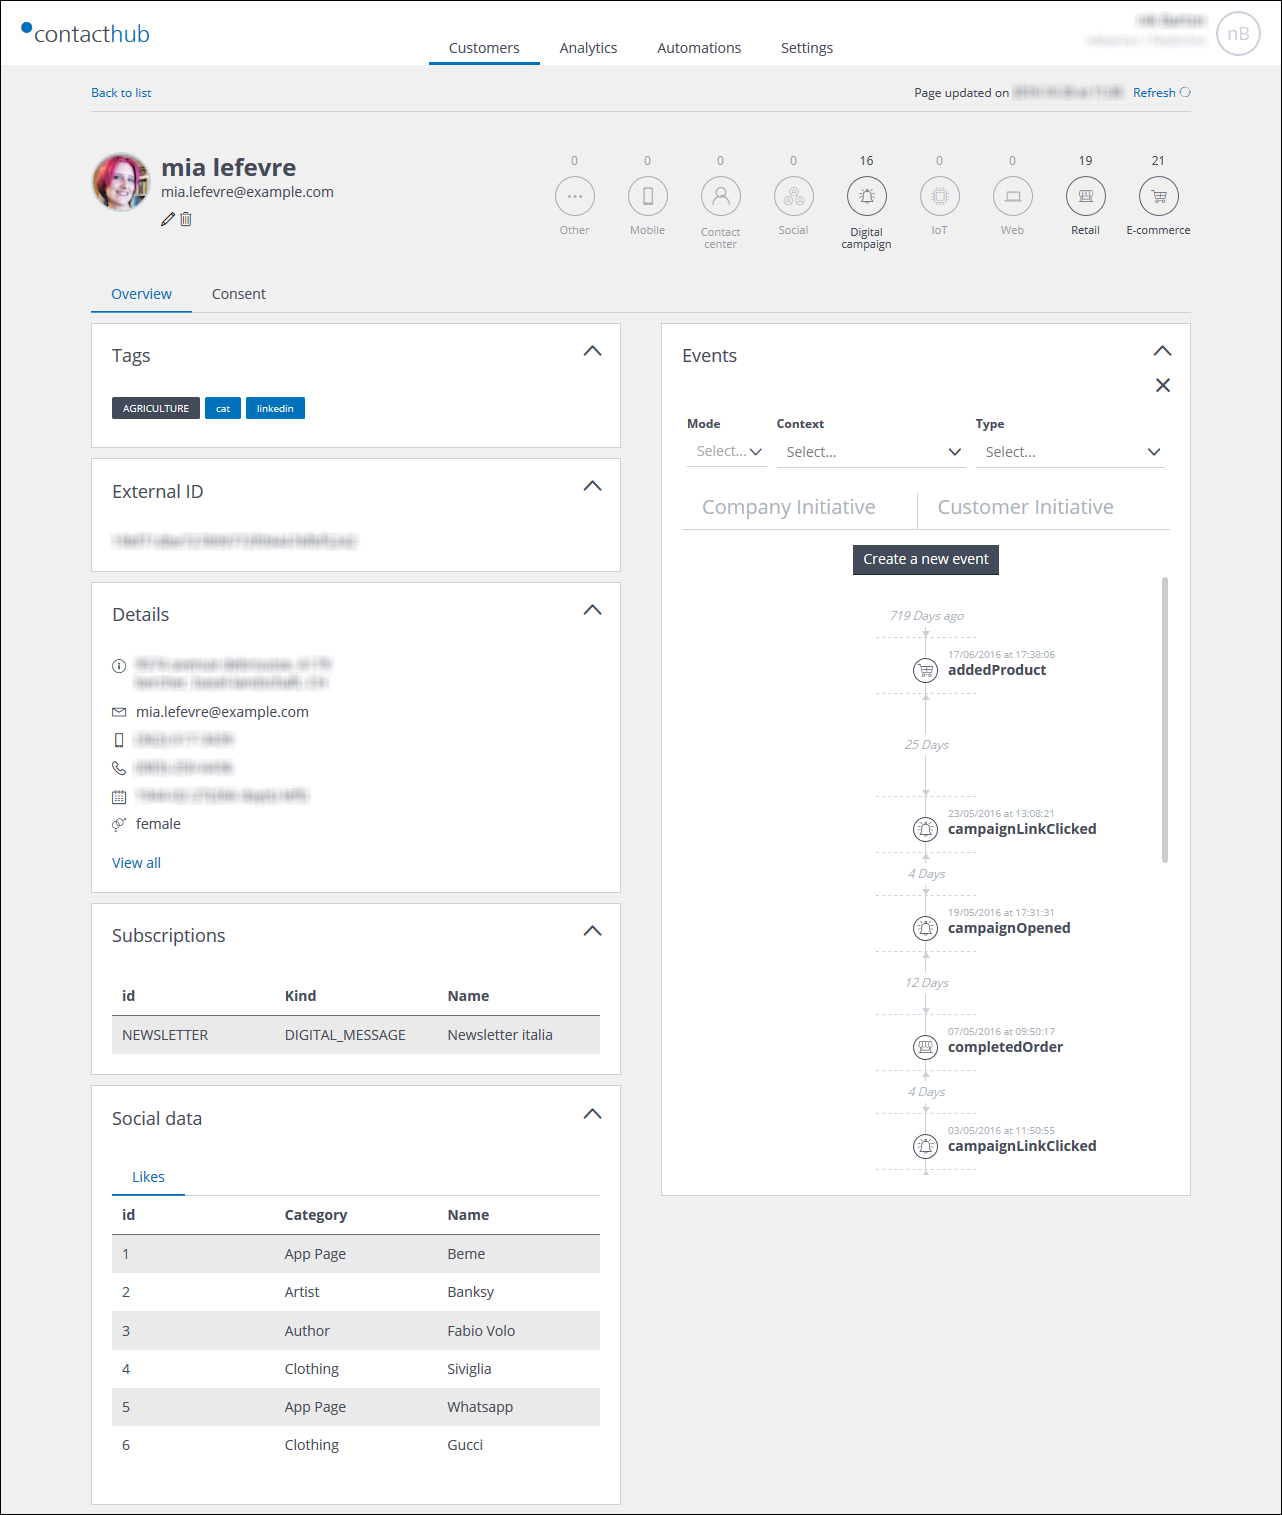
Example of the Customer details page
The Customer details page
The Customer details page includes the following:
- The Customer Summary panel.
- The Event Summary panel.
- The Overview tab.
- The Customer Properties section.
- The Events Timeline section.
- The Consent tab.
Displays the consent categories that are active for the customer, together with any associated limitation or objection settings.
See Viewing customer consents for more details.
The Customer Summary panel
The Customer Summary panel is positioned at the top of the page and includes:
- The customer’s picture, if available.
- The customer’s first and last name.
- The customer’s email address.
- The Edit icon
 .
.
Click to open the Customer properties page, where you can view and/or edit the customer entries. - The Bin icon
 .
.
Click to delete the customer. See Deleting a customer for more details. - A Back to list link.
Enables you to return to the Customers management page and the appropriate Table of customers.
The Event Summary panel
The Event Summary panel is positioned to the right of the Customer Summary panel. It includes a summary of events related to the customer, broken down into categories such as e-commerce, web, retail, digital campaigns and similar.
The Customer Properties section
Positioned to the left of the page, the Customer Properties section is made up of panels that are only displayed, if relevant data is available.
The section may include the following panels:
- Tags
The tags that are manually or automatically associated with the customer.
If you are viewing the details of a customer from an aggregate node, any duplicate tags are removed. - External ID
Displayed if an external system identifier has been defined. - Details
Provides access to all of the customer socio-demographic data, according to the Base and user-defined Extended properties.
See the Glossary and Understanding properties for more about Base and Extended properties.
The panel displays the following customer details:-
- The address.
- The email address.
- Available telephone numbers.
- The date of birth.
- The gender.
If you click View all, the Customer properties page displays, which includes all of the available socio-demographic data for the customer.
-
- Subscriptions
Displays a summary of the relevant service and/or digital message subscriptions.
If you are viewing the details of a customer from an aggregate node, the subscriptions from all relevant entry nodes are displayed, but with different identifiers.
- Social data
Displays a summary of details that generally come from social media, such as:- Likes.
- Education.
- Work.
- Buying behavior
Displays a summary of the customer buying activities with relation to the brand. - System info.
Displays details such as when and how the customer was registered on the system, together with the source of the registration data and any updates.
Note:
If you are viewing the details of a customer from an aggregate node, an additional Aggregate Profiles panel is displayed.
This includes:
- A list of Match keys.
Shows the matching properties that have been used to identify the same contact or customer. - A list of the entry node profiles that have been aggregated.
The Events Timeline section
Positioned to the right of the page, the Events Timeline section shows all of the recorded events for the customer, according to the date and time they took place.
Filters
You can refine the timeline display by applying the following filters, which appear towards the top of the section:
- Mode
Customer or company initiatives, or all. - Context
The event context, for example, a digital campaign event, a Web event, a retail event and similar. - Type
The event type, for example, abandoned cart, campaign subscribed, clicked link and similar.
Timeline organization
The timeline is arranged as follows:
- Company and brand initiated events appear on the left.
For example, a price has been given to the customer. - Customer initiated events appear on the right.
For example, the customer made a purchase or opened a newsletter.
Click any event to display the details, for example, a completed order.
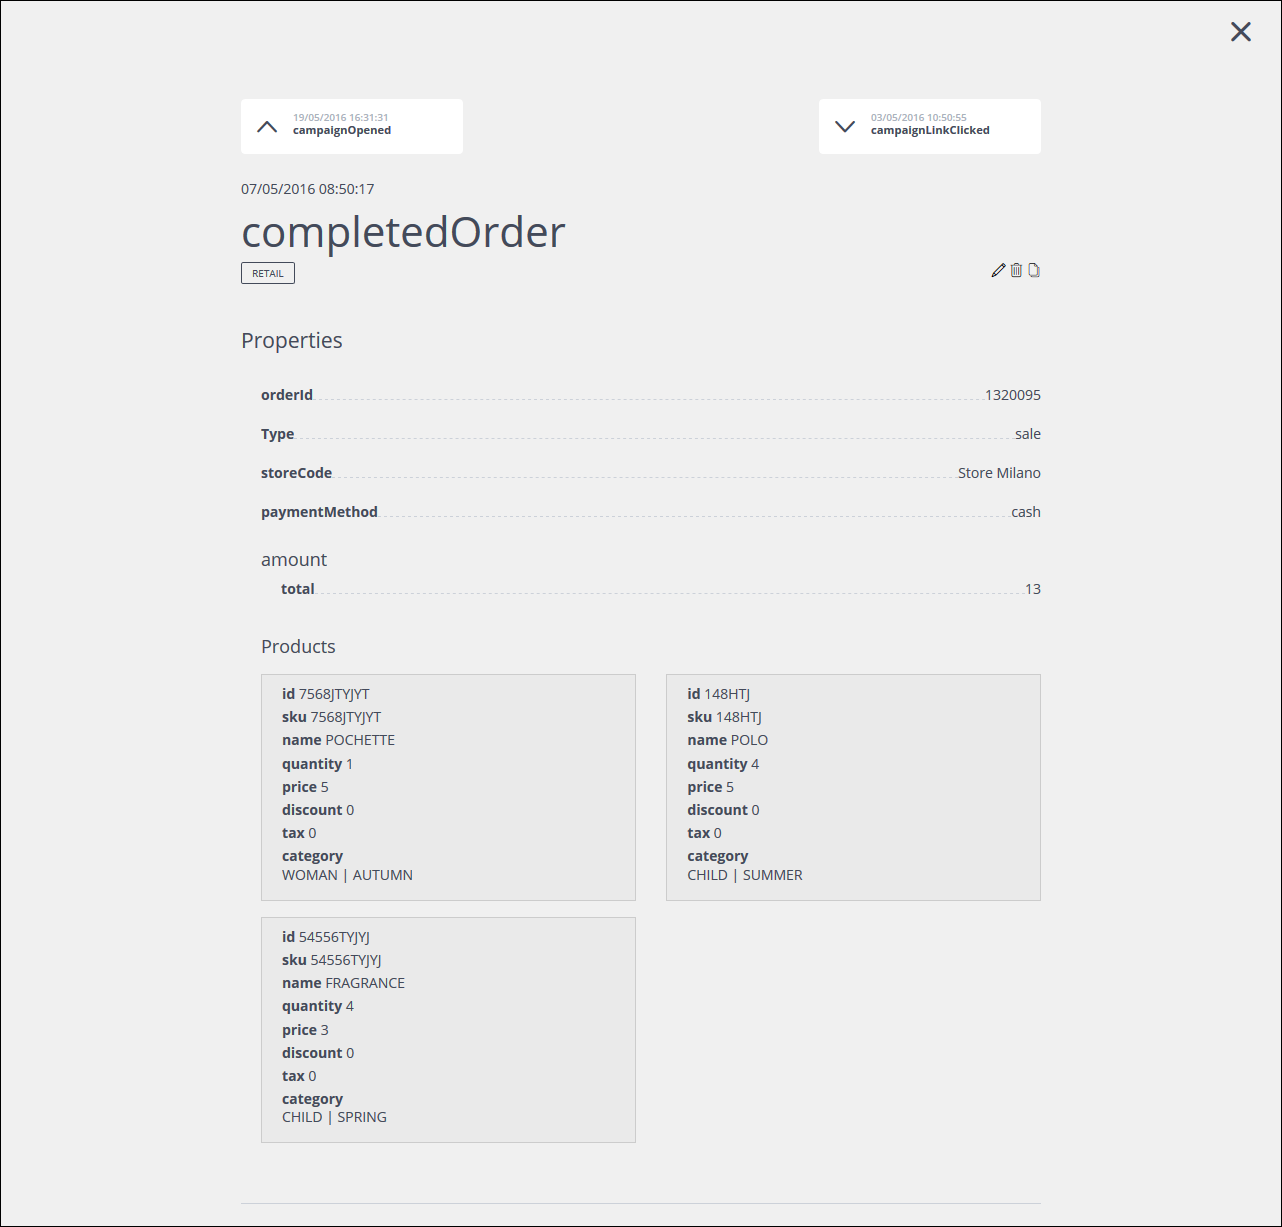
Example of an Event details page
Previous page: The Customer properties page | Next page: Viewing customer consents