At Contactlab, the new star shines on and on… Platform innovations in the first six months of 2019

2019 has continued where 2018 left off, with Contactlab’s new and innovative Marketing Cloud. Now, we can say that without doubt, the highlight of the first half of this year has been the release of several new, powerful and feature-rich enhancements.  Below are just a few examples of what we mean – compelling and practical innovation that raises the platform to unprecedented levels. If you want to know more, then get in touch, right away!


A new UI for the Contactlab Marketing Cloud… The usability interface


A tailor-made workplace, which both integrates a wealth of platform features, and enables you to move from one module to another – while using the same view, company and node – with just a simple click in the sidebar. A modern UI that has been optimized for use on different devices, including tablets. Access and manage your user details, swap between modules and companies as required, read documentation… But most of all, experience a simple, quick, intuitive and immediate way to enjoy the Marketing Cloud platform.


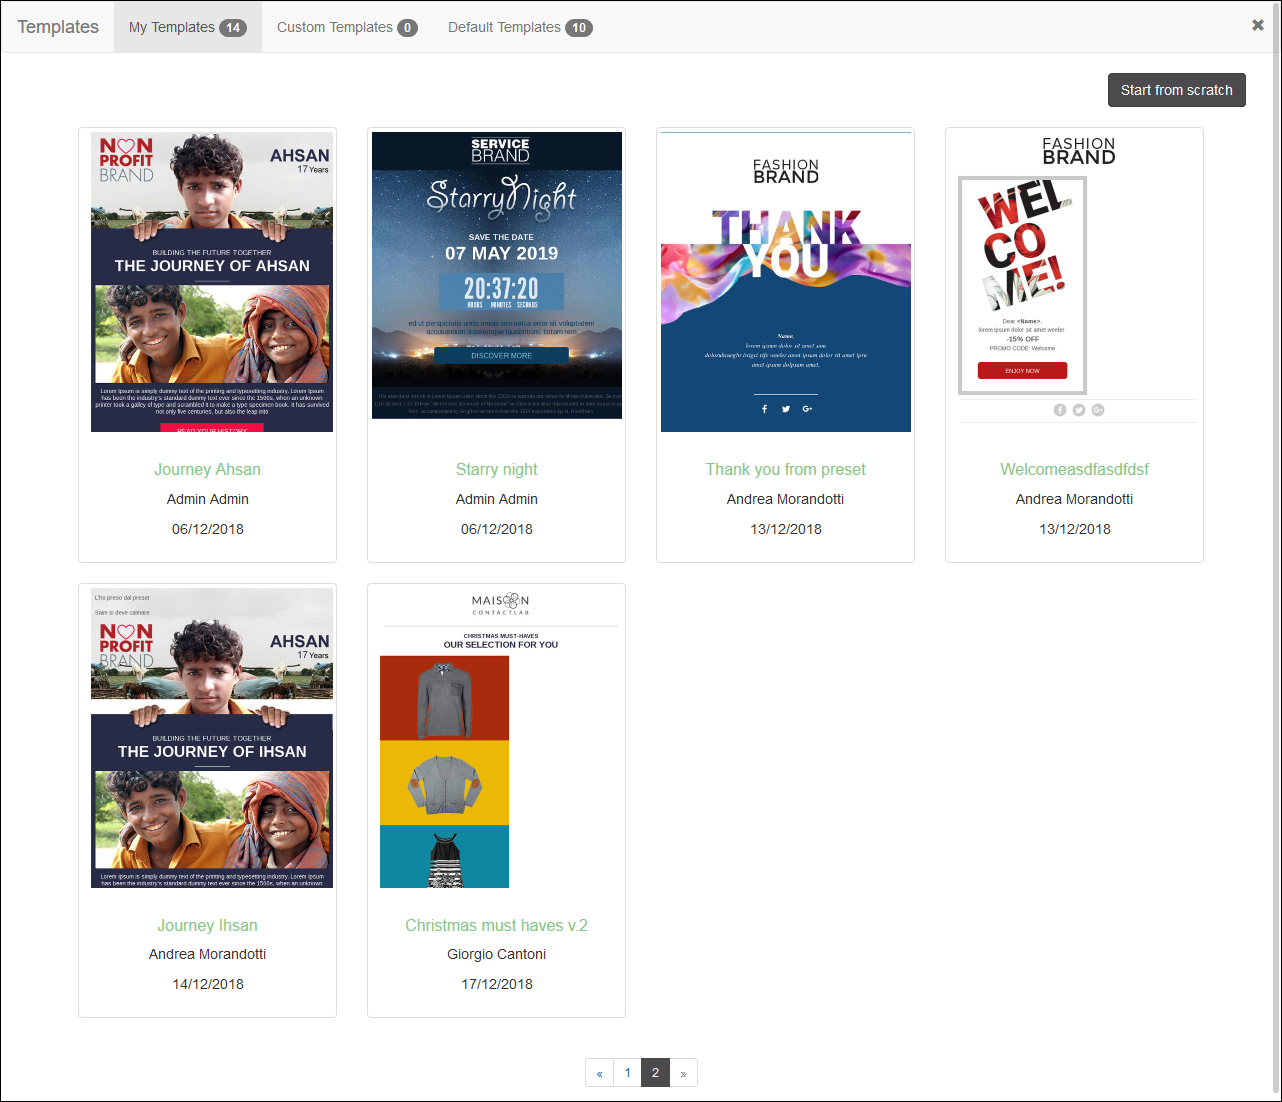
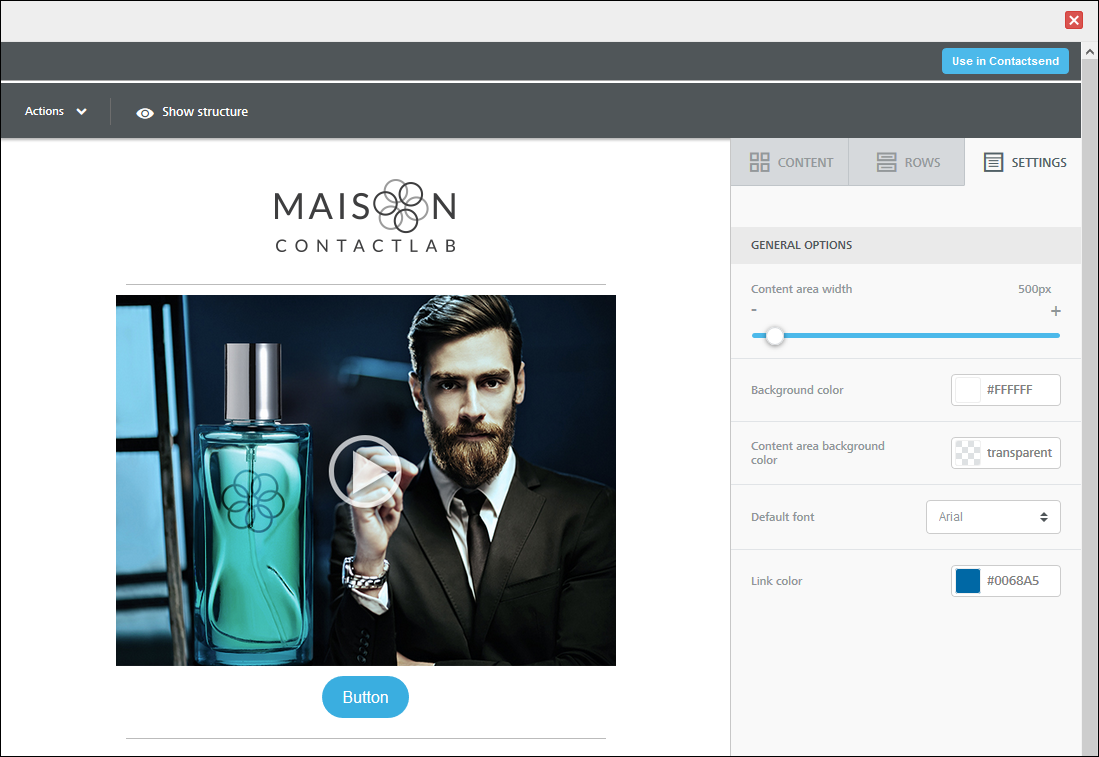
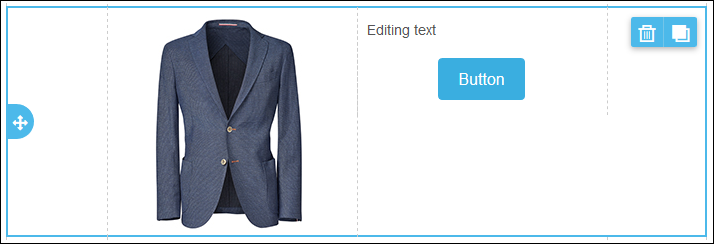
Creating emails has become a breeze with Email Designer


Email Designer


The new Email Designer editor enhances the platform with an innovative way of creating effective emails more simply, intuitively and quickly. You can start from scratch or use one of the templates that are available in the Email Designer library. Freely access the new editor in Send, and immediately start creating responsive design-based emails, using all the simplicity that drag & drop puts in your hands.


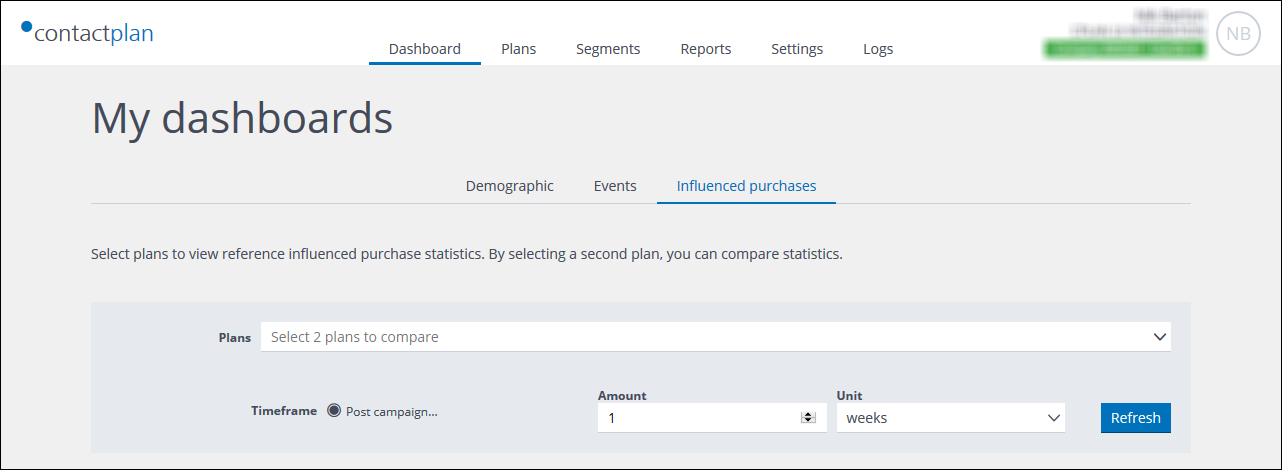
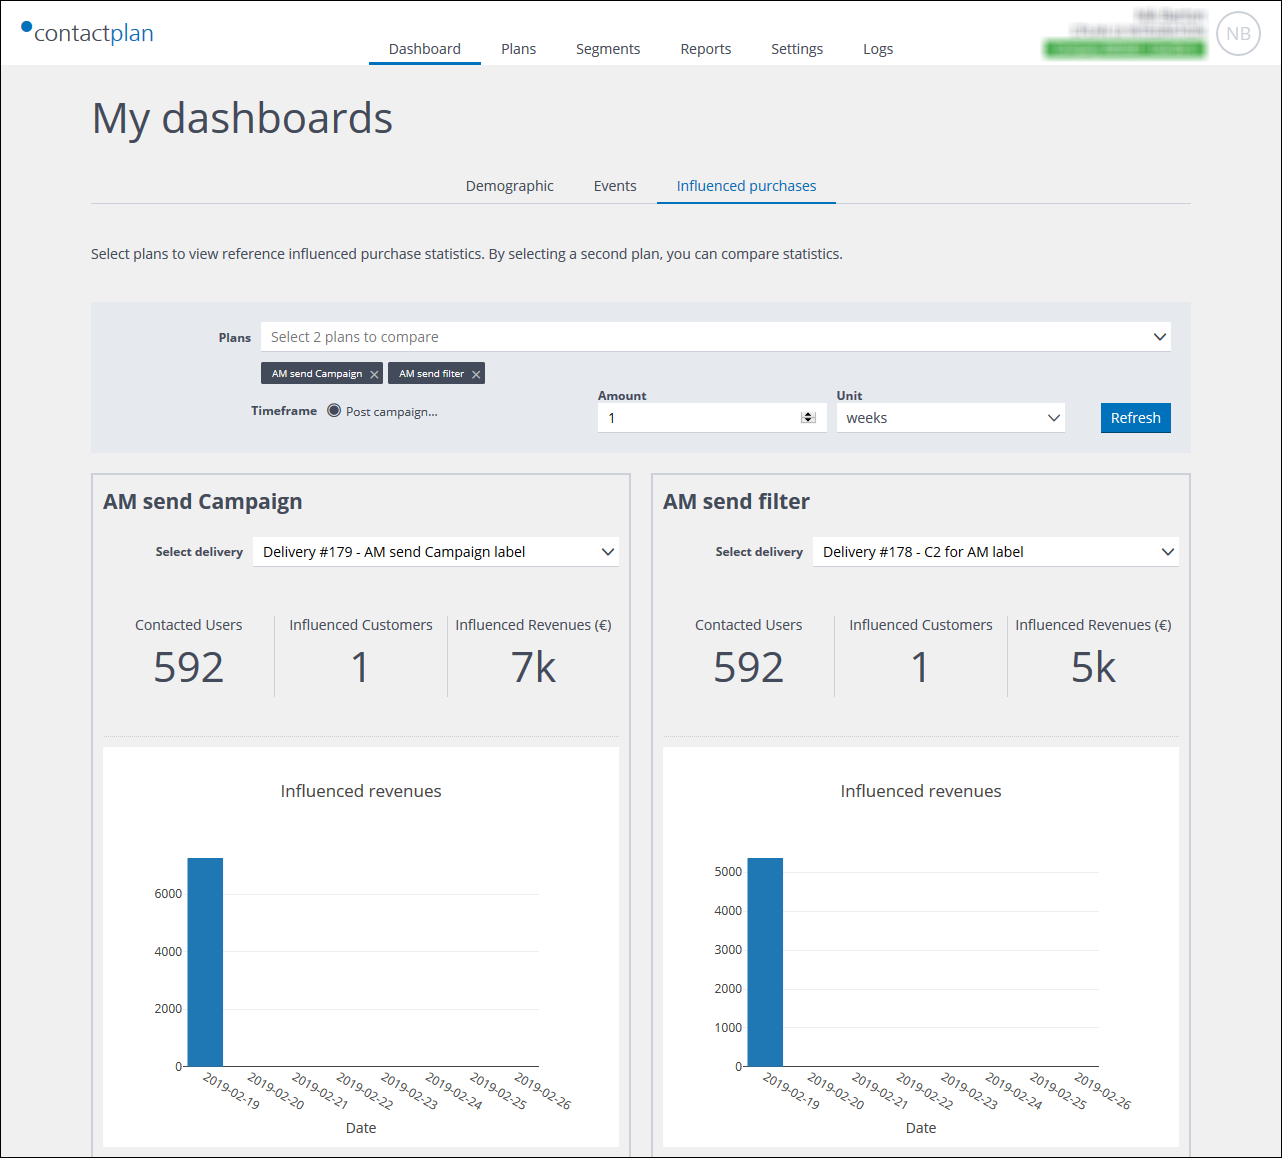
It is no longer enough to just read data… You need to compare and correlate it. Analytics is the ace card that lets you see unexpected results


Analytics
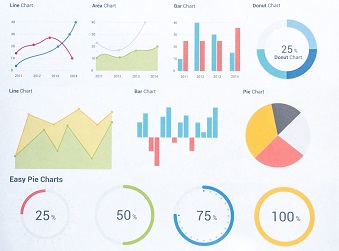
You collect mountains of data about your contacts’ behavior and preferences every day, as their journeys lead them through all the channels they are connected to. The real challenge is not to miss any opportunity – collect, organize and manage data by all means – but above all, equip yourself with the tools that are capable of exploring it and revealing the true meaning. Don’t stop at just the first impressions. Compare and correlate your data in depth, and quickly discover new information and facts that couldn’t be seen before.


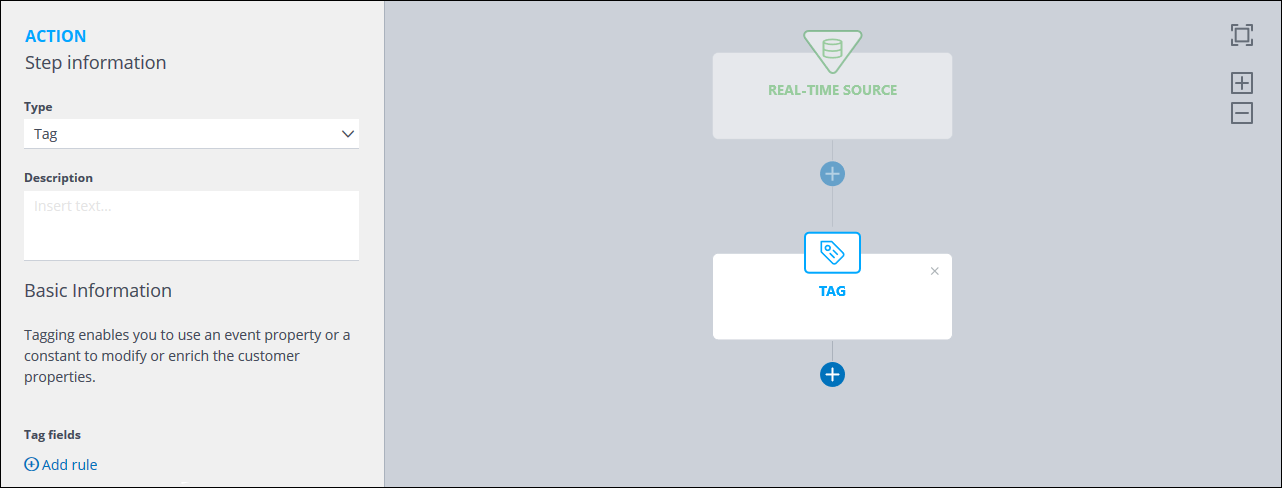
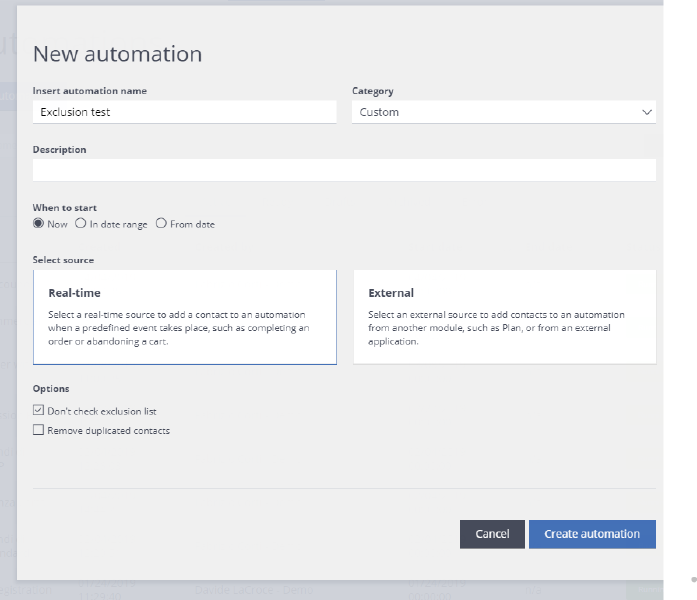
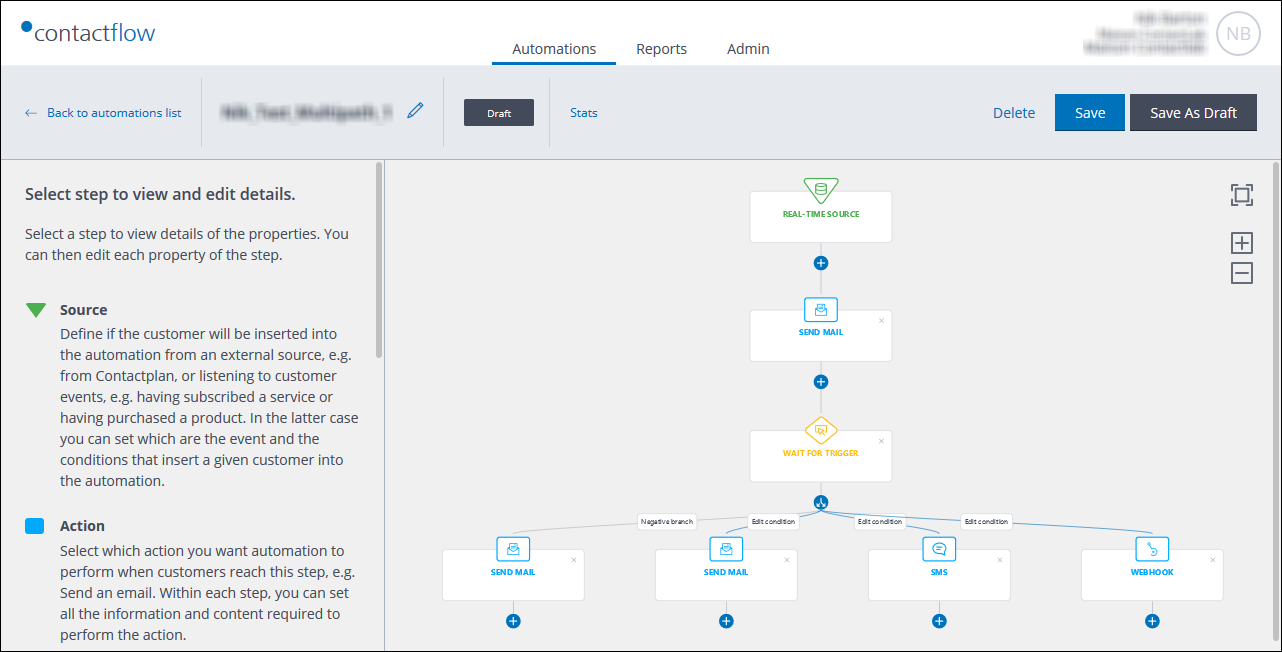
All-embracing personalization of the customer experience… Use all the available data to design multipath automations with
Flow


Marketing Automation

Being able to reach just the right contacts, on their preferred channels, at the most appropriate time, with the messages they are waiting for, is key to successful customer engagement activities. These are the unforgettable experiences that really make a difference to each customer’s relationship with a brand.

Flow marketing automation from Contactlab enables you to tailor personalized journeys for each individual contact, by using all your collected data to get to know and understand them better. And it’s not just email… You can reach the right audience, wherever they are, thanks to webhooks and SMS. SMS messages that can also be concatenated and sent in almost all modern languages.


Contactlab has been included in the first Gartner Customer Data Platform Market Guide 


Gartner
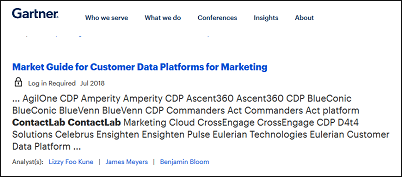
Gartner has published their first Market Guide for Customer Data Platforms for Marketing, and Contactlab has been named among the Representative Vendors globally, as a technology that enables brands to integrate contact data, collected from different sources, into individual profiles. Both personal and behavioral data is combined in one point, then made available again to the various distributed systems – continuously enriched, updated and immediately ready to use.


Read more

Email Designer Series: Together, towards a new way of creating email (2/4)


Start from scratch or begin with one of the templates that we provide for you, in the Email Designer repositories – what really matters, is that you can use this powerful editor to easily create emails even more intuitively and speedily.

Ask our Customer Service to activate it, if you have not already done so. In less than a blink of an eye and completely free of charge, you too can access the editor and immediately start creating responsive design-based emails, using all the simplicity that drag & drop puts in your hands.

To accompany you in your journey with Email Designer, we will give you some interesting  and useful suggestions – enabling you to experience all the benefits and advantages of getting closer to this new feature, and learn how to best use it to reach your contacts with attractive messages, designed to ensure success. Find out more below.


Access

DISCOVER MORE

Discover

DISCOVER MORE

Create

COMING SOON

Use it

COMING SOON


Read more

Create automations that directly augment contact properties with valuable information

A new Flow version that brings additional features to the module is available from April 29th, 2019.

What does this release help you do?

The new Tag action step lets you add information to a customer property, or replace the current value with one that you define.

How?

  1. In a similar way to other Action steps, click ACTION in the Steps selection panel, then select Tag as the Type from the drop-down list.

  1. Enter a Description, if required, then under Tag fields:
    1. Click Add rule and select the appropriate property from the drop-down list.
      Note:
      The options that are available in the next step vary according to the property you select.
    2. Select the required action, such as:
      1. Concatenate with the value.
        Combines the value you define with the existing information.
        or:
      2. Replace with the value.
        Replaces the existing information with the value you define.
        or:
      3. Append the value.
        Adds the value you define to the end of the existing information.
    3. Under Insert text…, enter the appropriate value.
    4. Add further rules, if required.

Take a look at this short video for more details.


What does this mean?

This new functionality is particularly useful when you want to add easily recoverable information to a customer’s records, increase a counter, or replace existing data.


See the Flow Guide for more details or, if you have any questions, contact our Customer Service.

Read more

Optimized journeys for your transactional campaigns

A new Flow version is available from April 12th, 2019, and it includes some new features that enhance the module.

What does this release enable you to do?

You can further refine the variables that include a contact in a specific journey, or which exclude them from it.
For example, you can select whether the automation you are creating should also include contacts that:

  • Are on a suppression list (blacklist).
  • Have a subscription field (CLS field) with a value other than 1.

How?

Simply select the Don’t check exclusion list checkbox on the New automation page. As a result, all the contacts that are registered in Hub and who meet the other conditions set for automation, will be added to the journey and receive the relevant communications, even if they are on a suppression list or have unsubscribed.

The checkbox can be enabled:

  • When the journey is being created.
  • Later, by returning to the  to the New automation page.
    In this case, the option will only be valid from that point forward.

What does this mean?

The new functionality is particularly valuable for service journeys, in support of transactional email and/or text message deliveries. For example, when you need to create an automation that helps manage abandoned carts, or to complete an online purchase.

See the Flow Guide for more details or, if you have any questions, contact our Customer Service.


Changelog
Guide
Resources
Support


Read more

Which plan helped influence sales the most? Compare them and discover the best one

Are your contacts more attracted by an adventure weekend, or by realizing their dream of traveling round the world?
Which of two newsletters has influenced your sales the most?

You decide to dedicate two of your monthly newsletters to different types of travel. The first promotes all-inclusive adventure weekend packages, while the second focuses on a journey that dreams are made of… the trip most people wait a lifetime for. But which captured your contacts attention the most, and had the greatest impact on travel sales?

With Plan’s new dashboard, you can readily find out which activity has been more successful. You can also discover, for example, whether the most popular product following the plan’s delivery, is one suggested by the newsletter, or whether the five best selling items include any surprises.

Plan lets you compare the results of your deliveries in just a few clicks, and determine the influence your scheduling has on product sales, by displaying the facts side-by-side.

Here’s how:

  1. Sign in to the platform and select Contactplan.
  2. Click Dashboard in the Control bar, then the Influenced purchases tab on the My dashboards page.
  3. In the top panel, select an appropriate Plan and set the Time frame.
    After a short pause, the total number of people contacted, the number of influenced customers, and the total influenced revenue are displayed. The subsequent charts show, for example, the revenue distribution over the chosen time frame and the top five products that have been bought.
    Note:
    If more than one delivery is associated with the relevant plan, you can select the appropriate one to display, using the field beneath the plan name. If no data is available for the relevant time frame, a warning displays.

Example of the top panel of the Influenced purchases tab

  1. Now select the second plan and set the appropriate time frame.
    The results of both campaigns display next to each other, allowing you to readily compare results.

Example of the Influenced purchases tab with two plans compared

  1. Once you’ve, for example, identified the most effective of two plans, you can then compare it with another, simply by closing the one you no longer require (click the ‘X’ icon next to its name in the top panel) and selecting a new one, with the appropriate time frame.
    Note:
    To retain optimum system responsiveness, you can only have two plans open at the same time.

Comparing two or more plans is that easy. Take a look at the step-by-step video for more details.

For more information, see the Contactplan Guide or contact our Customer Care.

Read more

Differentiate your contacts’ journeys when important data is added to their profile

Imagine you want to enhance the data in your customer profiles, and ensure you have each contact’s date of birth and city of residence available, ready for tailored campaigns based on the use of that information.

Watch the following video and discover how new features in the latest release of Flow can help you differentiate paths and steer contacts towards the goal… to improve the data in their profiles.
This short video shows how to configure such an automation in easy to follow steps.


Read more

Thank customers for their purchases, automatically promote your range, and gather more details about their interests

Fantastic!! Your customers have responded well to your latest promotion, buying products from your new range as a result, but where to now?

How about automatically following up an initial thank you mail and special loyalty offer, with individualized communications that are tailored to each customer’s interests and preferred channels? With Flow, creating automatic, interactive and multi-option communication campaigns  becomes second nature.

In fact, it’s as easy as this:

  1. Sign in to the platform and select Contactflow.
    The My automations page displays by default.
  2. Click Create new automation, complete the appropriate fields on the New automation page, ensuring you select the Real-Time source option, then click Create automation.
    The Automation configuration page displays.
  3. Click the Real-time Source panel, then under Incoming event in the Sidebar, select Completed order as the event that will trigger a contact being added to the automation.
  4. Under Event rules, add conditions to refine the incoming event, for example:
    1. Click Add condition, then select Products – category from the drop-down list, followed by Contains and Winter.
      This identifies purchases from the winter product range.
    2. Click Add condition again and select And as the interaction condition.
    3. Select CompletedOn from the drop-down list, and Equal to or greater than, then enter the date when the range became available.
      This differentiates the current range from previous years.

You can continue to add event and demographic rule conditions, if required, and/or a Removing event that determines when a contact is removed from an automation, according to your needs. For example, you could add a minimum total purchase value, to filter out those who just bought a very small item. These customers could then be added to a different, more appropriate automation.
See the Flow Guide for more about configuring a Real-Time source.

  1. When you are finished, return to the Automation configuration panel, and continue creating the automation, as follows:
  2. Under the Real-time Source panel, click + and select ACTION.
    An action panel is added to the Automation configuration flow diagram, with the name Choose Type.
  3. Click the panel to display the Action Step information in the Sidebar, select Send mail as the Type, then configure the initial ‘Thank you’  email.
    Don’t forget to include a link to a web page where customers can record their interests and contact preferences, to receive, for example, a special loyalty discount.
    See Adding an Action step > Send mail configuration options in the Flow Guide for more details.
  4. When you are finished, click + under the SEND MAIL panel in the Automation configuration flow diagram and select CHECK.
    A check panel is added, with the name Choose Type.
  5. Click the panel to display the Check Step information in the Sidebar, select Wait for Trigger as the Type, Service subscribed as the Event and 1 week as the time interval before moving contacts to the negative path.
  6. In the Automation configuration flow diagram, click the Path button beneath the check panel once to generate the negative (No) path, then another three times to create the positive (Yes) paths. Ensure that you select ACTION as the first step for each path.

The different positive paths are used to send follow-up communications, employing the preferred contact method that each customer has identified, through the ‘Thank you’ email web page. Hub records the choice in each customer’s individual profile, while Plan is used to create the appropriate filters for the email, SMS and Push deliveries. See the Hub and Plan guides for more details.

  1. Click Edit condition above each positive path and do the following:
    1. Give the condition an appropriate Name, such as ‘Select service event’.
    2. Under Event rules, select serviceName and Equal to, then enter the name of the relevant database column that is used to record your contacts’ channel preferences and responses to the first mail, such as LoyaltyProgramme.
  2. Click the first, second and third positive action panels in turn, and in the Sidebar, select Send mail, SMS or Webhook (for a Push message) as the Type, so the result is one of each.

Example of the initial automation flow diagram

  1. Configure the email, SMS and Webhook options in the Sidebar. For example, do the following for a Webhook:
    1. Add a Description, as required.
    2. Under Basic Information, enter the URL to which the HTTP request should be sent.
      This should be the URL of the external Push notification service that you use.
    3. Under HTTP headers, enter the appropriate key/s and value/s to add a header to the Push message, as required.
    4. Under JSON Properties, enter the appropriate key and value pairs to define the Push message. For example, the customer ID, the message template and the authorization token.
      Note:
      An appropriate authorization token is always needed.

See Adding an Action step in the Flow Guide for more details about adding an email, SMS or Webhook step.

  1. When you have configured the initial action step for each channel, continue to add action, check and delay steps until you have a complete campaign.
    A campaign that is both proactive in encouraging people during their journey, and one which responds to your customers’ behavior and purchase activity, through their preferred communication method. See Creating an automation in the Flow Guide for more details about each type of step.
  2. Once you have completed the three positive (Yes) paths, select the action step in the negative (No) path and choose Send mail as the Type in the Sidebar.
  3. You can then go on to configure a reminder email, to be sent to all those customers who didn’t respond to the initial ‘Thank you’ message, in the Sidebar.
    Perhaps one that invites them again to register their interests and contact preferences, to receive the special loyalty discount.
  4. Complete the negative path as required.
    You could for example, repeat steps 8 to 14 above, to replicate the three positive communication paths for when further customers respond to the second mail, while adding an End step to the new negative path, for those who do not react.

Flow is so flexible that the choice is always yours.

The above example describes just a few of the available options. But you have many, many choices available to you. So why not start to explore the flexibility, power and strengths of Flow today?

Note:
The events and categories that are actually available to you, depend upon how Hub has been configured for the relevant workspace.

For more information, see the Contactflow Guide or contact our Customer Care.

Read more

Use Facebook Lead Ads integration? Update your permissions by February 1st

If you use the integration between Send and Facebook Lead Ads, you need to renew the access authorization permissions for the Facebook pages to which you ad. campaigns are connected.

Facebook recently changed its authorization policies and is now asking for explicit permissions to access pages connected to advertising accounts. It is important that you immediately update the permissions for your Facebook integration. From February 1st, 2019, you can ONLY create new connections between your Send databases and Lead Ads campaigns IF the new permissions are correctly set.

Don’t worry, you can do it in minutes from within the Send UI!

Here’s how…

  1. Log in to Send and access the Configure > Integrations > Facebook section.
  2. Click the Authorizations tab and then the Pencil icon (edit) next to your advertising account.
  3. In the next screen, click the blue Continue with Facebook button.
  4. If you are not currently logged in to Facebook, you are asked to enter your username and password.
    Note:
    Log in with the profile that has access to your Facebook advertising account.
    Once your identity is confirmed, you’ll see the following dialogue screen:

  1. If you click the OK button, you automatically authorize access to all relevant pages.
    In this case, the dialogue window closes, and you return to the Send page.
  2. Now just click the Save button, to confirm your changes.

You are finished. The permissions are correctly set, and you can continue using the integration with all your Lead Ads.

Can I see the status of each authorization?

Sure! If you want to check which Facebook pages you are going to authorize before you click OK:

  1. Click the Choose what you allow link.
    A list of your pages is displayed.

  1. The first option you see at the top, Access leads for your Pages, must be enabled.
    If you disable this, the Send integration won’t be allowed to access data from any of your pages and Lead Ads forms.
  2. You can individually set the permissions for the pages you see in the list under Pages.
  3. When you are finished, click OK.
    You return to Send.
  4. Click the Save button to confirm your changes.

Update your permissions right now and continue to exploit the full potential of the integration between Facebook and the Send module of the Contactlab Marketing Cloud.

If you have doubts or experience any difficulties, don’t hesitate to contact our Customer Service.

Read more

Creating an email delivery with Send and Email Designer is as simple as 1, 2, 3…

Envisage creating a well targeted and personalized email delivery in a few simple, easy-to-follow stages…

In this tutorial, you will learn how to use Send and the new Email Designer content editor to create powerful, personalized and effective email deliveries, which you can deploy just when you require.

Just step this way…

As an example, imagine you have decided that you want to invite your top spending customers to a special local event, where they can preview your latest collection. The teaser email should give each contact the opportunity to choose exactly which event they want to attend, and let you know whether they will come alone, or with friends.

Note:
For a complete description of all the steps and controls mentioned in the following example, as well as other available options, see the Email deliveries page in the Send Guide.

Do the following:

  1. Sign in to Send, then click Create > Email campaign.
    The list of Email groups displays.
  2. Locate the appropriate group and click Create delivery to display the Procedure selection page, where you should select Create a new campaign.
  3. On the Delivery parameters page, under Delivery title, enter a name for the delivery, or leave the field blank if you want to use the email subject instead.
  4. Under Campaign filter, click Select a filter and choose the Best spenders one from the drop-down list, which you created earlier in Plan.
    See the Plan Guide for more about creating filters for use in Send.
  5. Under Message format, ensure that HTML and plain text is selected, together with Use dynamic text under Options, and Track opens and Track clicks under Statistics.
  6. Click Next to display the Message content page.
  7. After you have completed the From and Reply to fields, enter the Email subject, for example, ‘A special opening, just for you …
  8. Don’t forget to start personalizing the message by adding the contact’s first name to the subject, as follows:
    • Position the mouse cursor after ‘just for you ‘, then under Insert, select FirstName (or whatever the column is called in your database) from the drop-down list and click +.
      The appropriate string is added to the email subject field.
  9. Under the HTML version panel, click Email Designer.
    The Email Designer Template management page displays in an overlay window.

Example of the Email Designer Template management page

  1. Click the appropriate template, followed by Open.
    For this example, the Starry Night template has been selected, but you are free to use any template that you feel is appropriate.
    The template displays in the Content Editing page.

Example of a template open in the Email Designer Content Editing page

  1. Edit the template as required, for example:
    • Add your company logo at the top.
    • Edit the date of the event.
    • Enter an appropriate description of the event with any dynamic text that may be required.
    • Configure the Discover More button.
      For example, create a link to a web page where the recipient can select the appropriate local event, download tickets, and let you know how many people will be attending.
  2. When you are happy with the email content, click Use in Contactsend.
    Email Designer closes, and the email content HTML is transferred to the HTML version panel of the Contactsend Message content page.
  3. Under Plain text version, click Plain text from HTML.
    The plain text is automatically generated from the HTML version.
  4. Under Preview on different clients, click Generate preview to see how the message will display on different devices.
  5. When you are finished, click Next to display the Link tracking page.
    If there are any problems with the HTML version, notices display. If so, correct any issues, then click Next again.
  6. Click Check the links to test that they work correctly, then click Next.
  7. On the Summary page, review the details of the email and, if you want to make any changes, click Back until you have returned to the appropriate page.
  8. Under Analysis, check whether the message may be flagged as spam, or whether any links include IP addresses instead of text-based URLs.
  9. When you have finished, click Next to display the Delivery page.
  10. Here, you can send a test delivery, which is highly recommended, and remove duplicate addresses.
  11. Select Confirm your campaign deployment from the Communicate section and click Extract the addresses from the database only at the time of mailing.
  12. Click Finish to display the Email campaign confirmation page, then Go to communicate section to complete the deployment of the delivery, by sending it immediately or on a later date.

Now, you can stop imagining, and create a well targeted and personalized email delivery as simply as 1, 2, 3, with Send and Email Designer.

See the Send Guide for more about creating email deliveries and using Email Designer, or contact our Customer Care for further details.

Read more

Creating effective email content has just become as easy as drag & drop with Email Designer

The new approach to creating email content without any HTML or other coding skills, and with no need to use a preformatted template (although that option is of course, readily available too) is called Email Designer. A modern, responsive design compliant, and very effective editor, which has recently been added to your choice of options in the Contactlab platform.

In this tutorial. You will learn how to quickly and easily create content by using drag & drop tools to define the structure, then simply and intuitively adding the message, images and pretty much anything else you require, including dynamic links for individual personalization.

How does Email Designer work?

As an example, consider an email to welcome new customers to your e-commerce site and thank them for their initial purchase. While a suitable template is already available on Email Designer’s template page, you want to try something a little different. Do the following:

  1. Sign in to Send, click Create > Email campaign, locate the appropriate email group, then click Create delivery, to display the Procedure selection page.
  2. Click Create a new campaign, complete the Delivery parameters page as required, making sure that Use dynamic text is selected, then click Next.
  3. On the Message content page, complete the Sender details and Email subject fields, then click Email Designer, positioned under the HTML version panel.
    The Email Designer Template management page displays in an overlay window.
  4. Click Start from scratch to display the Content editing page.

Example of the Content Editing page

Note:
For a complete description of all the controls and steps mentioned in the following example, as well as other available options, see the Creating, editing and managing content or templates with Email Designer page in the Send Guide.

  1. The first thing you need to do is define the basic settings for the message. To do so:
    1. Click the Settings tab, located in the Sidebar and set the Content area width to 600 pixels.
    2. If your company uses a special font for its communications, you can also select it here, under Default font.
    3. Otherwise, leave the remaining settings set to their default.
  2. Now click the Rows tab to define the column layout of your email.
    The default email layout already includes a single column row block at the top of the page in the Editing panel, which you can use, for example, for your brand’s logo, a heading and perhaps your initial message. To add further column combinations:

    1. Drag the appropriate tile from the Rows tab, for example, two equal width columns, onto the Editing panel and drop it in the appropriate place. In this instance, below the default single column row block.
      When you drop the tile, the resulting block’s width, together with the column layout it includes, automatically adjusts to the Content area width that you set in Step 5a above.
    2. Continue to add row and column configurations to your email, as required. To complete this simple example, drag and drop another single column row beneath the two column block you have just added.
      Note:
      It is generally recommended that you keep the layout simple, so you do not risk confusing the recipient with an over complicated design.
  3. Next click the Content tab to define the type of content that you want to add, for example:
    1. In the top row, drag and drop an Image tile, followed by two Text tiles, positioned vertically below the previous block.
      Note:
      When using a single column layout, content blocks can only be ordered vertically. They cannot be added horizontally side-by-side.
    2. In the middle row, drag and drop a Text tile and a Button tile to the left column, followed by an Image tile to the right one.
    3. Add a Social tile and a Text tile to the bottom row.
  4. Now do the following:
    1. Hover your mouse over the two-column row block to display its Structure frame, then click the frame to reveal the control buttons.
    2. Click the Duplicate button.
      An exact copy of the block is added to the layout immediately beneath the original.
    3. Click the Image block in the duplicate to display its Content frame, then use the Re-positioning arrows to move it to the left column.
    4. Click the Text block in the duplicate and use the Re-positioning arrows to move it to the right column.

Example of a row’s Structure frame

Once you are finished with creating the email’s structure and layout, you can start adding the content. For example:

  1. In the top row, click Browse in the Image block, then use the File manager to Upload an appropriate copy of your brand’s logo to the Myfiles folder. Click Insert positioned next to its icon, to add the logo to your email. Then:
    1. Click the logo to display its Content Properties and adjust or set them as required.
      Besides adjusting the image size and alignment, you can, for example:
    2. Under Action, add an Image link, so the brand’s home web page opens when the reader clicks the logo.
  2. Click the first text block to display the Text editor controls, then:
    1. Adjust the text size so that it is appropriate for a heading, then add the required text, such as ‘Welcome to our online store!’
    2. To make the email more personal, you could add the customer’s first name to the title, by left-clicking the mouse after the word ‘store’, then clicking the Special links button on the text control panel and adding the appropriate Dynamic field.
      See the Send Guide for more about dynamic text.

The Text editor controls

  1. In the second text box, enter your initial message.
  2. In the second row, add a promotional text, perhaps related to something the customer has already bought from your e-commerce site, remembering to add the appropriate dynamic text. You could also, for example:
    1. Offer the customer a 10% discount off their next purchase online or in-store.
    2. Configure the button that is associated with the text to open a web page where they can collect the discount voucher.
      Note:
      Click the button to display its Content Properties. To change the button text, simply highlight it and enter the text you require.
    3. Add a product image to the content block in the adjacent column, then convert it to a Dynamic image, using its Content Properties.
      Dynamic images enable you, for example, to personalize the visual content for each contact that the email is sent to.
  3. In the third row, add a further promotional text such as inviting the customer to view your range of accessories, with the button linked to the appropriate web page, and perhaps a static image of the range in the Image block.
  4. Click the Social networks block and use its Content Properties to configure each required icon and link.
  5. In the following text field:
    1. Add text such as ‘To unsubscribe or change your email preferences, please click here’.
    2. Highlight the words ‘click here’, then click the Insert link button in the Text editor controls panel, and add the appropriate URL for the unsubscribe web page.
    3. Add any further text as required, such as your company’s contact details.
  6. When you are finished, click Use in Contactsend, to add the relevant HTML to the HTML version panel on the Message content page.
  7. Continue creating your campaign as described in the Email deliveries page of the Send Guide.

Why wait any longer? Start creating your next email content today, using Email Designer and its simple yet very capable drag & drop tools.

See the Send Guide for more about using Email Designer, or contact our Customer Care for further details.

Read more