
Introduction
ContactLab can “automatically” handle group subscriptions and unsubscriptions. This involves creating subscription and in subscription forms that interact directly with the database in ContactLab. It will therefore no longer be necessary to add or remove users from the database by hand (or using Excel files).
Objective
This guide explains how subscription/unsubscription forms work and how to create and manage them.
Summary
- How it works
- Creating a new form
- Consequences on db management
- Managing subscriptions
- Managing unsubscriptions
How it works
ContactLab subscription/unsubscription forms are based on a numerical field, known as the “registration field”, which is added to the database. This field has 3 possible values: 1, -1 and 0.
- 1 means the user has subscribed.
- -1 means the user has unsubscribed.
- 0 means the user is pending (he has received the double opt-in email confirming subscription but has not confirmed).
The form is called “Subscription”: a Subscription form is used to manage both subscriptions and unsubscriptions. Subscription forms are associated with groups even though they act on the associated databases. They can be managed by pressing the “Forms” button next to each group in the Configure > group section.
Creating a new Subscription form does NOT necessarily mean you have to insert it on your site. For example, you can create the Subscription form to manage unsubscriptions only while continuing to enter new users manually.
Creating a new form (new “Subscription”)
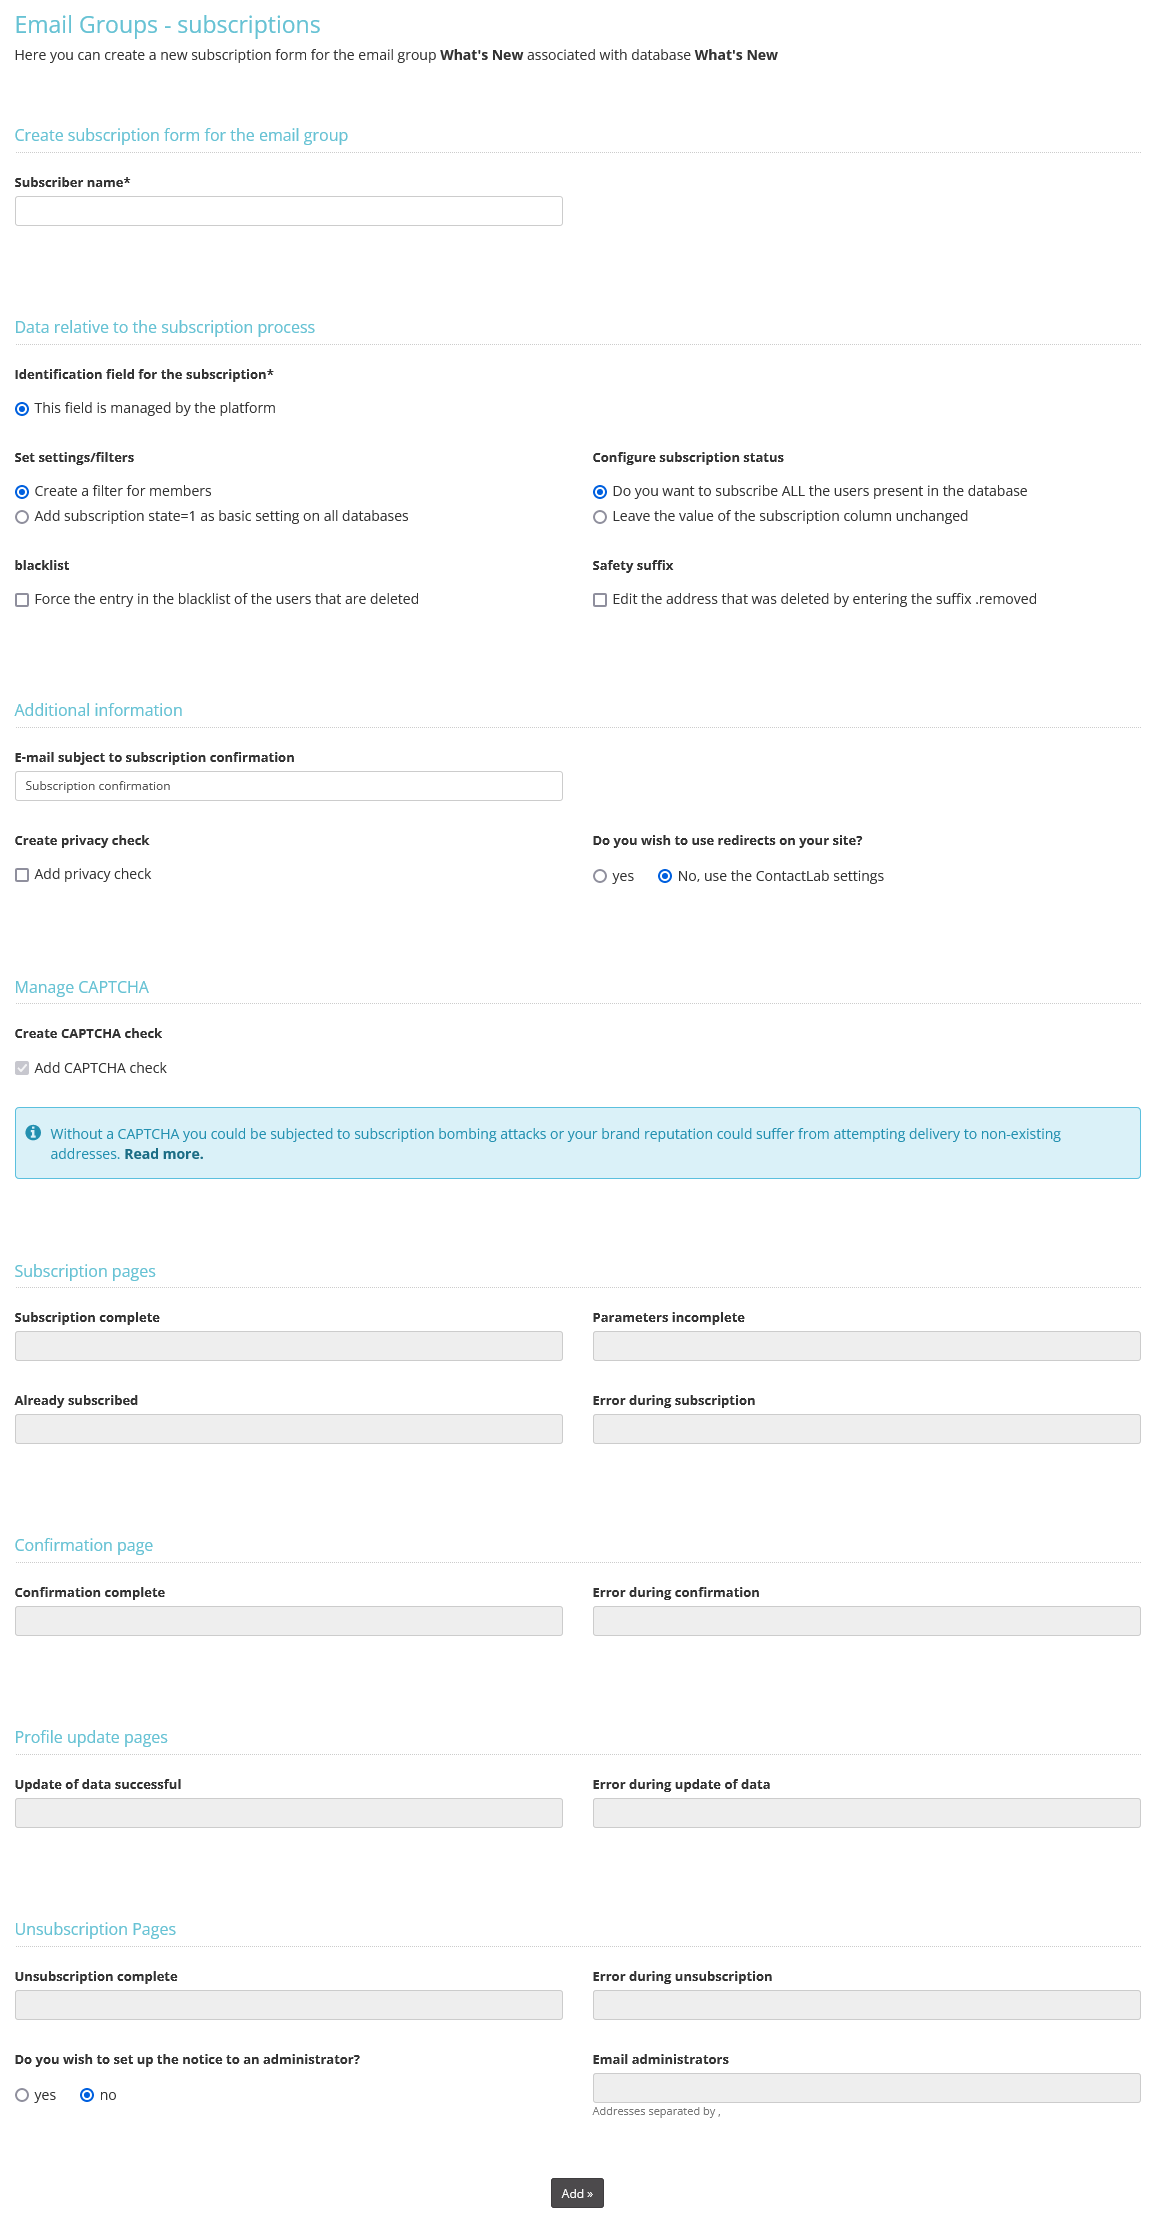
| 1. | Click on the “Form” next to each group in Configure > group. |
| 2. | Click on “Create new form”. |
| 3. | The “registration field” is created automatically and is called __cls1. It is set to 0 by default. |
| 4. | You may select any visible field in the database for insertion in the form. |
| 5. | You may decide whether the confirmation and error pages of the form must reside on the ContactLab server or on your own site. |
| 6. | Confirm creation of the form. |
The invisible CAPTCHA is automatically inserted on forms created from May 2022. For all the active forms at that date:
- Do you use standard forms that already use a captcha?
The invisible captcha is automatically active on both active and new forms you create. - Do you use standard forms that don’t use a captcha but you want to add one?
Go to your form and enter the captcha. You will benefit from the invisible captcha immediately. - Have you customised your form and use a captcha?
Update your form with a new snippet from Send to introduce the invisible captcha. - Have you customized your form, don’t use the captcha and want to add it?
Ask one of our experts to help you configure the invisible captcha.
Effects on db management
Each Subscription form is associated with a group but acts on the database associated with that group. There are some differences when managing a db associated with a group that is associated with a Subscription form.
First of all, you cannot change the db associated with a group that is associated with a Subscription form. You must first cancel the Subscription form, change the associated db and then create a new Subscription form. However, it is best NOT to change a db associated with a group that is associated with a Subscription form.
Additionally, if you manually add db users using an Excel or csv file, you must remember NOT to overwrite the users as otherwise all the information contained in the “registration field” (unsubscribed users, etc…) would be lost. Select the option “Add to records already present” so as to add the new addresses without losing the information already contained in the db.
Managing subscriptions
Click on “Manage” next to a Subscription form to view the “Subscription details”. This section contains a subscription link; click on it to go to a ContactLab page containing the subscription form (the page layout is standard but it can be customised by the staff of ContactLab on request). Or you can find the html code of the form, copy it and insert it in your site. In the last case, if your website page has an “https” index, it should be replaced with “http” once the link has been pasted in the html version.
Managing unsubscriptions
Click on “Manage” next to a Subscription form to view the “Unsubscription details”. You may copy and insert the relative link in the body of the message; users can click on it to go to a ContactLab page (the page layout is standard but it can be customised on request) from where they can confirm their unsubscription. Their registration field value will change to -1.
In order to work, the unsubscription link must be inserted in a campaign of the group with which the Subscription form is associated, and the registration fields of users clicking on the link must be set to 1 (to allow the system to change this to -1).