
To access the email groups section, first click configure in the main menu, then the groups panel on the Configure page, and then click the email groups panel on the Groups page. The Email groups page displays, including the email groups list (figure 1).
Click the appropriate link below to scroll to the information you require:
- The Overview.
- Creating a new group.
- Viewing and editing an existing group.
- Managing subscription, unsubscribe and modify requests.
Overview
All group settings are configured and managed from the Groups page.
This section (figure 1) enables you to:
- Create, view and manage email groups.
- Create subscribe, unsubscribe and modify request forms and access their details.
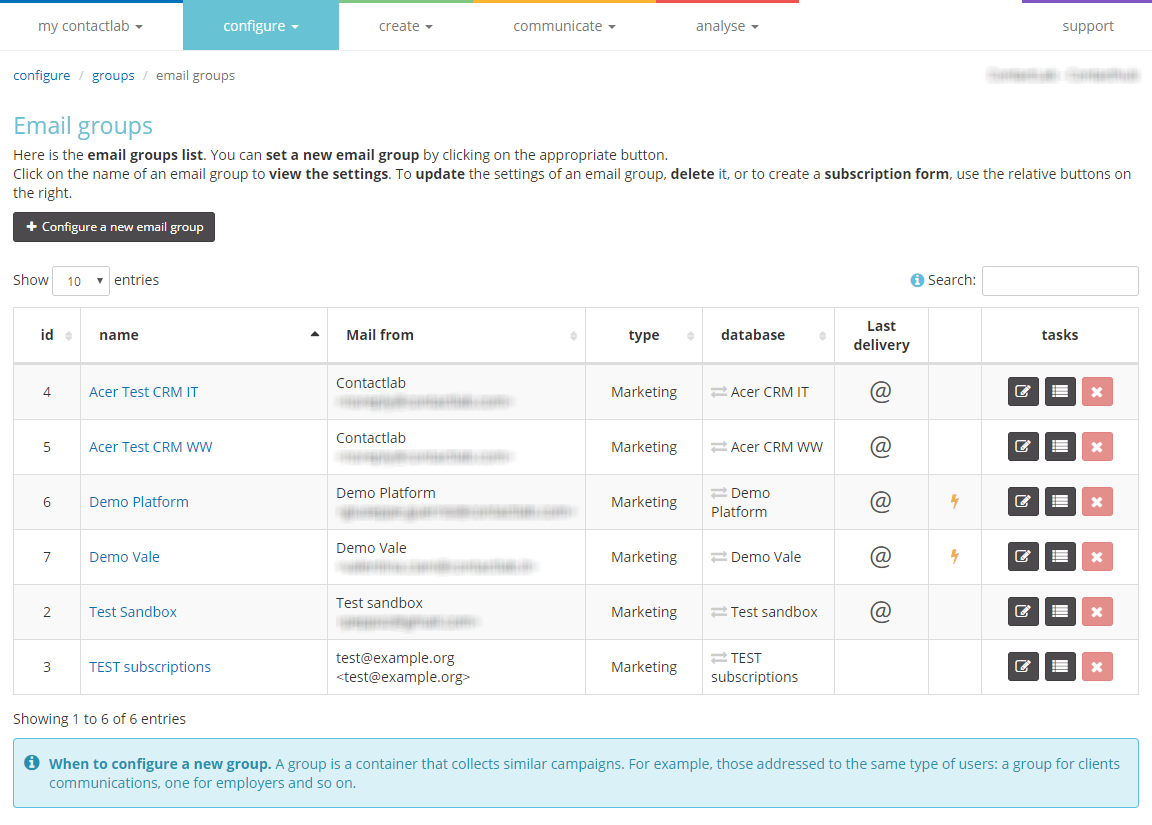
Figure 1: Example of the Email groups page with the email groups list
Note:
Please remember that a group is a container that can be used for an infinite number of campaigns or mailings. A group should not be confused with an individual campaign. For example, a publication such as a daily newsletter corresponds with the group, while each daily delivery represents a campaign.
Creating a new email group
To create a new group, do the following:
- Click + Configure a new email group on the Email groups page.
The Main settings page of the new email group wizard displays.
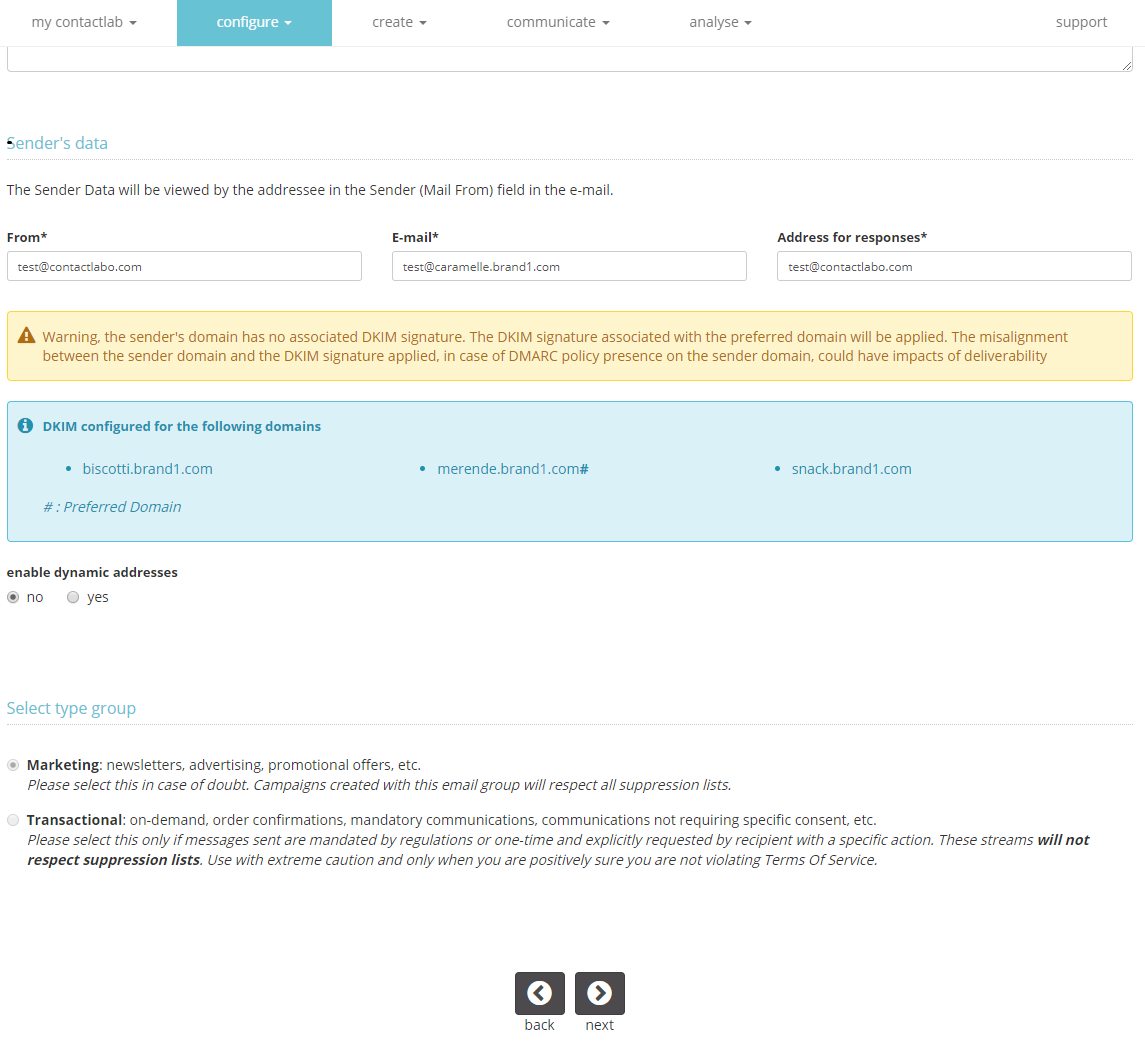 Figure 2: The Main settings page of the new email group wizard
- Under Detail of email group > Name of email group, enter a name for the new group.
- Under description, add a short description, if required.
- Under Sender’s data, enter the From, E-mail and Address for responses details.
NOTE: If you have multi-DKIM enabled, at the beginning of the section are displayed the customer domains that have an associated DKIM signature, in order to verify the sender address with respect to the DKIM signature that will be applied to emails sent using the email group.
Specifically, it is possible to specify the sender’s data (“From”) and in particular its reference domain without constraints.
Nevertheless, in case the selected domain is note compatible with with any of those that have an associated DKIM signature or there are no customer domains with associated DKIM signature, a non-blocking alert is issued to inform the user that it will be applied one of the following:-
- the DKIM signature associated with the domain “contactlab.it” if the company does not have custom DKIM, i.e. if there are no domains of the company with associated DKIM signature
- the signature of the “preferred” domain (i.e. the domain to be applied by “default” in case of mismatch between sender and signed domains). In both cases, the user will also be informed that if a DMARC policy is applied to the sender domain, the misalignment between the applied DKIM signature and the sender’s domain may impact the deliverability performance.
NOTE: The sender domain and the signed domain are considered compatible when:
1) The sender domain (From) matches the signed domain.
2) The sender domain (From) refers to a corporate domain and the signed domain corresponds to a subdomain of the corporate domain.
In the event that a subdomain compatible with the corporate domain exists, outgoing emails are signed with the DKIM most recently created of those associated with subdomains compatible with the corporate domain.
Example.
Sender (From): company.com
DKIM 1 – news.company.it – created on 01/07/2021
DKIM 2 – bulk.company.it – created on 01/01/2022
In the example case, the DKIM No. 2.
3) The sender domain (From) and the signed domain are subdomains of the same corporate domain.
In the event that there is more than one subdomain with an associated DKIM signature, outgoing emails are signed with the most recently created DKIM from among those associated with subdomains compatible with the sender’s domain.
Example.
Sender (From): breaking.company.it
DKIM 1 – news.company.it – created on 01/07/2021
DKIM 2 – bulk.company.it – created on 01/01/2022
DKIM 3 – subs.company.en – created on 01/09/2022
In the example case, DKIM No. 3. -
- Select whether you want to enable dynamic addresses.
- Under Select type group, select whether the group is for Marketing messages or Transactional communications.
- When you are finished, click next.
The Database selection wizard page displays.
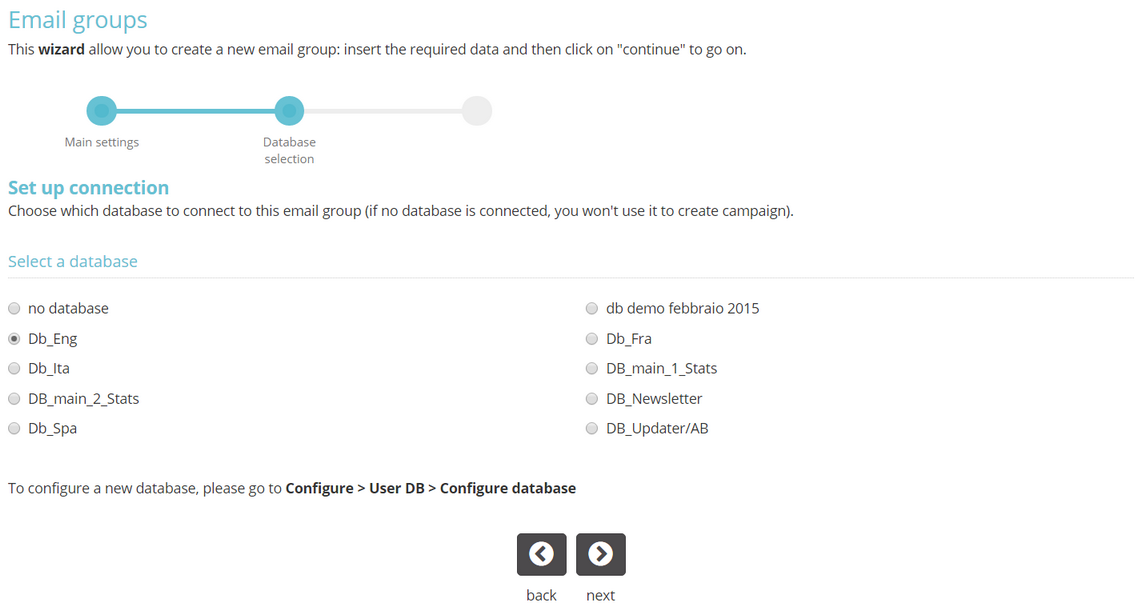
Figure 3: The Database selection wizard page
- Under Select a database, select the contact (user) database that you want to connect to the email group.
If no database is selected, the group will not be available to create a campaign. - When you are finished, click next.
The options wizard page displays.
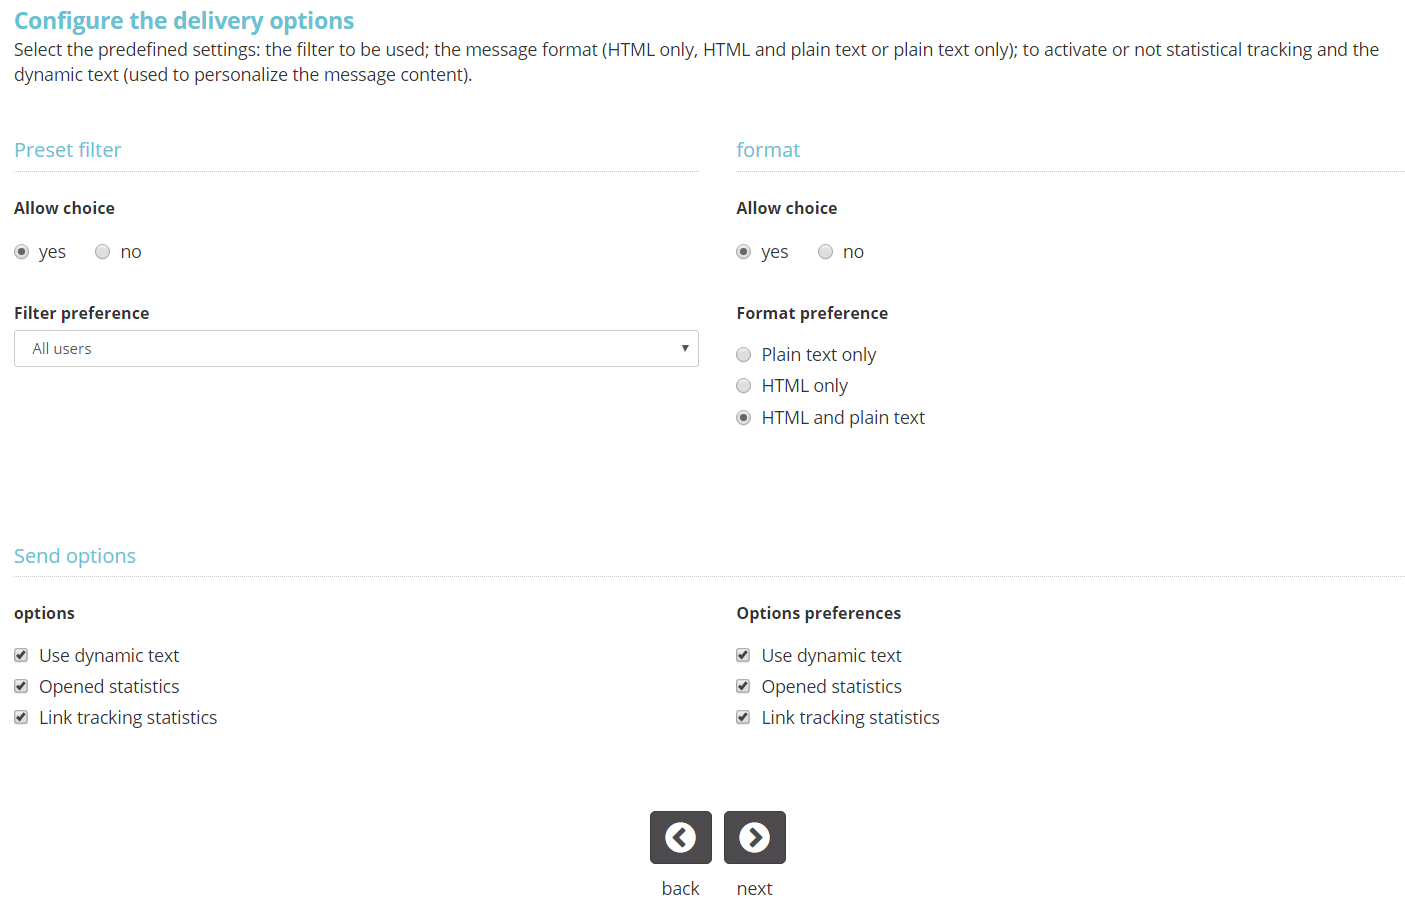 Figure 4: The options wizard page
- Under Preset filter, select whether you want to allow a choice, and the Filter preference, if required.
- Under format, select whether you want to allow a choice, and the email Format preference.
Plain text only, HTML only, HTML and plain text. - Under Send options, select the options and Options preferences you require, for example:
- Use dynamic text.
If selected, dynamic text is enabled and cannot be disabled. - Opened statistics.
Allows you to enable or disable opened statistics. Disabled by default. - Link tracking statistics.
Allows you to to enable or disable link tracking statistics. Disabled by default.
- Use dynamic text.
Note:
The options and Options preferences settings influence what choices are available when you create a new email campaign for the group, as follows:
- If a setting under options is selected, for example, Link tracking statistics, then the email campaign > Delivery parameters page will include an empty check (tick) box to Track clicks. As a result, you have the option to activate Track links, if required.
- If a setting under Options preferences is selected, for example, Link tracking statistics, then the email campaign > Delivery parameters page will include a check (tick) box to Track clicks, which is selected by default. You have the option to deselect the check (tick) box , if required.
- If a setting is not selected under either options or Options preferences, then no check (tick) box is displayed on the email campaign > Delivery parameters page, and you cannot select this behavior.
See Create > Email campaign for more about creating a campaign.
- When you are finished, click next.
The contents wizard page displays.
 Figure 5: The contents wizard page
- If you want to define content, which will be proposed as the default whenever a campaign is created, complete the fields as required.
Note:
All fields in the contents wizard page may be left blank. - Select the appropriate Allow choice options.
- When you are finished, click next.
The Summary and confirmation page displays. - Check the details, and if you are satisfied, select Yes, I confirm the creation of the email group, then click finish.
The email group is created.
Viewing and editing an existing email group
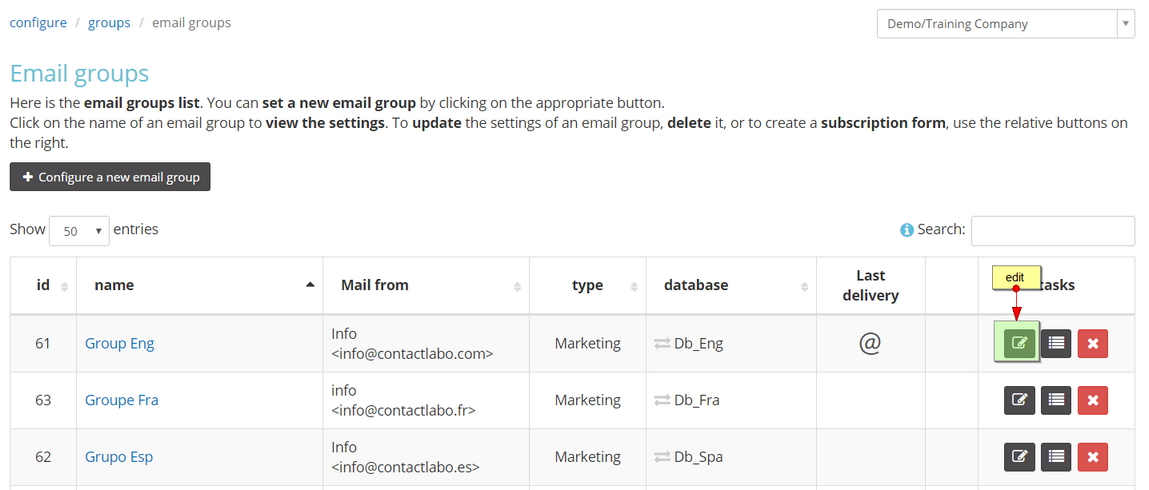
Figure 4: Example of the email groups list on the Email groups page, with the edit icon highlighted
Viewing an existing email group
To view the details of an existing group, do the following:
- Click the name of the appropriate group in the email groups list on the Email groups page.
The Email groups page for the selected group displays, with three tabs:- Detail
Read only. Displays details of the group, for example, ID, name, database, type and similar. - configuration
Read only. Displays the configuration of the group, for example, Filters, Message subject, Message format and similar. - most recent mailings.
Displays lists of the last five email group, triggered and immediate message deliveries, as appropriate.- Click the delivery ID or subject to display the campaign summary.
- Detail
- When you are finished, click back to manage email groups.
The email groups list on the Email groups page displays.
Editing an existing email group
To edit an existing group, do the following:
- Locate the appropriate group in the email groups list on the Email groups page, and click the edit icon in the tasks column (figure 4).
The Main settings page of the edit email group wizard displays. See Creating a new group for more about the content of the edit wizard pages, which is the same as in the pages used to create an email group.
- Click next to navigate through the wizard pages and make the required changes.
- When you are finished, confirm your edits and click finish.
The email group is updated with your changes.
Changing the database associated with an email group
If it is possible to change the database that is associated with a group, a black bidirectional arrow icon displays next to the database name in the database column of the email groups list. To change the database without using the edit email group wizard, do the following:
- Locate the appropriate group in the email groups list, and click the bidirectional arrow next to the current database name.
A drop-down list of available databases displays (figure 5).
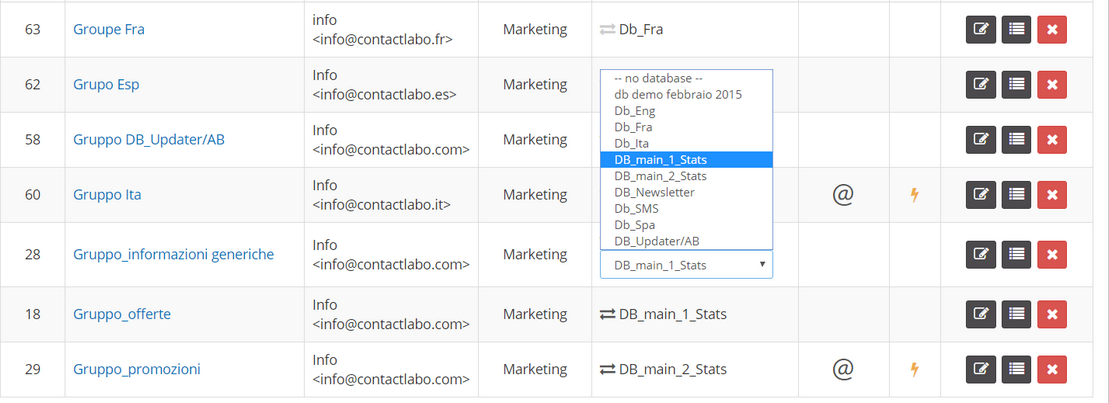 Figure 5: Example of the drop-down list of databases
- Select the appropriate database.
The drop-down list closes and the database is updated.
Note:
If the bidirectional arrow icon appears gray, then the database cannot be changed. This may be because, for example:
- There is a subscription configured and if the database is changed, it will not know where to send the data.
- A campaign associated with the group is in the queue and, as a result, the group is queued for delivery. If the database was changed at this stage, the result would be a system error.
Managing subscription, unsubscribe and modify requests
Contactsend automatically generates forms that enable contacts (users) to subscribe or unsubscribe from a group. The forms can be located at clientsection.contactlab.it, or they can be included in a page on your website. The same system also generates a form that a contact can use to update their details in the appropriate database.
Each iteration of the subscribe, unsubscribe and modify service is identified by a numerical code (wfc) and associated with the relevant group. As a result, links only work if they are included in emails that are associated with the appropriate newsletter or other marketing delivery. If you just want to create an unsubscribe link, for example, when subscriptions are manually loaded into the database, you must create a form using the procedure described here, then add the unsubscribe link that is generated to the body of the relevant message.
The subscribe, unsubscribe and modify forms enter the appropriate data directly in the database associated with the relevant group.
All URLs of the subscription, unsubscribe and modify systems (forms locations, links to subscribe, confirm subscription, update, unsubscribe) are accessible via secure protocol HTTPS.
Click the appropriate link below to scroll to the information you require:
- Creating a new subscribe, unsubscribe and modify service iteration.
- Editing a subscribe, unsubscribe and modify service iteration.
- Subscribe, unsubscribe and modify links and details.
Creating a new subscribe, unsubscribe and modify service iteration
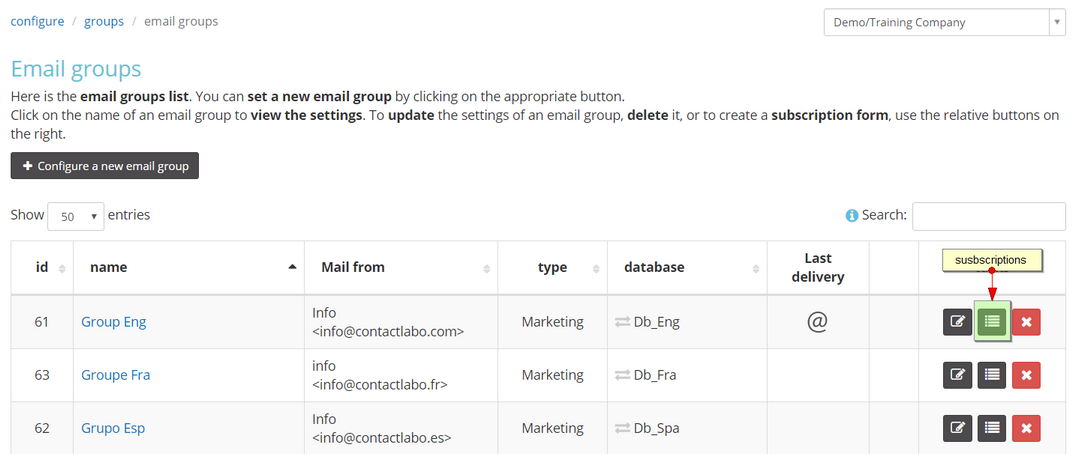
Figure 5: Example of the email groups list on the Email groups page, with the subscriptions icon highlighted
To create a new subscribe, unsubscribe and modify service iteration, do the following:
- Locate the appropriate group in the email groups list on the Email groups page, and click the subscriptions icon in the tasks column (figure 5).
The email groups subscriptions page displays (figure 6).
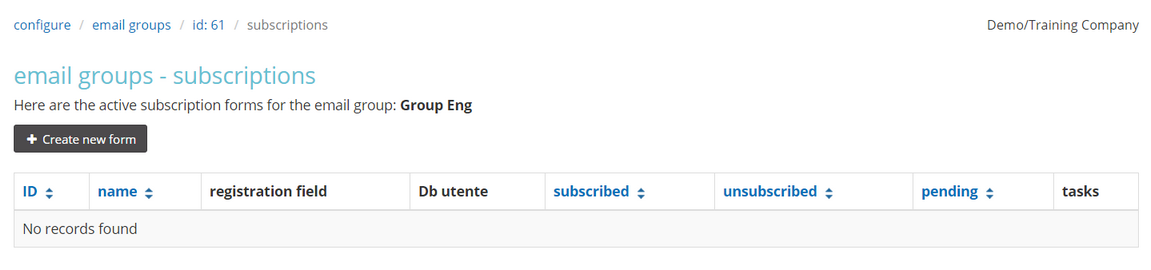
Figure 6: Example of the email groups subscriptions page
- Click + Create new form.
The email groups subscriptions form page displays.
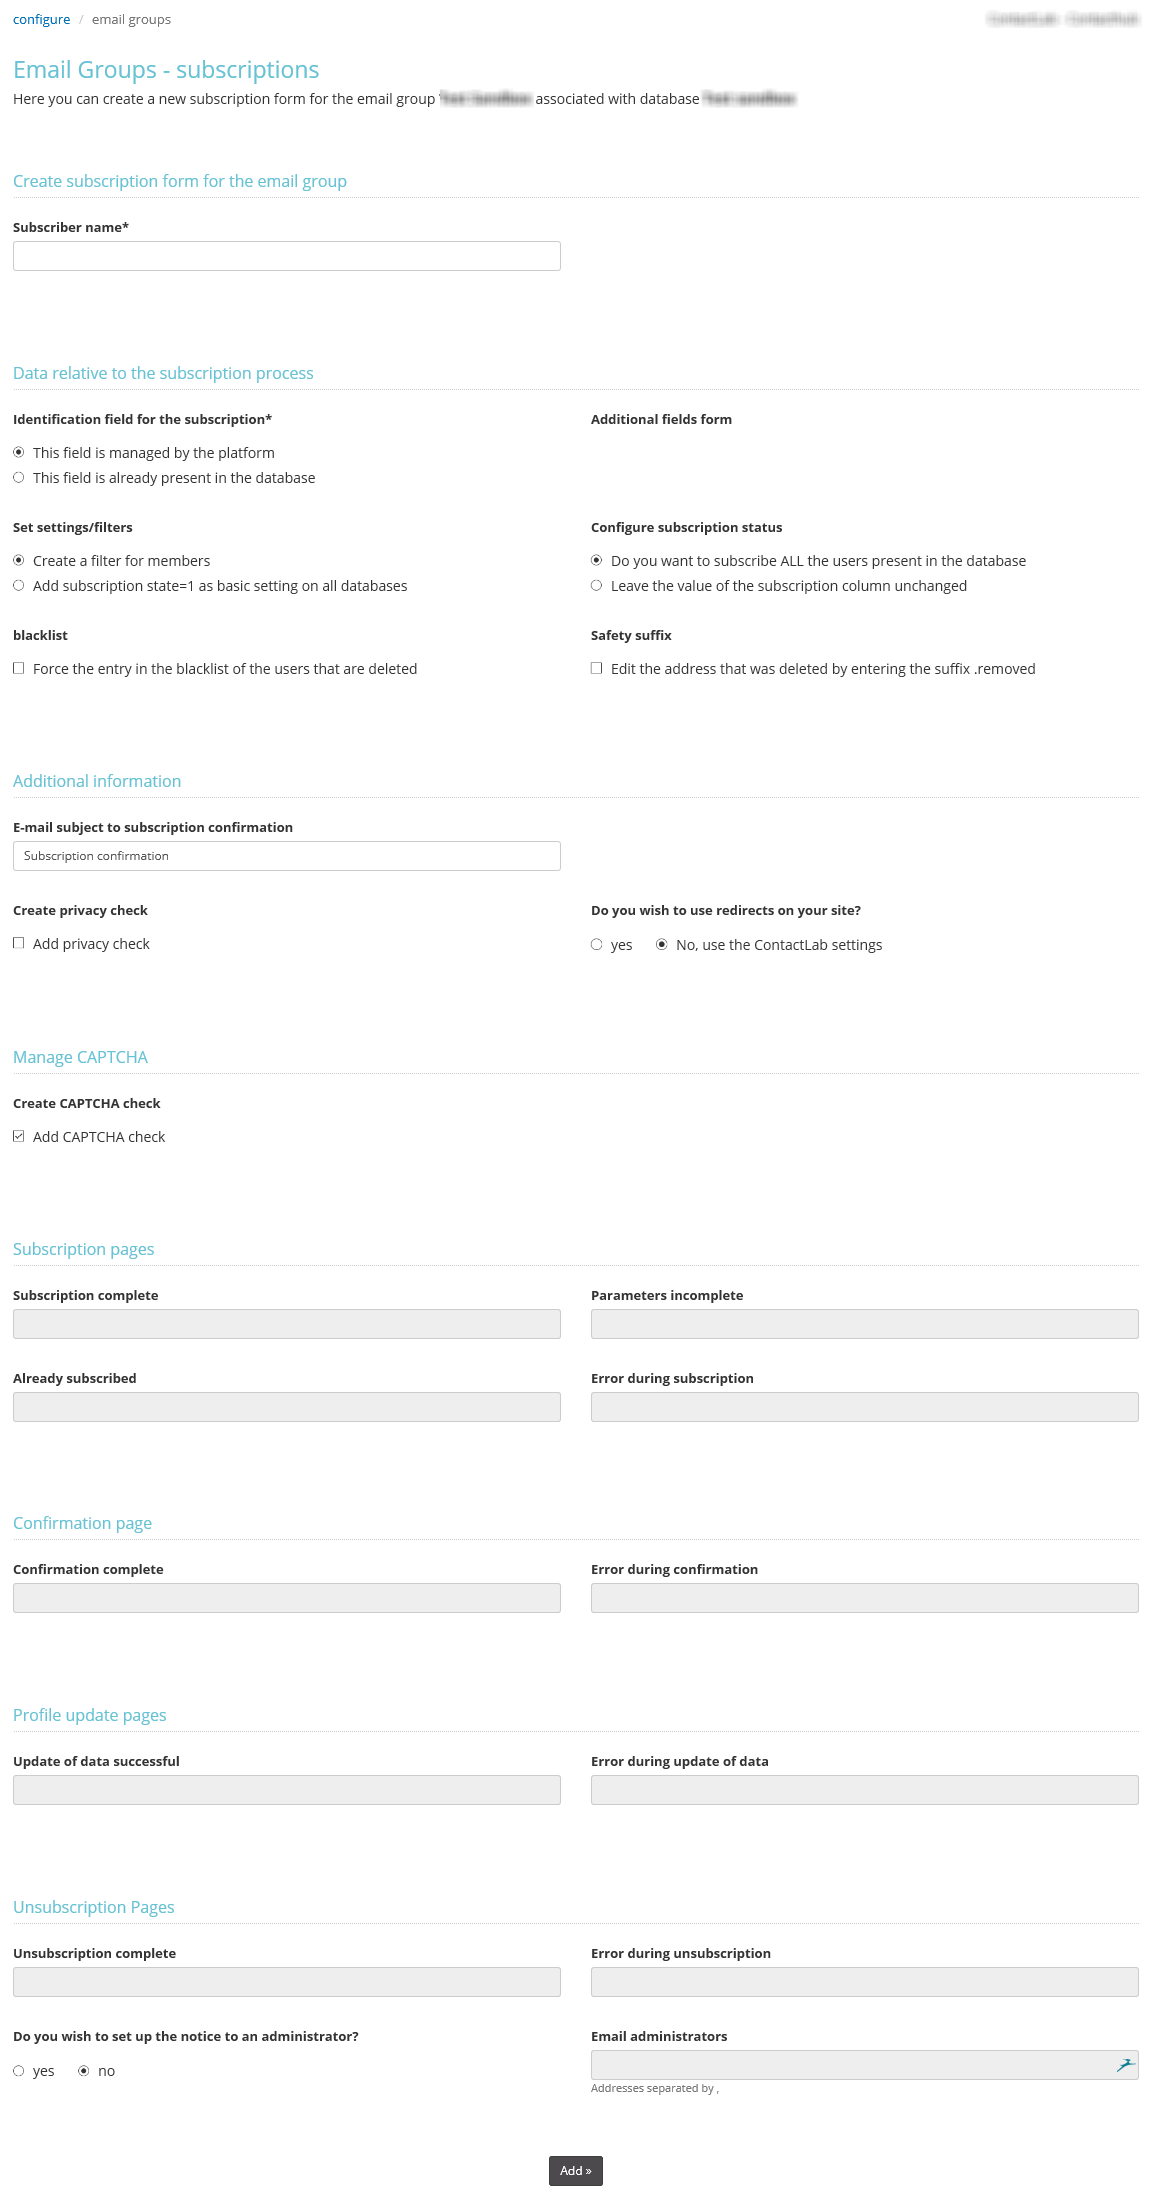
Figure 7: The email groups subscriptions form page
- Under Subscriber name, enter a name for the form.
- Under Identification field for the subscription, select one of the following:
- This field is managed by the platform.
The system automatically creates a new field in the database with a name such as _cls, _cls1, _cls2 and so on.
This registration field contains one of the following values:- 1
The contact (user) has subscribed. - -1
The contact (user) has unsubscribed. - 0
The contact (user) is pending.
- 1
- This field is already present in the database.
If you select this option a list of database fields displays for you to choose the appropriate one.
- This field is managed by the platform.
- Under Set settings/filters, select either:
- Create a filter for members.
Automatically creates a filter for the database, which contains the contacts (users) who have subscribed.
or:
- Add subscription state = 1 as basic setting on all databases.
Note:
The system sets the registration field to 0 by default. If you select this option, it will be set to 1 for all records.
Any contacts set to 0 or -1 will not be displayed in the database.
- Create a filter for members.
- Under blacklist, select Force the entry in the blacklist of the users that are deleted, if required.
Forces the contact (user) to be included in the suppression list (blacklist) if they unsubscribe. This step helps to avoid returning an unsubscribed contact to the subscription list. - Under Additional fields form, select the additional fields that you want to add to the form.
For example, FIRSTNAME, LASTNAME and similar fields.
Note:
Fields are only displayed here, if they are set to be visible in the field management page. To make a field visible, do the following:- Click configure in the main menu and then click the user db panel.
The database list displays. - Locate the relevant database in the list, and click the manage icon.
The database management page for the selected database displays. - Click field management in the Configuration panel.
The field management section displays. - Locate the appropriate field/s in the table and under visible, select the check (tick) box.
- Click configure in the main menu and then click the user db panel.
- Under Configure subscription status, select either:
- Do you want to subscribe ALL the users present in the database.
or:
- Leave the value of the subscription column unchanged.
- Under Safety suffix, select Edit the address that was deleted by entering the suffix .removed, if required.
A security .removed suffix is added to the contact (user) record. This step helps to avoid returning an unsubscribed contact to the subscription list. - Under E-mail subject to subscription confirmation, enter a new subject line, if required.
- Under Create privacy check, select Add privacy check, if required.
Adds a privacy statement to the email, which contacts must accept before subscribing. - Under Do you wish to use redirects on your site, select either:
- Yes.
The fields under Subscription pages, Confirmation page, Profile update pages and Unsubscription pages become editable.
or:
- No, use the Contactlab settings.
Contactsend will automatically manage all the required pages.
- Yes.
- Under Create CAPTCHA check, select the check (tick) box, if required.
- If you have selected Yes under Do you wish to use redirects on your site, enter the URLs of the relevant pages on your website, for each page type under Subscription pages, Confirmation page, Profile update pages and Unsubscription pages.
- Under Do you wish to set up the notice to an administrator, select the appropriate option.
If you select yes, add one or more email addresses under Email administrators. Notifications will be sent to the appropriate addresses each time a contact (user) subscribes, unsubscribes or modifies their details. - When you are finished, click Add >>.
The subscribe, unsubscribe and modify service iteration is created, and added to the email groups subscriptions page.
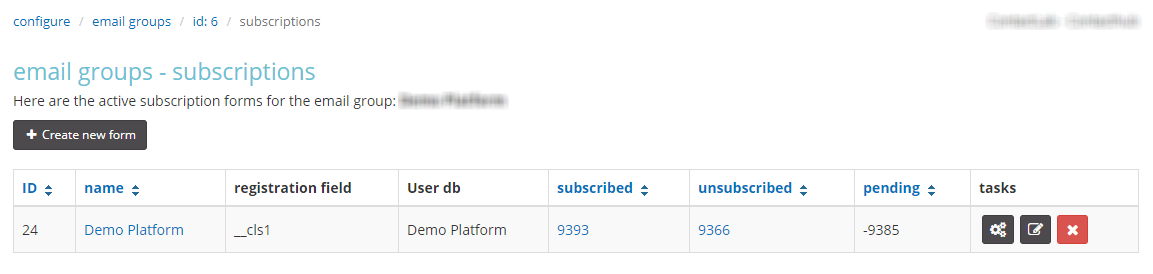
Figure 8: Example of the email groups subscriptions page with a new subscription
IMPORTANT:
Once you have set up an automatic subscribe, unsubscribe and modify service iteration, make sure that you do not overwrite the database when loading new contacts (users). You should add any new records to those that already exist. Otherwise, the unsubscribe details (-1) in the registration field of the database will be lost. See User db > Viewing and managing an existing database and filters > The database management page > Using the tools panel > File operations > Insert for more about adding new records.
Editing a subscribe, unsubscribe and modify service iteration
To edit a subscribe, unsubscribe and modify service iteration, do the following:
- Locate the appropriate group in the email groups list on the Email groups page, and click the subscriptions icon in the tasks column (figure 5).
The email groups subscriptions page displays (figure 6). - Locate the appropriate subscription form, and click the edit icon in the tasks column.
The email groups subscriptions form page (figure 7) displays. - Edit the settings as required.
See Creating a new subscribe, unsubscribe and modify service iteration for more about the email groups subscriptions form page contents. - When you are finished, click edit.
The email groups subscriptions form page closes and you are returned to the email groups subscriptions page.
Subscribe, unsubscribe and modify links and details
To access and manage the links and details related to a subscribe, unsubscribe and modify service iteration, do the following:
- Locate the appropriate group in the email groups list on the Email groups page, and click the subscriptions icon in the tasks column (figure 5).
The email groups subscriptions page displays (figure 6). - Locate the appropriate subscription form, and click the manage icon in the tasks column.
The email groups subscriptions details page displays, with five tabs:
Click the appropriate link above for more about each tab.
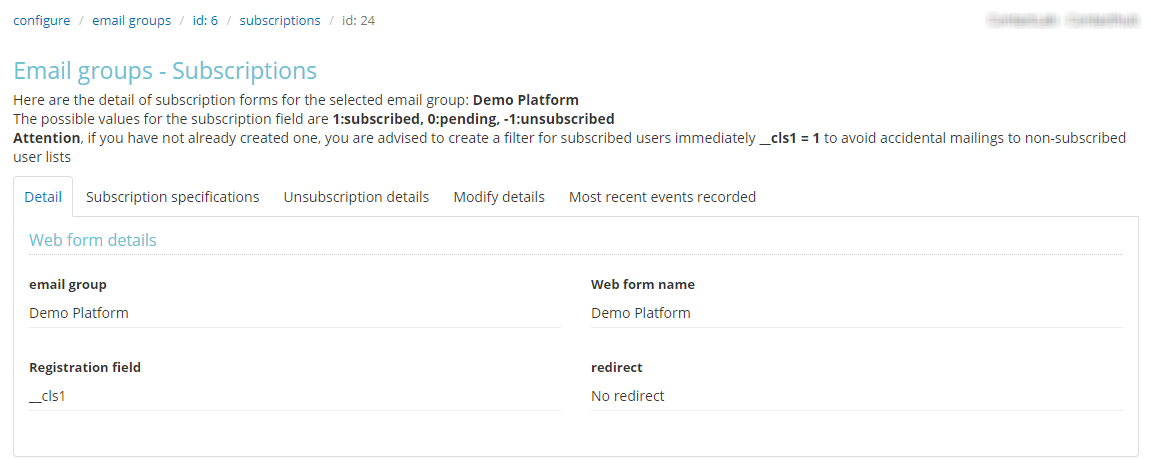
Figure 9: The email groups subscriptions details page
Detail
This tab (figure 9) is read-only and displays the details of the form, including:
- The email group.
- The Web form name.
- The Registration field.
- Whether redirects have been included.
Subscription specifications
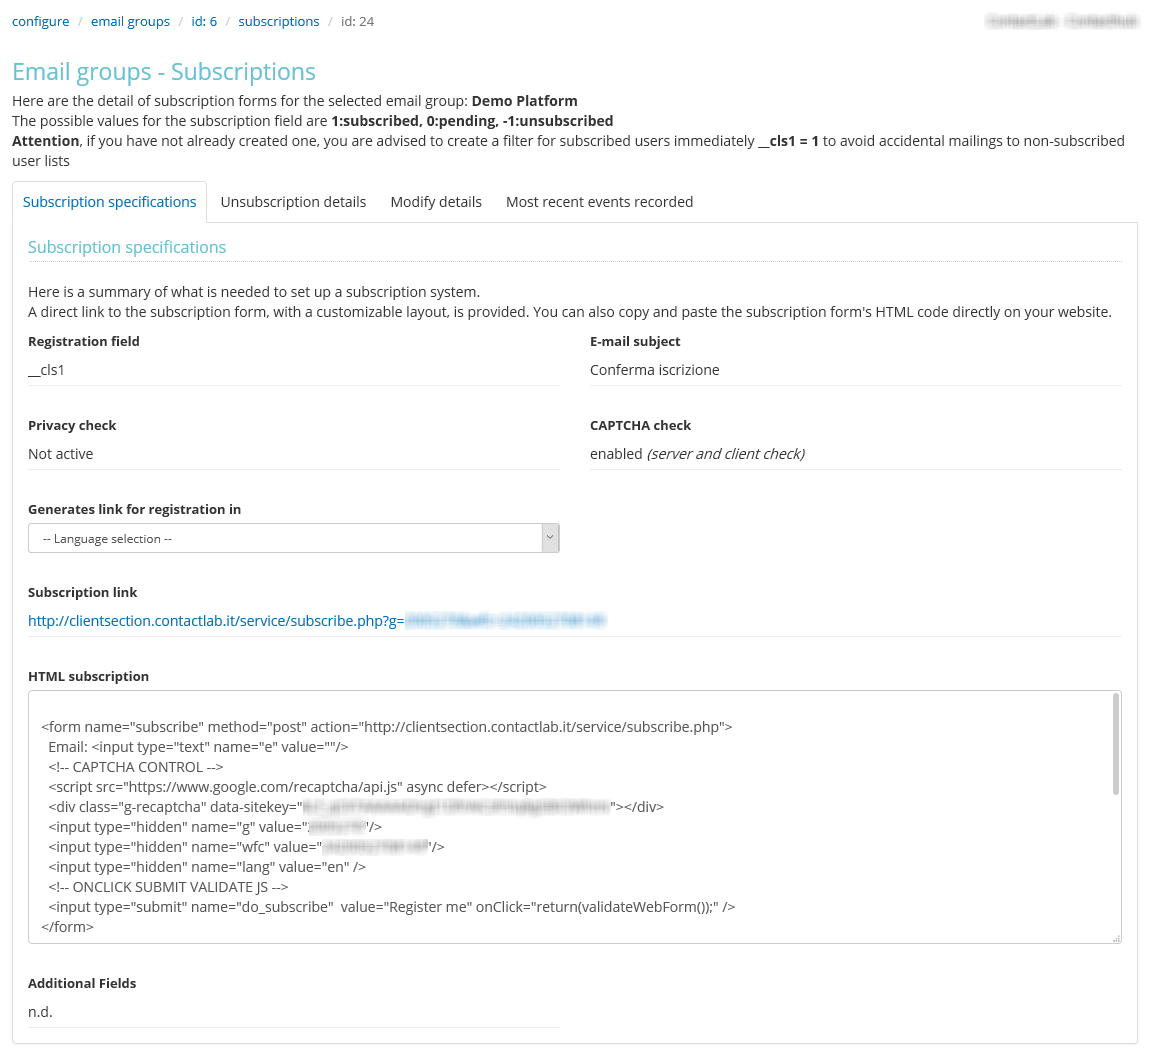
Figure 10: Example of the Subscription specifications tab on the email groups subscriptions details page
This tab provides all the details that you require to enable contacts (users) to subscribe to the relevant subscription service.
Besides information about the Registration field, the Email subject, the Privacy check and the CAPTCHA check, it includes:
- A Subscription link.
Provides a direct link to the subscription form at contactlab.it.
You can also create a link for contacts (users) to register in the appropriate language:- Under Generates link for registration in, select the appropriate language.
The Subscription link is updated accordingly.
- Under Generates link for registration in, select the appropriate language.
- The subscription form HTML code.
For use directly in your website.
Unsubscription details
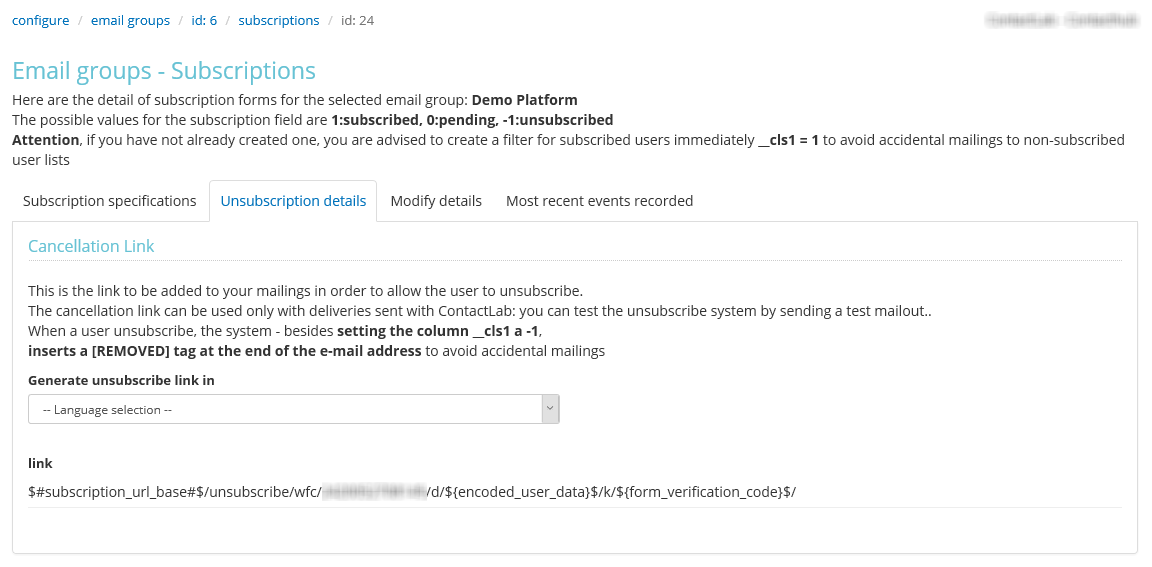
Figure 11: Example of the Unsubscription details tab on the email groups subscriptions details page
This tab contains a link that you can add to your mailings to redirect contacts (users) to an unsubscribe form, where they can cancel their subscription. Each link only applies to campaigns associated with the relevant group.
You can also create a link to a form in the appropriate language, as follows:
- Under Generate unsubscribe link in, select the appropriate language.
The unsubscribe link is updated accordingly.
Modify details
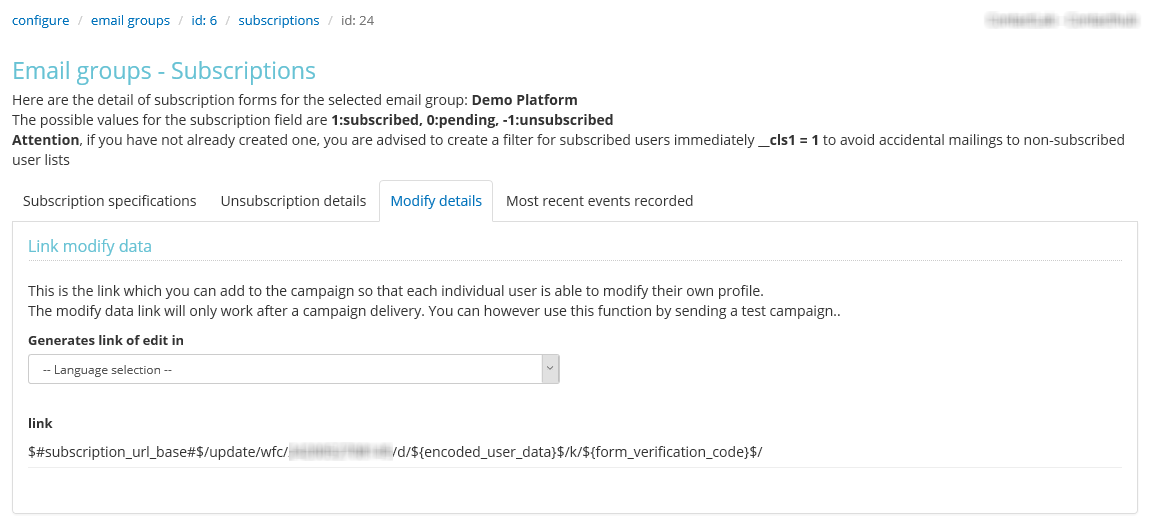
Figure 12: Example of the Modify details tab on the email groups subscriptions details page
This tab contains a link that you can add to your mailings to redirect individual contacts (users) to a form, where they can modify their profile, as required. Any changes are immediately added to the relevant Contactsend database.
You can also create a link to a form in the appropriate language, as follows:
- Under Generate link of edit in, select the appropriate language.
The modify link is updated accordingly.
Most recent events recorded
This tab displays the last 20 subscribe, unsubscribe or modify events.