
The new approach to creating email content without any HTML or other coding skills, and with no need to use a preformatted template (although that option is of course, readily available too) is called Email Designer. A modern, responsive design compliant, and very effective editor, which has recently been added to your choice of options in the Contactlab platform.
In this tutorial. You will learn how to quickly and easily create content by using drag & drop tools to define the structure, then simply and intuitively adding the message, images and pretty much anything else you require, including dynamic links for individual personalization.
How does Email Designer work?
As an example, consider an email to welcome new customers to your e-commerce site and thank them for their initial purchase. While a suitable template is already available on Email Designer’s template page, you want to try something a little different. Do the following:
- Sign in to Send, click Create > Email campaign, locate the appropriate email group, then click Create delivery, to display the Procedure selection page.
- Click Create a new campaign, complete the Delivery parameters page as required, making sure that Use dynamic text is selected, then click Next.
- On the Message content page, complete the Sender details and Email subject fields, then click Email Designer, positioned under the HTML version panel.
The Email Designer Template management page displays in an overlay window. - Click Start from scratch to display the Content editing page.
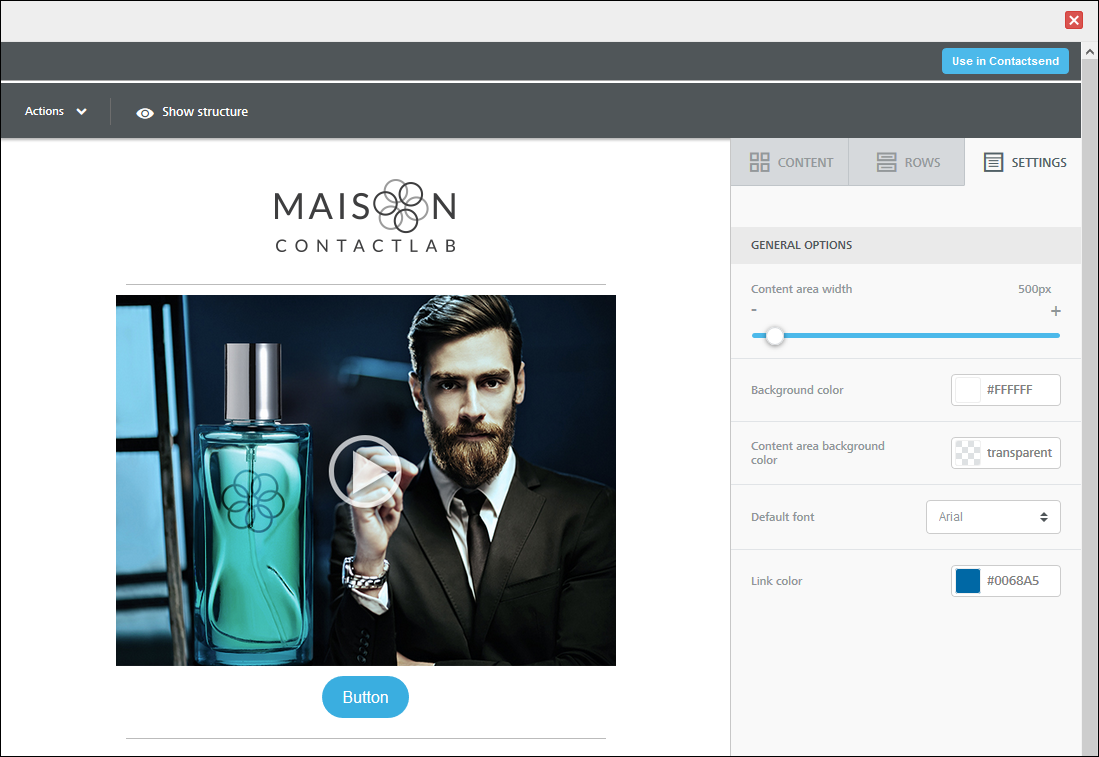
Example of the Content Editing page
Note:
For a complete description of all the controls and steps mentioned in the following example, as well as other available options, see the Creating, editing and managing content or templates with Email Designer page in the Send Guide.
- The first thing you need to do is define the basic settings for the message. To do so:
- Click the Settings tab, located in the Sidebar and set the Content area width to 600 pixels.
- If your company uses a special font for its communications, you can also select it here, under Default font.
- Otherwise, leave the remaining settings set to their default.
- Now click the Rows tab to define the column layout of your email.
The default email layout already includes a single column row block at the top of the page in the Editing panel, which you can use, for example, for your brand’s logo, a heading and perhaps your initial message. To add further column combinations:- Drag the appropriate tile from the Rows tab, for example, two equal width columns, onto the Editing panel and drop it in the appropriate place. In this instance, below the default single column row block.
When you drop the tile, the resulting block’s width, together with the column layout it includes, automatically adjusts to the Content area width that you set in Step 5a above. - Continue to add row and column configurations to your email, as required. To complete this simple example, drag and drop another single column row beneath the two column block you have just added.
Note:
It is generally recommended that you keep the layout simple, so you do not risk confusing the recipient with an over complicated design.
- Drag the appropriate tile from the Rows tab, for example, two equal width columns, onto the Editing panel and drop it in the appropriate place. In this instance, below the default single column row block.
- Next click the Content tab to define the type of content that you want to add, for example:
- In the top row, drag and drop an Image tile, followed by two Text tiles, positioned vertically below the previous block.
Note:
When using a single column layout, content blocks can only be ordered vertically. They cannot be added horizontally side-by-side. - In the middle row, drag and drop a Text tile and a Button tile to the left column, followed by an Image tile to the right one.
- Add a Social tile and a Text tile to the bottom row.
- In the top row, drag and drop an Image tile, followed by two Text tiles, positioned vertically below the previous block.
- Now do the following:
- Hover your mouse over the two-column row block to display its Structure frame, then click the frame to reveal the control buttons.
- Click the Duplicate button.
An exact copy of the block is added to the layout immediately beneath the original. - Click the Image block in the duplicate to display its Content frame, then use the Re-positioning arrows to move it to the left column.
- Click the Text block in the duplicate and use the Re-positioning arrows to move it to the right column.
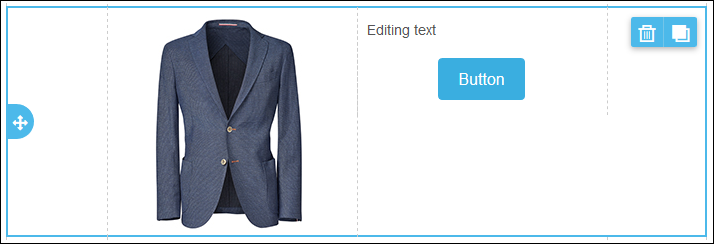
Example of a row’s Structure frame
Once you are finished with creating the email’s structure and layout, you can start adding the content. For example:
- In the top row, click Browse in the Image block, then use the File manager to Upload an appropriate copy of your brand’s logo to the Myfiles folder. Click Insert positioned next to its icon, to add the logo to your email. Then:
- Click the logo to display its Content Properties and adjust or set them as required.
Besides adjusting the image size and alignment, you can, for example: - Under Action, add an Image link, so the brand’s home web page opens when the reader clicks the logo.
- Click the logo to display its Content Properties and adjust or set them as required.
- Click the first text block to display the Text editor controls, then:
- Adjust the text size so that it is appropriate for a heading, then add the required text, such as ‘Welcome to our online store!’
- To make the email more personal, you could add the customer’s first name to the title, by left-clicking the mouse after the word ‘store’, then clicking the Special links button on the text control panel and adding the appropriate Dynamic field.
See the Send Guide for more about dynamic text.

The Text editor controls
- In the second text box, enter your initial message.
- In the second row, add a promotional text, perhaps related to something the customer has already bought from your e-commerce site, remembering to add the appropriate dynamic text. You could also, for example:
- Offer the customer a 10% discount off their next purchase online or in-store.
- Configure the button that is associated with the text to open a web page where they can collect the discount voucher.
Note:
Click the button to display its Content Properties. To change the button text, simply highlight it and enter the text you require. - Add a product image to the content block in the adjacent column, then convert it to a Dynamic image, using its Content Properties.
Dynamic images enable you, for example, to personalize the visual content for each contact that the email is sent to.
- In the third row, add a further promotional text such as inviting the customer to view your range of accessories, with the button linked to the appropriate web page, and perhaps a static image of the range in the Image block.
- Click the Social networks block and use its Content Properties to configure each required icon and link.
- In the following text field:
- Add text such as ‘To unsubscribe or change your email preferences, please click here’.
- Highlight the words ‘click here’, then click the Insert link button in the Text editor controls panel, and add the appropriate URL for the unsubscribe web page.
- Add any further text as required, such as your company’s contact details.
- When you are finished, click Use in Contactsend, to add the relevant HTML to the HTML version panel on the Message content page.
- Continue creating your campaign as described in the Email deliveries page of the Send Guide.
Why wait any longer? Start creating your next email content today, using Email Designer and its simple yet very capable drag & drop tools.
See the Send Guide for more about using Email Designer, or contact our Customer Care for further details.