
A segment can consist of, or include, two consecutive event-type rules, which are then correlated to identify contacts who carried out a particular action, then did something else within a defined time frame.
Example:
Contacts who bought a handbag more than three days after clicking an email link to the 2015 bag collection. See Correlation-based queries for more examples.
Digital messages rules, purchases rules, or a combination of both, can be used to create the correlation, while the segment can be further quantified, using all three types of rule.
Correlating rules to create a segment
Do the following:
- Decide upon:
- The rules that you want to correlate.
- The order in which they need to be created to achieve the desired result.
The order cannot be changed later. - Their relationship with any other rules that are to make up the segment.
For example, you may wish to use a demographic rule before the correlated rules.
- Follow the steps given in Creating new segments, Creating a custom event-based rule or Creating a custom insights rule to create the first rule.
- Repeat the above step to create your second rule.
When you have created two rules that can be correlated, the Segment Summary panel includes a Correlate events icon, positioned to the left of the interaction condition controls.
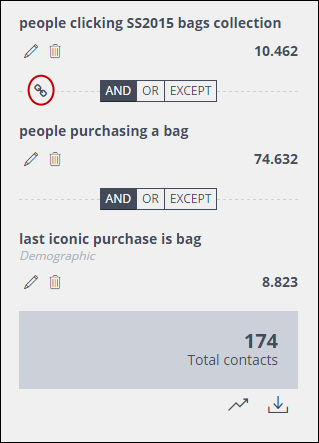
Example of the Segment summary panel with the Correlate events icon highlighted
- Click the Correlate events icon.
The Create correlation page displays.
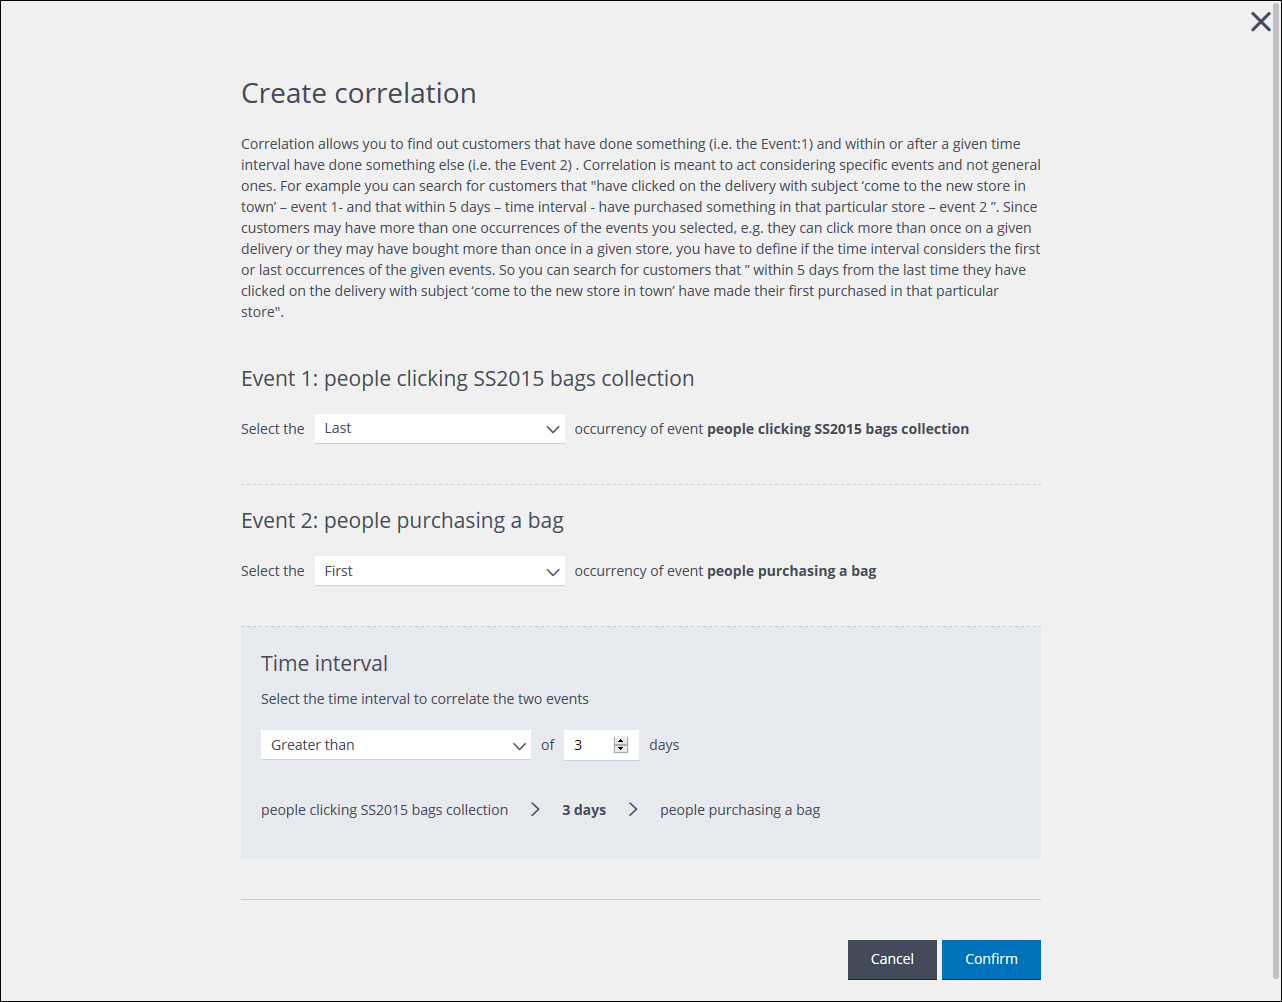
Example of the Create correlation page
- Choose to correlate the first or the last time contacts carried out each action, as follows:
- Under Event 1, click the downwards pointing arrow, positioned to the right of the box, and select to use either the First or Last occurrence of the event defined by rule 1.
- Under Event 2, click the downwards pointing arrow, positioned to the right of the box, and select to use either the First or Last occurrence of the event defined by rule 2.
- Under Time interval, define the time period that is to be applied to the correlation, as follows:
- Click the downwards pointing arrow to the right of the first box, and select the appropriate operator, for example, Greater than, from the drop-down list.
See Operator types for more about operators. - Enter the required number of days in the second box.
- Click the downwards pointing arrow to the right of the first box, and select the appropriate operator, for example, Greater than, from the drop-down list.
- Click Confirm to apply the correlation.
The Create correlation page closes and the Segment summary panel changes to display the correlation.
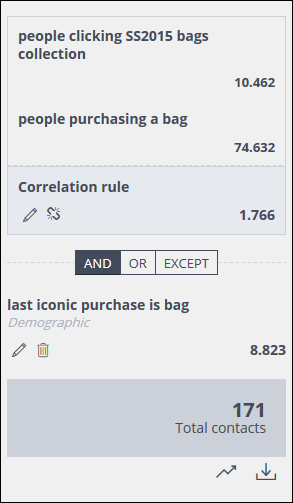
Example of the Segment summary panel with correlated rules
Note:
If the two rules cannot be correlated, a warning message displays towards the top of the New segment page.
Previous page: Creating a new combined segment | Next page:Creating preset rules